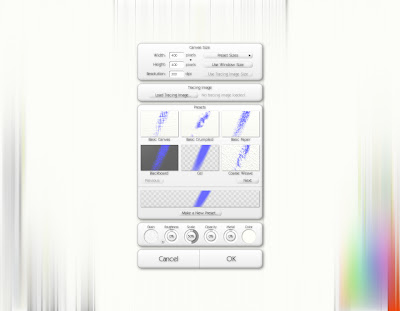
1. Open up a new painting in Art Rage. The example uses a 400 x 400 canvas at 300 dpi. Select Cell as your preset so that you can have a transparent background.
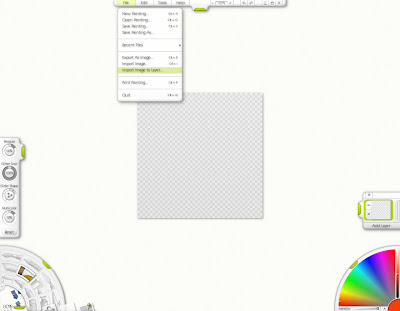
2. If you want to use a palette for color selection, import the palette as a layer. This will place the palette as the top layer. Skip steps 2, 3 and 4 if you are not using a color palette and select a color by clicking on the color wheel in the bottom right corner.
3. Click the bottom layer to make it active, then click the color picker in the lower left-hand corner. Click on the canvas to select your color of choice.
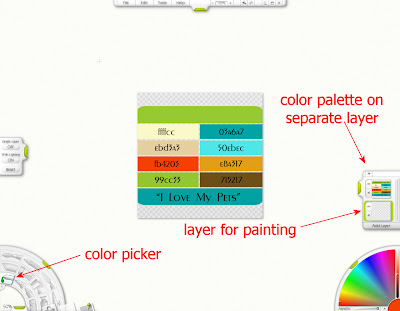
4. Click the eye next to the color palette layer to hide it.
5. To make the glitter metallic, go to the bottom right-hand corner and slide the metallic slider all the way to the right. Go to the bottom left-hand corner and select the glitter tool. After selecting the glitter tool, you can change the size of the glitter brush, click the +/- tabs located on the bottom and side of the quarter moon of this menu. The settings for the glitter are in the menu on the left side of the screen. This tutorial will focus on the effects of different glitter shapes.
Pressure = Density of the glitter. Higher pressure means greater density.
Glitter size = The size of the individual glitter pieces.
Glitter shape = Changes the shape of the glitter.
Multicolor = Changes the amount of other colors in the glitter. Lower percentage means addition of close, complimentary colors to your chosen color. Higher percentage means more hues.
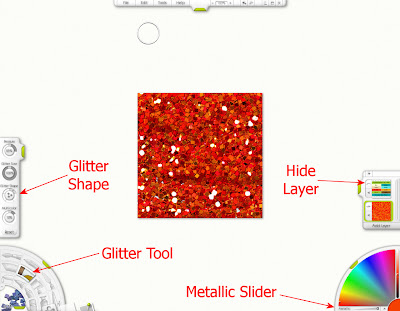
6. To choose a glitter shape either click on the little crescents surrounding the circle or click on the circle and a menu will appear with all the choices.
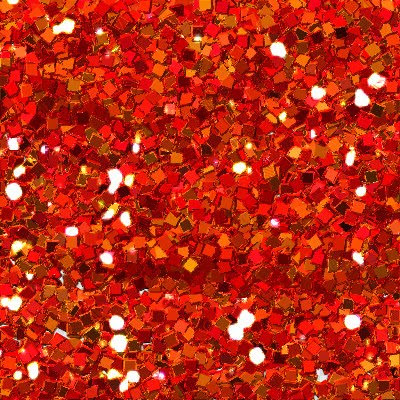
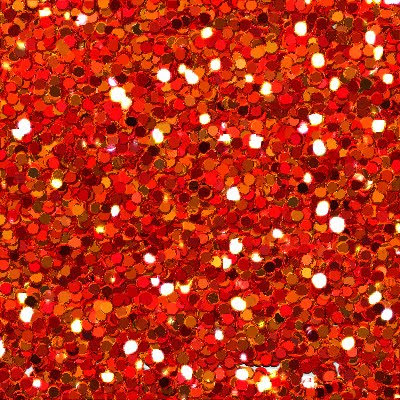
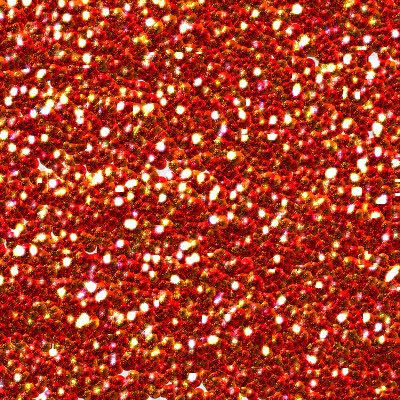
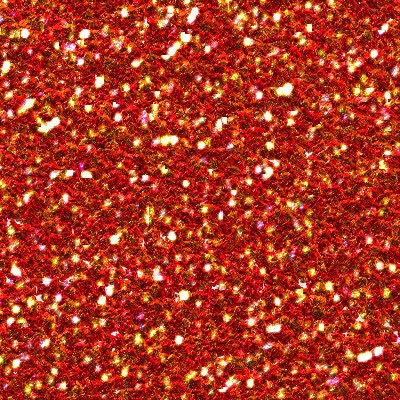
 7. Here is a comparison of the 5 different types of glitter shapes at 100% size.
 Square:
Round:
Blob:
Grit:
Random:
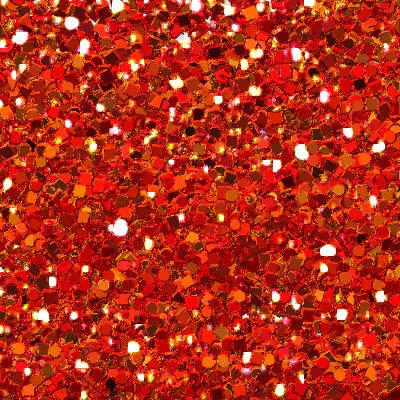
8. Fill your canvas with glitter.
9. Optional: You can follow steps 3-7 of my seamless glitter tutorial to make a seamless tile, but you will need to reduce the pressure.
10. Export the painting as a PNG file for use in Paint Shop Pro or Photoshop.

i love this tut, i was lookin for one to make my own glitters in order to make some kits elements without using anyone else's
ReplyDeletehope i can manage to install the free version of the Art Rage
Thanks for the great tutorial! I've been wondering how people make glitter. This really cleared it up. Do you use ArtRage for anything else?
ReplyDelete@Marisa Lerin, No, I don't use ArtRage for anything else as I lack the artistic skills necessary.
ReplyDeleteThank you so much for this tutorial, and the seamless glitter one as well!
ReplyDeleteA very useful tutorial and tips. Thanks for sharing the information.
ReplyDeleteCrafticonnections
Azure Metallic Glitter
Konya
ReplyDeleteKayseri
Malatya
Elazığ
Tokat
T7GK1
görüntülü.show
ReplyDeletewhatsapp ücretli show
2TG
https://titandijital.com.tr/
ReplyDeleteısparta parça eşya taşıma
ankara parça eşya taşıma
izmir parça eşya taşıma
diyarbakır parça eşya taşıma
RV68G
Çorum Lojistik
ReplyDeleteKaraman Lojistik
Gümüşhane Lojistik
Denizli Lojistik
Artvin Lojistik
BRF
çankırı evden eve nakliyat
ReplyDeletekırşehir evden eve nakliyat
kütahya evden eve nakliyat
hakkari evden eve nakliyat
antalya evden eve nakliyat
JTİ
34D53
ReplyDeleteTokat Evden Eve Nakliyat
Bitmex Güvenilir mi
Konya Lojistik
Ünye Çelik Kapı
Çanakkale Parça Eşya Taşıma
Çerkezköy Boya Ustası
Erzincan Parça Eşya Taşıma
Erzurum Evden Eve Nakliyat
Siirt Şehirler Arası Nakliyat
06836
ReplyDeletebuy oxandrolone anavar
turinabol
halotestin for sale
order steroid cycles
masteron for sale
order turinabol
buy pharmacy steroids
buy dianabol methandienone
boldenone
C495C
ReplyDeleteErzincan Şehir İçi Nakliyat
Balıkesir Lojistik
Ağrı Şehirler Arası Nakliyat
Coin Nedir
Gümüşhane Parça Eşya Taşıma
Vindax Güvenilir mi
Sivas Şehir İçi Nakliyat
Çerkezköy Halı Yıkama
Bitmart Güvenilir mi
6C8DB
ReplyDeleteIğdır Evden Eve Nakliyat
Eskişehir Lojistik
Urfa Evden Eve Nakliyat
Sakarya Parça Eşya Taşıma
Yenimahalle Fayans Ustası
Urfa Şehir İçi Nakliyat
Zonguldak Evden Eve Nakliyat
Silivri Cam Balkon
Bingöl Evden Eve Nakliyat
2D731
ReplyDeleteDiyarbakır Lojistik
Çerkezköy Çilingir
Erzurum Lojistik
Çorum Şehir İçi Nakliyat
Ardahan Lojistik
Kucoin Güvenilir mi
Şırnak Parça Eşya Taşıma
Altındağ Boya Ustası
Urfa Lojistik
A50AB
ReplyDeletebinance %20
85A36
ReplyDeleteBitcoin Kazanma
Mexc Borsası Güvenilir mi
Parasız Görüntülü Sohbet
Bitcoin Kazanma
Twitter Takipçi Hilesi
Coin Para Kazanma
Binance Referans Kodu
Binance Komisyon Ne Kadar
Snapchat Takipçi Satın Al
7E429
ReplyDeleteThreads Takipçi Satın Al
Bone Coin Hangi Borsada
Twitter Trend Topic Satın Al
Okex Borsası Güvenilir mi
Tiktok Takipçi Satın Al
Baby Doge Coin Hangi Borsada
Bitranium Coin Hangi Borsada
Kripto Para Kazanma Siteleri
Kripto Para Üretme Siteleri
FB9C5
ReplyDeleteBtcturk Borsası Güvenilir mi
Satoshi Coin Hangi Borsada
Binance Yaş Sınırı
Trovo Takipçi Hilesi
Paribu Borsası Güvenilir mi
Binance Referans Kodu
Soundcloud Dinlenme Hilesi
Parasız Görüntülü Sohbet
Kripto Para Nasıl Çıkarılır
2F6D5
ReplyDeletesolflare
poocoin
trezor suite
dappradar
defilama
shiba
ellipal
metamask
avax
1FF5B37737
ReplyDeletetakipçi paketleri
4E336DD82D
ReplyDeleteinstagram takipci satis
0004478671
ReplyDeleteTelegram Para Kazandıran Oyunlar
Telegram Güvenilir Mining Botları
Yeni Telegram Farm Botları
Telegram Para Kazanma
Binance Hesabı Açma
A0C4C387F1
ReplyDeleteen ucuz tiktok takipçi
begeni satin al
mobil ödeme takipçi
ig takipçi
takipçi