
I've been playing with felt for awhile and I finally decided that I liked this puffy felt best. If you need a felt texture for this tutorial, you can get one here.
1. Open a new transparent image and draw a vector letter or shape. For this tutorial, I opened a 600 x 600 image and used a preset shape as a new vector layer.
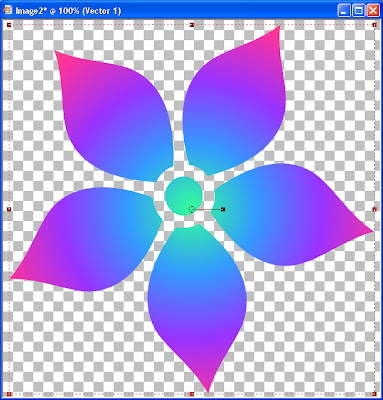
2. Open the felt texture. Fill the transparent layer below the vector layer with the felt texture. In my case, this is Raster 1.
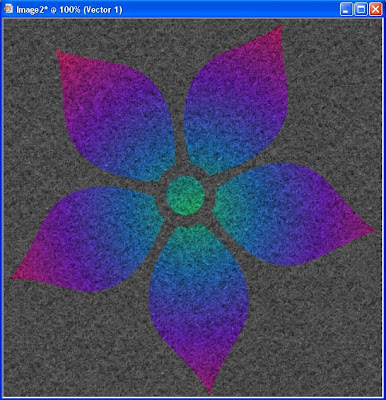
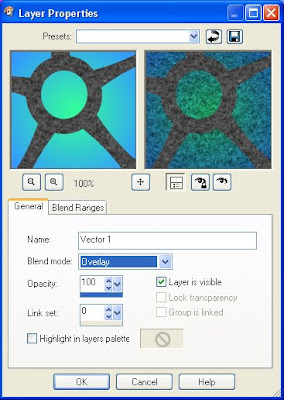
3. Change the Layer Properties of the vector layer to Overlay.
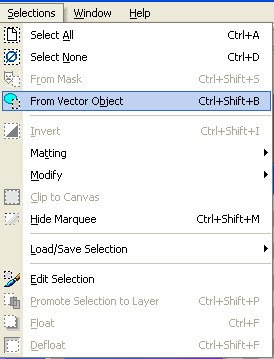
4. Make sure the Vector Layer is the active layer by clicking on it. Then, make a selection from the vector object, Selections > From Vector Object (Ctrl + Shift + B).
5. Merge the two layers.
6. Feather the selection by 5 (Selections > Modify > Feather).
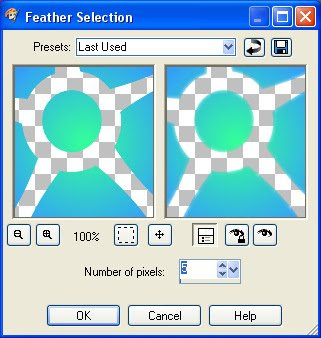
7. Invert the selection and then press the delete key to clear the selection.
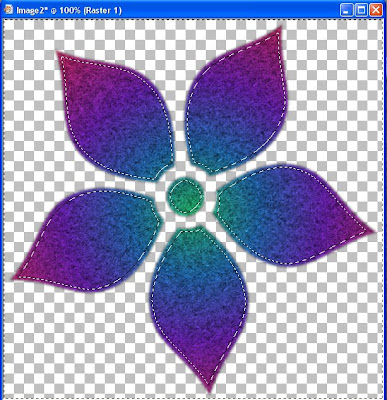
8. Select None (Ctrl+D).
9. Apply the Inner Bevel. The width should be something that fits the size of your shape. Adjust it until you are happy with what you see.
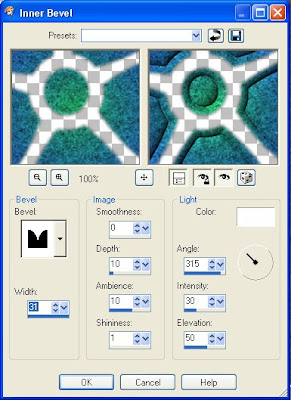
Bevel = 7
Width = 31 (adjust to fit the size of your shape)
Smoothness = 0
Depth = 10
Ambience = 10
Shininess = 1
Color = White
Angle = 315
Intensity = 30
Elevation = 50
9. Apply the Inner Bevel a second time, changing the Bevel to the round shape.
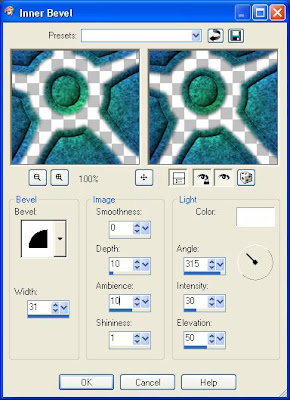
Bevel = 2
Width = 31 (adjust to fit the size of your shape)
Smoothness = 0
Depth = 10
Ambience = 10
Shininess = 1
Color = White
Angle = 315
Intensity = 30
Elevation = 50
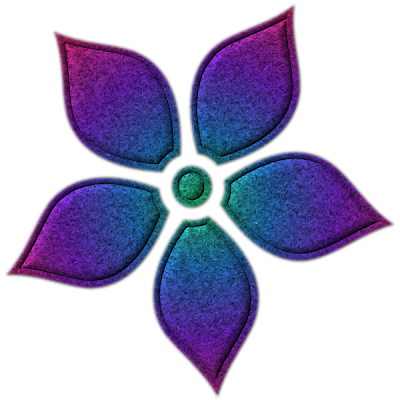
Your puffy felt shape is now complete. Anything you make from this tutorial is yours to do with as you see fit.

ty for your tutorial.
ReplyDeleteGreat tutorial. Thank you so much!
ReplyDeleteThank you! Your blog post will be shared on the
ReplyDeleteCU Freebies Only Forum Friday May 8th 2009!
in this topic
Tutorials Your Place to find Commercial Use Scrap Booking Freebies!
Thanks For Sharing your Time and Talent with us!
Hello, Hun give me til this weekend and I'll be more than happy to send a donation to your paypal so you can get your plugin. I know that as much fun as it is to make beautiful creations as you do, it can be quite costly. Hugs,Sandy
ReplyDeleteThank you!
ReplyDeletethank you! I have a blog award for you.
ReplyDeleteawesome tut!! i'll it later
ReplyDelete