I'm not quite sure what to call this effect. I wanted to make papers with a blotchy effect which colored papers achieve when they are splashed with water. So, I'm calling this the water splattered paper tutorial, but I'm uncertain this is an accurately descriptive name.
Supplies:
Visman Filters
1. Open new canvas for the paper. I used 3600 x 3600 which is the standard size for a full size scrap kit.
2. Fill the canvas with your color.
3. Duplicate the layer.
4. Right-click the duplicated layer in the layer palette and click Properties. Rename the new layer to Cloud and change the blend mode to Overlay.
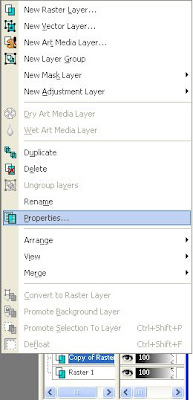
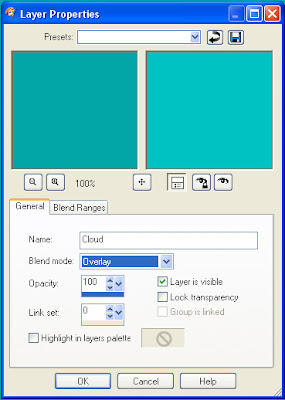
5. There are two ways to create the Cloud effect: Mura Meister Clouds or Eye Candy: Texture Noise. The settings for both are shown.
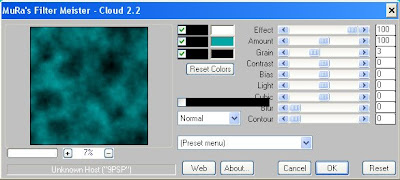 The top color is white.
The middle color is the same as the canvas fill color.
The bottom color is black.
Effect = 100
Amount = 100
Grain = 0
All other settings = 0
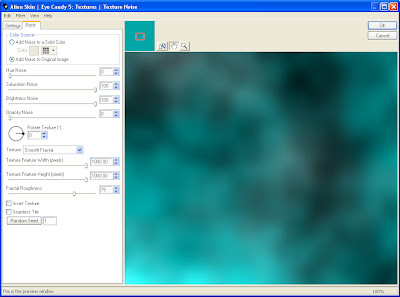 Add Noise to Original Image = Checked
Hue Noise = 0
Saturation Noise = 100
Brightness Noise = 100
Opacity Noise = 0
Rotate Texture = 0
Texture = Smooth Fractal
Texture Feature Width = 1000
Texture Feature Height = 1000
Fractal Roughness = 75
Invert Texture = Unchecked
Seamless Tile = Unchecked
Random Seed = Any Number
6. Click on the original layer. Duplicate the layer.
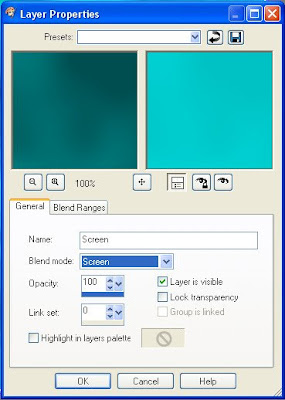
7. Right-click the duplicated layer in the layer palette and click Properties. Rename the new layer to Screen and change the blend mode to Screen.
8. Click on the original layer. Duplicate the layer.
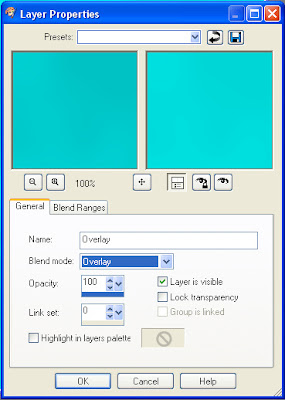
9. Right-click the duplicated layer in the layer palette and click Properties. Rename the new layer to Overlay and change the blend mode to Overlay.
Here is the order of the layers:
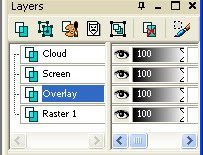
10. Layers > Merge Visible.
Optional: Mesh Overlay
11. Create a new layer. Call it Grid.
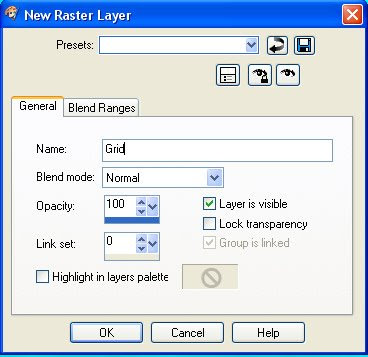
12. On the Grid layer, create a mesh with the Grid Plugin that is part of VM Toolbox (VM Toolbox > Grid). VM is also known as the Visman Filters.
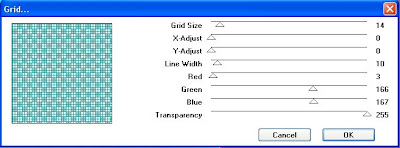 Grid Size = 14
X-Adjust = 0
Y-Adjust = 0
Line Width = 10
Transparency = 255
My RGB settings match my fill color.
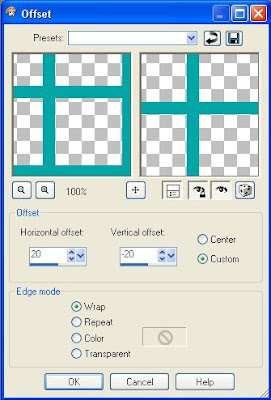
13. Shift the grid by 20 pixels through Offset (Effects > Image Effects > Offset).
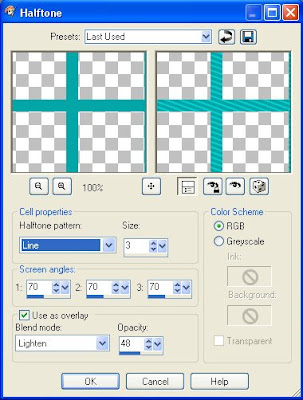
14. Apply the Halftone effect (Effects > Artistic Effects > Halftone) to the grid layer.
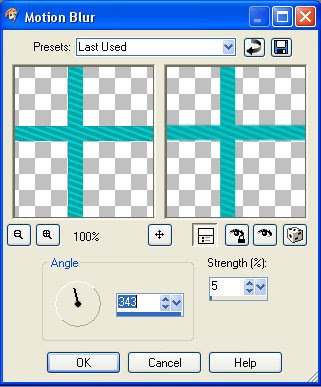
15. Soften the mesh with motion blur (Adjust > Blur > Motion Blur).
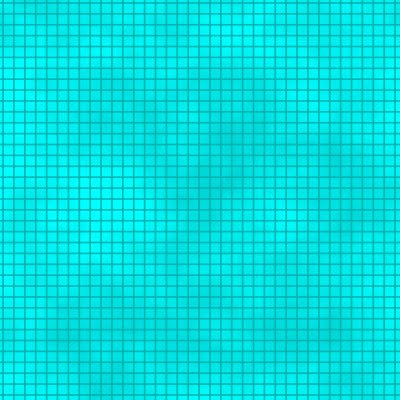
Here is the final result with the mesh overlay.
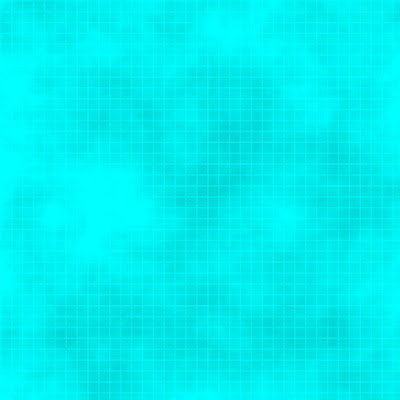
 If the optional mesh steps are performed after step 2, then the result looks like this:

Thank you for this tutorial. I have only used Photo Impact previously but have just loaded PSP on my computer so an looking for some simple tutorials to start off with. Hugs to you. Keryn
ReplyDeleteway cool can use this to make masks too!
ReplyDelete