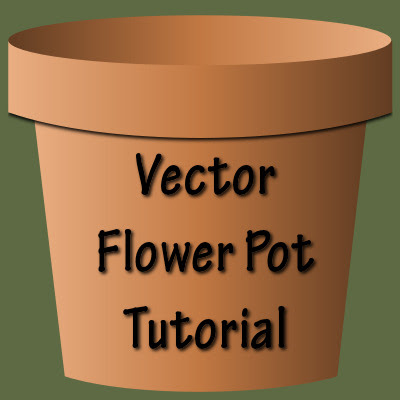
This tutorial will show you how to make a vector flower pot. This tutorial is based on Arizona Kate's Realistic Clay Flower Pot Tutorial, but updated for PSP9. You can make a gradient according to her tutorial or download my premade gradient.
Supplies:
Terra Cotta gradient
Creating the Rim of the Pot
1. Open a new canvas, 800 x 800.
2. Set the terra cotta gradient as the background.
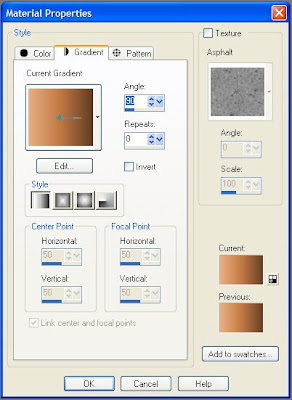
Gradient = Linear
Angle = 90
Repeats = 1
3. Select Preset Shapes and draw out a rectange. Rename the object to Pot Rim.
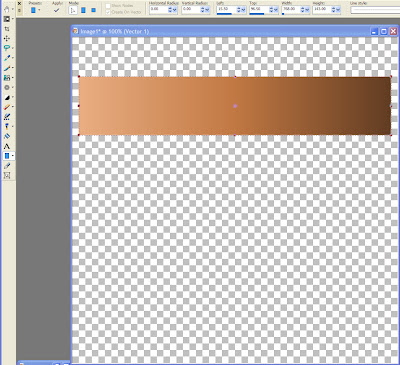
4. Convert the vector shape to a path.
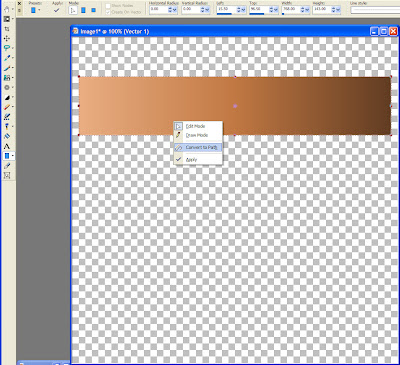
5. Switch to the Pen tool.
6. Make sure that you are in edit mode (with the arrow head selected).
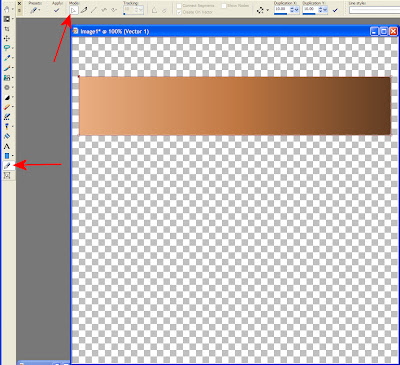
7. Click the upper left corner of the rectangle.
8. Right click and change the node type to Curve After.
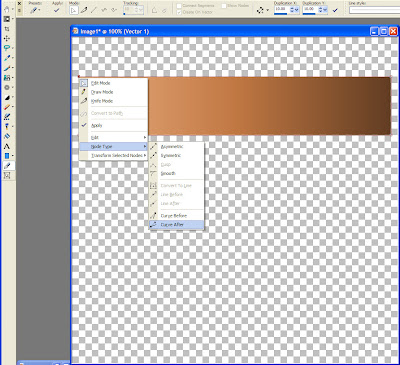
9. Pull the handle on the node toward the bottom of the canvas to create a curve.
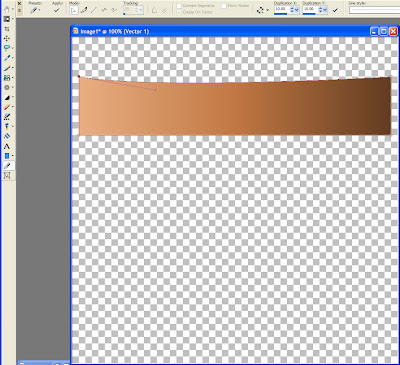
10. Click on the upper right corner of the rectangle.
11. Right click and change the node type to Curve Before.
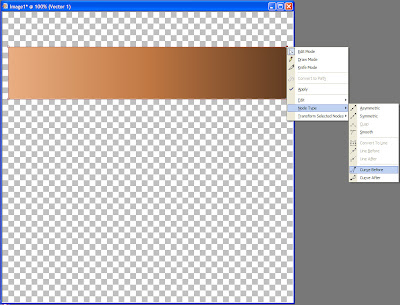
12. Pull the handle on the node to create a curve.
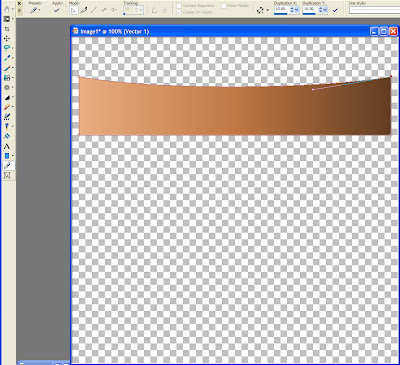
13. Click on the lower left corner of the rectangle.
14. Change the node type to Curve Before.
15. Pull the handle on the node to create a curve.

16. Click the lower right corner of the rectangle.
17. Change the node type to Curve After.
18. Pull the handle on the node to create a curve.
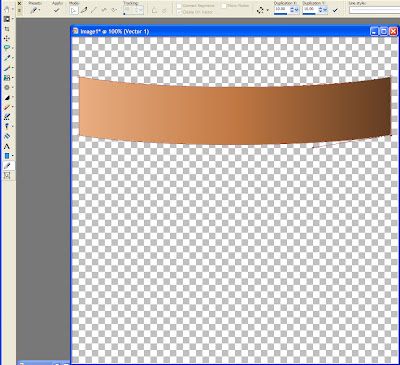
Creating the Main Body of the Pot
19. Go to Preset Shapes and draw out a rectangle from under the pot rim to the bottom of the canvas. Rename the object to Pot Main.
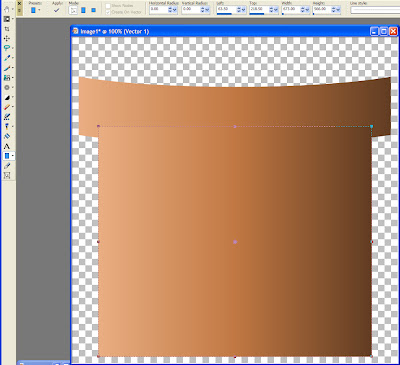
20. Convert the vector shape to a path.
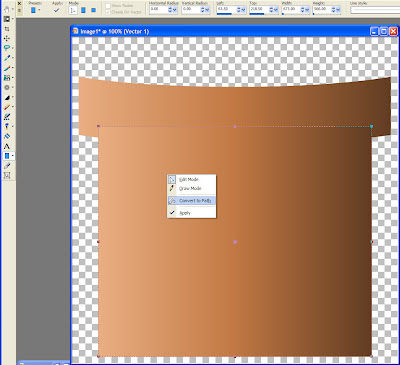
21. Switch to the Pen Tool and make sure that edit mode is selected.
22. Click the lower left corner of the rectangle. Pull the corner toward the middle of the pot to create a narrowed base.
24. Click the lower right corner of the rectangle. Pull the corner toward the middle of the pot to create a narrowed base.
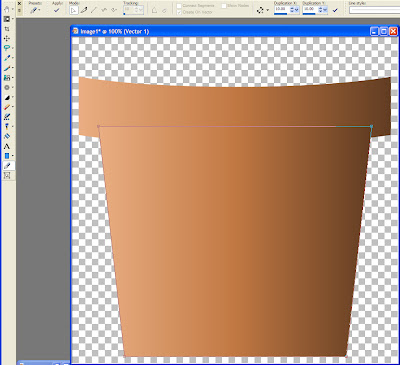
22. Click the lower left corner of the pot.
23. Change the node type to Curve Before.
24. Pull on the handle to create a curve for the bottom of the pot.

25. Click on the lower right corner of the pot.
26. Change the node type to Curve After.
27. Pull on the handle to create a curve for the bottom of the pot.
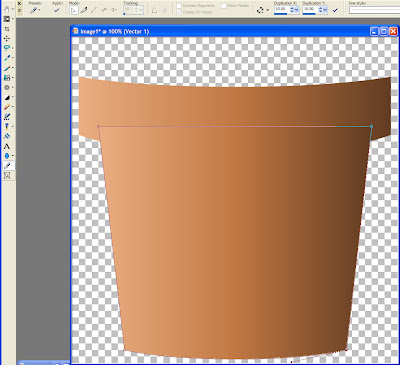
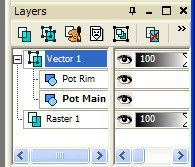
28. In the layers palette, slide the Pot Main rectangle under the Pot Rim rectangle.
Creating the Interior of the Pot
29. Got to Preset Shapes and select the ellipse.
30. Go to the background material and invert the gradient.
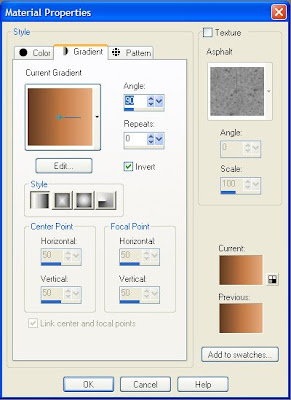
31. Draw out an ellipse from one side of the Pot Rim rectangle to the other to create the inside of the pot. You may need to move the ellipse up or down so that it is properly seated over the rim. Rename the object to Pot Interior.
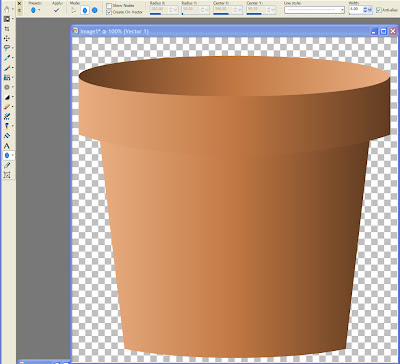
Adding a Drop Shadow to the Rim of the Pot
32. Use the Object Selection Tool to choose the Pot Rim.
33. Obtain the selection from the vector object (Ctrl + Shift + B).
34. Create a new Raster Layer over the Vector Layer.
35. Add the drop shadow (Effects > 3D Effect > Drop Shadow).
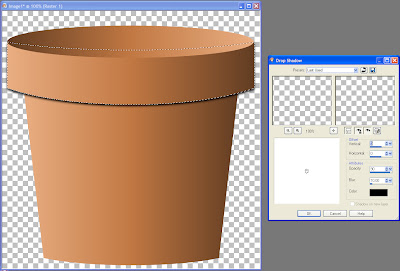
Vertical = 5
Horizontal = 0
Opacity = 90
Blur = 10.00
Color = Black
36. Select None (Ctrl + D).
37. Use the eraser to remove any bits of shadow that are in the wrong place (look where the red arrow is pointed).
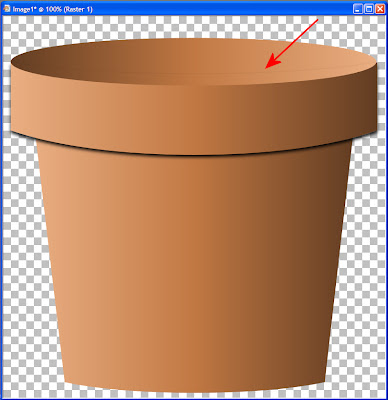
The flower pot can now be personalized. I recently started using the QuickScript functionality in PSP, so I turned my steps in this tutorial into a script. The script leaves all the vector layers, so you can customize the gradient or texturize once the script is complete. I'm making the script available for download for those of you who want it. It isn't as dynamic as some of my other scripts, but it makes a usable flower pot. Also, after several rounds of de-bugging, the script works in PSP9, PSPX, PSPX1 and PSP X2.


Thank you! Your blog post will be advertised on the DigiFree Digital Scrapbooking Freebie search engine today (look for timestamp: 29 May [LA 07:00pm, NY 09:00pm] - 30 May [UK 02:00am, OZ 12:00pm] ).
ReplyDeleteThank you so much for this Freebie. I want to let you know that I posted a link to your blog in Creative Busy Hands Scrapbook Freebies Search List, under the Elements or Papers post on May. 30, 2009. Thanks again.
ReplyDeleteThanks for sharing this nice site.
ReplyDeletecreativity of writer is purely impressive. It has touched to the level of expertise with his writing. Everything is up to the mark. Written perfectly and I can use such information for my coming assignment. Flange Disk For 40X40 Mm Square Cap Handrail
ReplyDelete