

A very kind person donated generously to my blog and has asked for some tutorials on scrapbooking elements. So, please bear with me as I try to figure out if I have interpreted the requests correctly. This tutorial will show you how to make a bracket frame in Paint Shop Pro.
1. Open up a new canvas with a vector layer. Mine is 1200 x 1200 pixels.

2. Select a font. For this tutorial, I chose to use Times New Roman because it comes with almost every computer as is a standard font. Make sure that Create As Vector is selected.
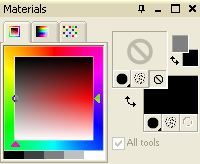
3. Make sure that the foreground color is set to transparent and the background color is set to a color. I chose black because it is easiest to see and the color of the font does not matter.
4. Type the Curly bracket ( { ) character. Then click 'Apply'.

5. Drag the text to your desired size by clicking on the red rectangle and then dragging.


6. Duplicate the layer (Layers > Duplicate). Mirror the new layer (Ctrl + M).

7. Duplicate the new layer (Layers > Duplicate).
8. Rotate the new layer 90 degrees to the right ( Image > Rotate > Free Rotate).

Degrees = 90
All layers = Unchecked
Rotate single layer around canvas center = Checked
9. Duplicate the new layer (Layers > Duplicate). Flip the layer (Ctrl + I).

10. Optional. If the ends of the bracket don't line up to make a smooth frame, then you can adjust them by either pulling on the red rectangle or using the pen tool (or Pick Tool).
11. Optional. To use the pen tool, right-click and select 'Convert to Path'. This should convert all four text shapes into vector paths.
12. Optional. Select the pen tool (or Pick Tool) and click on one bracket.

13. Optional. Click near the nodes (squares) that need to be adjust then drag to make a box that covers all the nodes that need to moved.

14. Optional. The select nodes should be solid and will have a rotation handle attached to them. Move the nodes to the desired location.

15. Optional. Repeat steps 11-14 for all nodes that need to be moved.

16. Optional. To make future steps easier, you can merge the vector layers using Merge Down (Layers > Merge > Merge Down). Start with the top layer and do this three times to make a single vector layer.
 -->
--> 
17. Ctrl + A to Select All.
18. Ctrl + Shift + B or Selections > Selection From Vector Object.
19. Create a new raster layer (Layers > New Raster Layer).
20. Select the Fill Bucket and fill the selection with the color, gradient or pattern of your choice.

21. Now, you can hide the original vector layer and the bracket frame is complete.

Just a quick note to let you know that a link to this post will be placed on CraftCrave today [06 Mar 12:00am GMT]. Thanks, Maria
ReplyDeleteDankeschön.
ReplyDeleteLG
Finja