

1. Open a new canvas 400 wide x 1200 high.
2. Set your foreground to black and your background to transparent/null.
3. Go to the Rectangle tool and draw a rectangle on the canvas.

4. Right-click on the rectangle and convert the shape to a path.
5. Go to the Pen Tool, press the Ctrl button and click on the left side of the rectange about 2/3rds of the way down to add a node.

6. Press the Ctrl button and click on the right side of the rectange about 2/3rds of the way down to add a node.

7. Right-click on the shape. Go to Edit > Select None to unselect all nodes.

8. Select the node in the upper left-hand corner of the rectangle and push the node in toward the middle of the canvas.

9. Right-click on the node. Go to Node Type > Curve After.

10. Select the node in the upper right-hand corner of the rectangle and push the node in toward the middle of the canvas.

11. Right-click on the node. Go to Node Type > Curve Before.

12. Drag the handle down to create a curve.

13. Click on the upper left-hand node to select it, then pull the handle down to create a matching curve on the left side.

14. Click on the node 2/3rds of the way down on the right side. Right-click and go to Node Type > Curve After. Pull the handle towards the center of the canvas to create a curve for the base of the lava lamp.

15. Click on the node 2/3rds of the way down on the left side. Right-click and go to Node Type > Curve Before. Pull the handle towards the center of the canvas to create a curve for the base of the lava lamp.

16. Click on the bottom left-hand node. Right-click and go to Node Type > Curve After. Pull the handle towards the center of the canvas to finish off the curve for the base of the lava lamp.

17. Click on the bottom right-hand node. Right-click and go to Node Type > Curve Before. Pull the handle towards the center of the canvas to finish off the curve for the base of the lava lamp.

18. Optional. I think a narrower base would be more eye-catching, so I pushed in each node at the base about 25 pixels (or one grid square in my preview). This step is optional if you want a base the same size as the widest part of the lava lamp.
19. Right-click on the bottom right-hand node, go to Node Type > Curve After. Pull the handle down to provide a curve for the bottom of the lava lamp.

20. Click on the bottom left hand node. Right-click and go to Node Type > Curve Before. Pull the handle down to provide a curve for the bottom of the lava lamp.

21. Duplicate the vector layer (Layers > Duplicate).
22. Click the duplicate layer, expand it by clicking on the plus (+) and then click on the vector object layer (New Rectangle).

23. Click on the bottom left hand node. Right-click and go to Edit > Merge.

24. Click on the bottom right hand node. Right-click and go to Edit > Merge.
25. Click on the node that is 2/3rds of the way down on the right side. Draw the handle up toward the center of the canvas. You may need to enlarge the window to reach the handle which is off the visible portion of the canvas.

26. Repeat for the node that is 2/3rds of the way down on the left side. Now you have a layer for the overall lava lamp (which will hold the bubbles) and a layer for the glass of the lava lamp.

27. Duplicate the top layer (Layers > Duplicate). Click on the duplicate layer, then click on the vector shape (New Rectangle).

28. Click on the Object Selection Tool (or the Pick Tool in PSP X and up). Put mouse over the bottom of the shape and push it up to the top of the canvas. This will be the cap to the lava lamp.

29. Press the Ctrl button, then put the mouse over one of the bottom corners of the cap. Push the corner in. I stopped just outside of original lava lamp so that the cap will look bigger than the lamp. The end result will appear more three-dimensional.

30. Click on the left-hand node and pull the handle down to create a curve for the cap.

31. Click on the right-hand node and pull the handle down to finish the curve for the cap.

32. Optional. I made a mistake and drew my rectangle too close to the top of the canvas, so I had to increase my canvas height by 50 prior to finishing off the cap. If you did not make this mistake, then you do not need to perform this step.
33. Ctrl + D to select none.
34. Go the the Ellipse tool. Swap the foreground and background, then draw out an ellipse so that the top of the cap is oval.

35. Optional. I like to draw stroked vectors rather than filled vectors because I find that the grid helps me symmetrically place my nodes. After I have drawn the vectors, I use them to create selections or I change the colors. However, you can skip the following steps if you choose to start with your colors rather than changing the vector properties after drawing. So, first, I am going to apply a gradient to the cap. Go to the Object Selection Tool (Pick Tool), then right-click on the ellipse. Change the fill to a gray gradient. If you want the cap to look flat, try a radial gradient instead of a linear gradient.

36. Optional. Click on the cap (New Rectangle) layer which is under the New Ellipse layer. Right-click and change the fill to a gray gradient that is the inverse of the first gradient.

37. Click on the original vector layer (Vector 1) and duplicate it (Layers > Duplicate).

38. This new layer will become the base of the lava lamp. Click the duplicate layer, expand it by clicking on the plus (+) and then click on the vector object layer (New Rectangle).
39. Right-click on the upper right hand node. Go to Edit > Merge.

40. Click on the upper left hand node. Right-click and go to Edit > Merge.

41. Click on the left node and pull the handle down toward the bottom of the canvas. The handle may be difficult to see as it is along the left edge of the lava lamp.

42. Click on the right node and pull the handle down toward the bottom of the canvas. The window may need to be enlarged as the handle is sticking off the visible area.

43. Click the Object Selection Tool (Pick Tool) and change the Properties of the base. I chose a the same gray gradient as the cap.

44. Optional. Change to the layer for the glass and select the vector object with the Object Selection Tool (Pick Tool) and change the Properties of the vector. This will be the interior of the lava lamp and I chose the Duotone Red gradient.

45. Go to the original Vector 1 layer and turn it off (because we don't need it anymore). If it isn't turned off then the interior of the lava lamp develops a black outline.

46. Ctrl + Shift + B or Selections > Selection From Vector Object. Then Selections > Promote Selection to Layer (Ctrl + Shift + P) to make a new layer with the selection. This will retain the red gradient.

47. Apply the Balls and Bubbles effect to create the lava blobs. Choose the Reflecting globs preset from the menu, then make the following modifications:


Shape
Automatic multiple balls or bubble = Checked
Coverage = 50
Average size = 50
Size variation = 80
Ball or bubbles type = Overlapping
Randomize = Unchecked
Seed = 0
Surface
Material = Black-white gradient
Opacity = 100
Shininess = 100
Gloss = 100
Maps
Bump Map = Unchecked
Environment Map = Checked
Opacity = 33
Current Image = Checked
Illumination
Maximum = 100
Minimum = 20
Light 1
- Position = Bottom
- Color = #812f2f (change color if you have a different color for your lava lamp interior)
- Highlight Size = 15
- Back Light = Checked
- Bubble Light = Unchecked (will be grayed out and unavailable)

49. Change the Properties of the glass vector to a fading white gradient so that the glass looks like it is being illuminated from the left.

50. Change the transparency of the vector layer to 50%.
51. The edge of the lava blog layer is slightly jagged. To get rid of it, return to the layer with the lava blobs. Contract the selection by 1.

51. Invert the selection (Ctrl + Shift + I) and hit delete.
52. Ctrl + D to select none.
The lava lamp is now complete and ready to look like red corpuscles floating in blood. This is a description from Komarr by Lois McMaster Bujold of a lava lamp and it has stuck with me since.
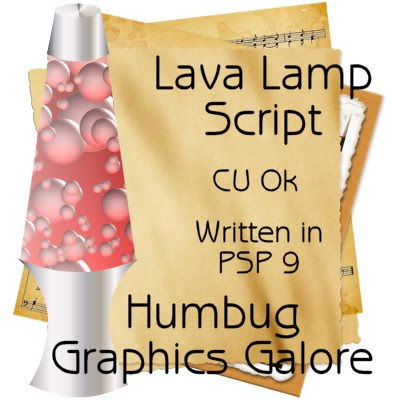
Here is an interactive script based on this tutorial. You can choose the colors for the lava, the lamp cap and the lamp base. It leaves all the layers and I'm expecting that it may not work for everyone since it uses vectors. I have guests this weekend and I wanted to get this tut and the script out before the Funkadelic blog train leaves the station. So the script has not been properly tested. Please let a comment if the script does (or doesn't) work for you (along with your version of PSP).
THANK YOU very much!! This is very good. I am excited about this one!
ReplyDeleteThank you so much for this Freebie. I want to let you know that I posted a link to your blog in Creative Busy Hands Scrapbook Freebies Search List, under the Page 3 post on Aug. 29, 2009. Thanks again.
ReplyDeleteThank you very much for sharing. I just love your scripts.
ReplyDeleteSpencer, I stumbled upon your site the other day while searching for something else and I want to say how enjoyable your tutorials are. I am so glad to see that there is someone else out there who is prepared to show others how to create elements rather than just giving them copy and paste tuts. Best wishes
ReplyDeleteVanessa (Scrapz 'n Bitz Designs)
http://scrappintutz.blogspot.com
I tested the script with PSP X2 and it works fine. Thanks for sharing!
ReplyDeleteSylvie
I so can't wait to try this one !
ReplyDeleteTY so much for all you do it is appreciated!
HUGE HUGGERS
SBQ Dawn
Thank you so much for sharing your knowlegde with others...your tuts are fun, easy, and explained so well...I am making a groovy scrapkit and this is great...many blessings.
ReplyDelete