I wrote up an action that will cut up a sheet of letters into individual files. However, I couldn't figure out how to automate the naming of the files without providing an options file and a mini-tutorial. So, to use the action to its fullest potential, you need to follow this tutorial.
Supplies:
6 x 6 Grid Template
Alpha Cutter Action and Output Settings Preset
1. The letters for the alpha need to be put on a grid. The cutter uses will evenly divide any canvas into 6 columns and 6 rows. This allows for 26 letters and 10 numbers. If you do not have a grid that you can follow, you can use my Grid Template. Open up the template or your own canvas in Photoshop.
2. Select a nice font. With the text tool, write out your letters and numbers as vectors. Try to position each letter in the middle of a grid square.
3. Turn off the layer containing the Grid Template by clicking the eye symbol on the layer palette.
4. Apply any styles or perform any actions needed to create the look of the alpha.
5. Install the action if you haven't done so already. Place the "alpha-cutter.iros" file some place where you can easily find it. Mine is in My Documents > Adobe > Presets > Output Settings.
6. Create the following directory My Documents > Adobe > alpha.
7. Play the action.
8. When you reach the pop-up box, read the instructions and press 'Continue'.
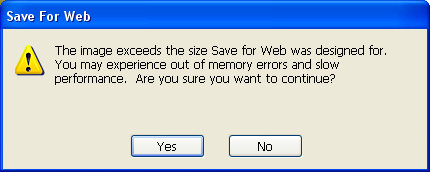
9. You may get a Save for Web warning message if you are using my template as the image is very large. Click 'Yes' if you get this warning.
10. Click the Optimize Settings button.
11. Select 'Edit Output Setting's from the menu that appears.
12. In the Output Settings dialog, click 'Load'.
13. Find the 'alpha-cutter.iros' file and load it. You should only have to perform steps 10-13 the first time you run the action. You will have to perform steps 10-13 again if you change the settings in the future.
14. Click 'Save'.
15. If you created the alpha directory, then the dialog will open in that directory. If not, then it will open in your last used directory. You can, if you wish, change to a different folder or make a folder for the alpha. The default name that appears in the dialog is the name of the file. So, if you used my Grid Template, then it will be HGG_gridtemplate.
16. Change the default name to something else.
17. Click 'Save' and the files will be saved.
When you go to the folder, you can see the individual files. They will be numbered from 1 - 36.
Donations Welcome
I am currently saving toward a new version of Paint Shop Pro. If you wish to help me out, then please donate.
Larger versions of images can be seen by clicking on the image. Also, thank you for your kind and encouraging comments. I love reading the comments. If you use my any of freebies, I would be overjoyed with a comment containing a link to your item. I love seeing any of my freebies in use.
Showing posts with label actions. Show all posts
Friday, October 15, 2010
Friday, July 16, 2010
Sequins Action
Here is an action that makes sequins. It follows the steps in my tutorial but allows the user to choose the color of the sequin. It should work in PSE as there aren't any Photoshop-specific commands, but I have not tested it in PSE yet. I did not want to abuse the members of my group by asking them to test this action, therefore it has not been tested in other versions of Photoshop. If this action works for you in PSE or other versions of Photoshop, please leave a comment.
Tuesday, July 13, 2010
Twill Ribbon Action
A member of my group offered up this action which she made following my twill tape tutorial. I am delighted to share it with everyone. The author of the action states that this item is commercial use ok.
Wednesday, November 4, 2009
Sprinkles Action
So, I recorded an action for the sprinkles while I was writing up the tutorial. I wrote it in CS3, so if you actually use this action in a different version of photoshop, please leave a comment so that everyone will know that it works in a different version.
I really like my new comment tracker in the sidebar as I'm actually seeing all the comments that people leave. Unfortunately, this does mean that I'm not seeing a lot of the comments that people leave at 4shared (until much later as I don't check it very frequently) as I can't seem to get a RSS feed for the comments. So, I noticed that Yanti has given me an award!
Now, I'm supposed to hand out the award to some people (not sure how many) and I'm supposed to scrap about 10 things about myself, but since I don't scrap, I will just write them.
1. I believe in the Public Option and support Health Care Reform in the United States as a means of lowering costs for everyone.
2. I have a day job which pays the bills and make digital alphabets and designer items for fun.
3. I support the re-instatement of the Glass-Steagall Act to prevent investment companies from owning bank holding companies and eliminate companies which are "too big to fail".
4. I'm still sick and both of my kids are sick. One went to the ER on Monday.
5. I have a worm bin in the basement where I compost our kitchen waste. It appears to have infested our house with fruit flies.
6. We own a hybrid vehicle to reduce our dependence on fossil fuels.
7. I do not scrap, which means that I do not make layouts. Wierd, I know.
8. I grow orchids.
9. I hate cleaning.
10. This morning I saw a cat on my garage roof.
Now I have to pass the award on, which as everyone knows, is always a difficult task for me.
1. Americo of Creativemundi
2. Delicious Scraps
3. Create with TLC
4. The Scrappin Cop
I suspect I am supposed to hand the award out to more than four people, but once again, my lack of blog reading is working against me.
Thursday, September 10, 2009
Dotted Paper in Photoshop
This tutorial will show you how to use layer masks and the halftone effect to create a paper covered in dots.
1. Open a new canvas. I made mine 3600 x 3600 for a full-size paper.
2. Fill the canvas with your choice of color using the paint bucket.
3. Make a new layer at 100% opacity.
4. Fill the layer with 50% gray (Shift + F5).
5. Go to Filter > Pixelate > Color Halftone.
6. Apply the effect with a radius of 50 pixels and after making sure that all the angles are the same.
7. Go the Select > Color Range and choose Shadows from the drop-down list.
8. On the layers palette, click the mask button to create a mask from the selection.
9. Click on the layer thumbnail so that the mask is de-selected.
10. Fill (Shift + F5) the layer with a color.
11. Make a new layer at 85% opacity.
12. Fill the layer with 50% gray (Shift + F5).
13. Apply the color halftone effect, reducing the size of the circles to 40 pixels and changing the screen angles. Make sure that all the angles have the same value.
14. Go the Select > Color Range and choose Shadows from the drop-down list.
15. On the layers palette, click the mask button to create a mask from the selection.
16. Click on the layer thumbnail so that the mask is de-selected.
17. Fill (Shift + F5) the layer with a color.
18. Repeat steps 3-10 for a third layer if another color is desired. Reduce the opacity of the new layer to 70% and the reduce size of the dots to 30 pixels. Also change the screen angles when applying the color halftone effect.
The dotted paper is now complete.
Here is an action that follows the script. You can make any sized paper and in any colors.
Sunday, August 16, 2009
Disco Ball Action
I think someone asked for the disco ball as an action, though I'm not entirely sure what a PnP is supposed to be. Anyways, I thought it would be simple to create the disco ball in Photoshop. It was fairly easy to make the ball in Photoshop, but the hanger took me a while to figure out since I'm not as familiar with the vector commands in Photoshop. I also discovered that changing vector shapes in Photoshop do not get recorded in actions. Why is that? Oh well, something to figure out on another day.

Here is the disco ball as an action. It is written in CS3 since that is what I have installed currently. I had to change some of the steps, so it doesn't really follow the tutorial anymore. Photoshop doesn't have a balls and bubbles effect so I really needed to substitute another filter. This appears to work with different colors, gradients and patterns, though you will need to have your canvas open prior to running the action since Photoshop doesn't allow you to fill with any open canvas.

Here is the disco ball as an action. It is written in CS3 since that is what I have installed currently. I had to change some of the steps, so it doesn't really follow the tutorial anymore. Photoshop doesn't have a balls and bubbles effect so I really needed to substitute another filter. This appears to work with different colors, gradients and patterns, though you will need to have your canvas open prior to running the action since Photoshop doesn't allow you to fill with any open canvas.
Subscribe to:
Posts (Atom)