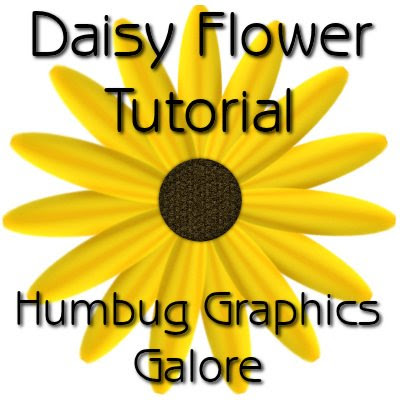
This tutorial will show you how to make a daisy-like flower. The tutorials that I have seen all require use of the burn/dodge brush or the darken/lighten brush. As I have no artistic skills and no Wacom tablet, I find it very difficult to draw on the petal with a mouse. So, I came up with this method for making flowers without needing to use any brushes. I have provided the ellipse selection (so that the halftone settings work out perfectly) as well as some additional petal shapes.
Supplies:
Petal Selections (Optional)
1. Open a 800 x 800 canvas.
2. Go to the Selection Tool and choose the Ellipse Selection. Create an elliptical selection in the upper middle of the canvas by clicking between the middle and the top of the canvas and then dragging the shape until the selection touches the top of the canvas.
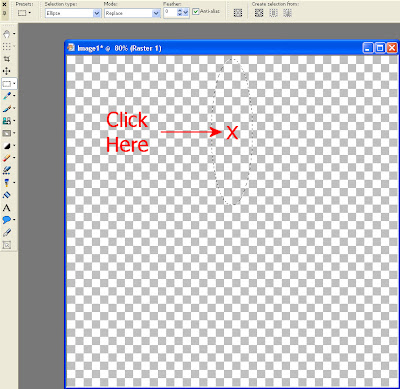
Selection Type = Ellipse
Mode = Replace
Feather = 0
Anti-alias = Checked
Or go to Selections > Load/Save Selections > Load Selection from Disk and load HGG_petal1.
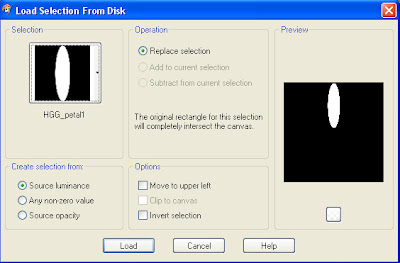
3. Fill selection with a color. I used #e8c818.
4. Go to Effect > Artistic Effects > Halftone and create lines using the following settings:
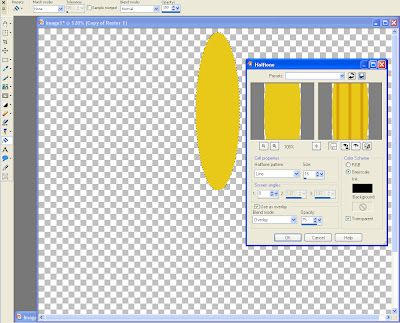
Halftone Pattern = Line
Size = 16 (may have to be adjusted depending on size of ellipse)
Screen Angles:
1 = 0
2 = 0 (will be greyed out when you choose Greyscale)
3 = 0 (will be greyed out when you choose Greyscale)
Use as overlay = Checked
Blend Mode = Overlay
Opacity = 75
Greyscale = Checked
Ink = Black
Background = Null
Transparent = Checked
5. Duplicate the layer (Layers > Duplicate).
6. Adjust > Blur > Gaussian Blur with radius of 4.0.
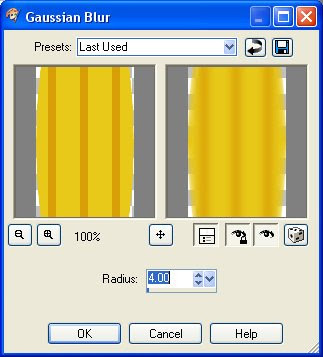
7. Duplicate the layer (Layers > Duplicate).
8. Adjust > Blur > Gaussian Blur with radius of 4.0.
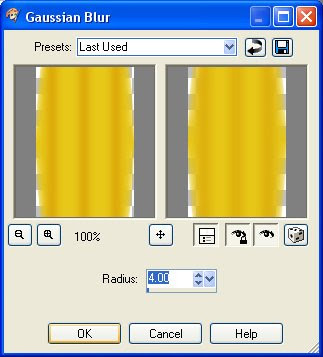
9. Go to Layer Properties for the top most layer and change the blend mode to darken and the opacity to 80.
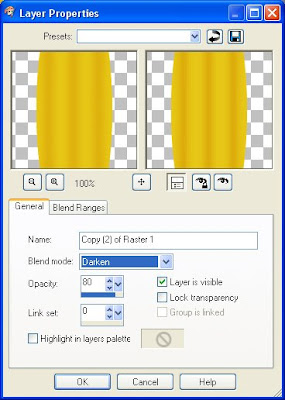
10. Layers > Merge > Merge Visible.
11. Select None (Ctrl + D).
12. Select the Deformation Tool and choose Perspective.
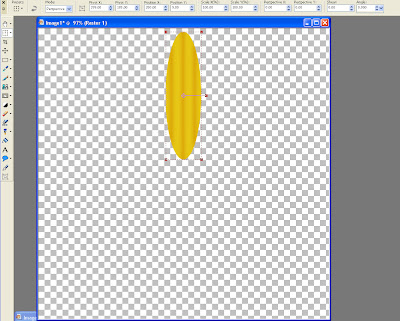
13. Click one of the squares at the bottom of the petal and push in to narrow the bottom of the petal.
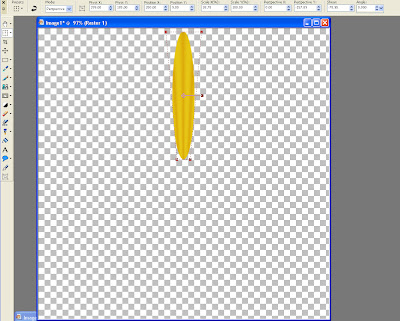
14. Click one of the squares at the top of the petal and pull out to widen the top of the petal.
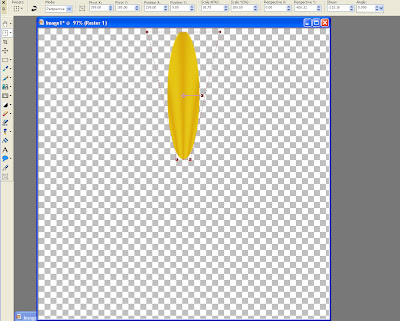
15. Optional. Apply an inner bevel to provide a greater illusion of depth.
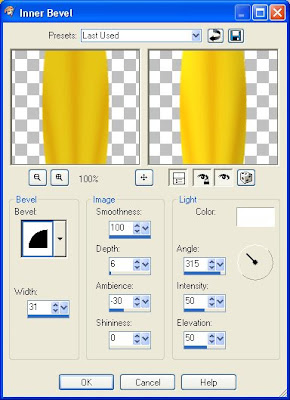
Bevel = 2
Width = 31
Smoothness = 100
Depth = 6
Ambience = -30
Shininess = 0
Color = White
Angle = 315
Intensity = 50
Elevation = 50
16. There are two different ways to make the ring of petals.
A. Plugin Method requires Mura Meister's Copies.
A1. Center the petal on the canvas.
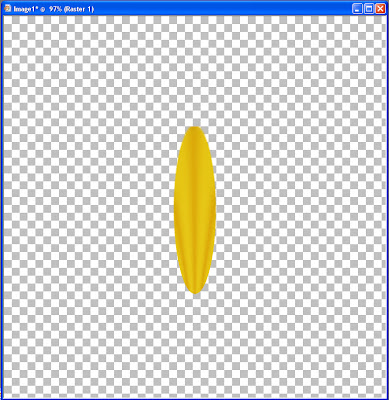
A2. Apply Mura Meister's Copies. Choose the Encircle preset, then change Number to however many petals you want.
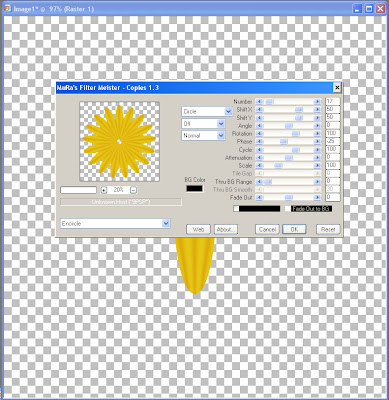
B. Plugin-Free Method. Decide on the number of petals. Divide 360 by the number of petals to obtain the rotation angle (360 degrees / 15 petals = 24).
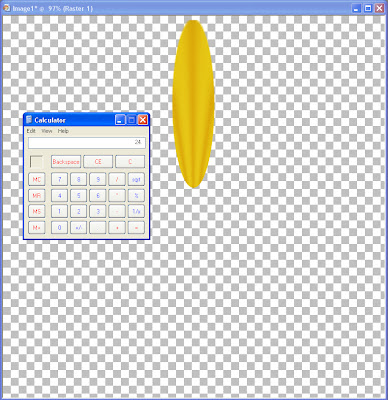 B1. Duplicate the layer.
B2. Go to Image > Rotate > Free Rotate.
B3. Select Free. Enter the rotation angle. Select Rotate Single Layer Around Canvas Center.
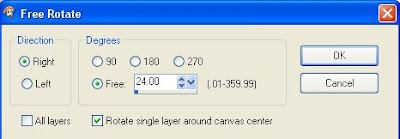
Repeat steps B1-B3 for each petal. In this example, repeat 15 times for 15 petals.
17. Create a new raster layer (Layer > New Raster Layer).
18. Go to the selection tool and choose Circle as the selection shape. Make a circular selection in the middle of the canvas.
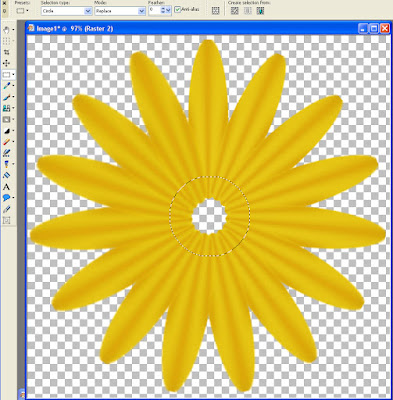
19. Fill the selection with a color. I used #322502.
20. Effects > Textures Effects > Tiles.
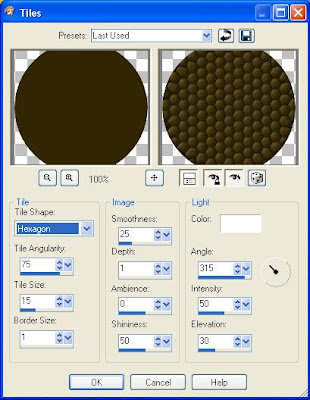
Tile Shape = Hexagon
Tile Angularity = 75
Tile Size = 15
Border Size = 1
Smoothness = 25
Depth = 1
Ambience = 0
Shininess = 50
Color = White
Angle = 315
Intensity = 50
Elevation = 30
21. Effects > Distortion Effects > Pixelate.
22. Adjust > Add/Remove Noise > Add Noise.
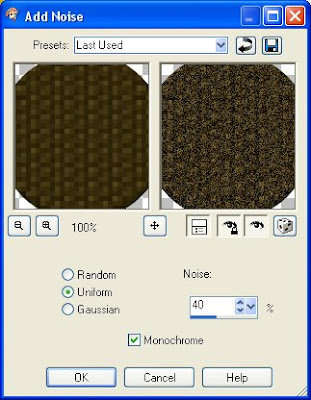
23. Float the selection (Ctrl + F).
24. Apply Cutout to give the center of the flower some depth (Effects > 3D Effects > Cutout).
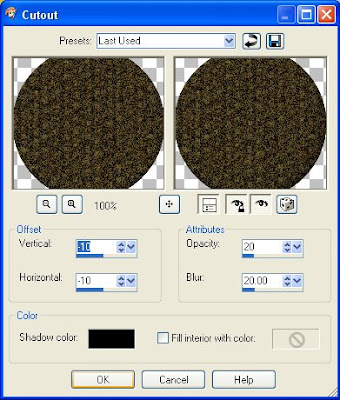 Vertical = -10
Horizontal = -10
Opacity = 20
Blur = 20.00
Shadow Color = Black
Fill interior with color = Unchecked
25. Apply the Cutout effect a second time, changing the Vertical and Horizontal from -10 and -10 to 10 and 10 (Effects > 3D Effects > Cutout).
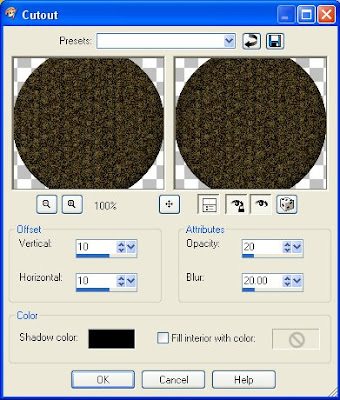 Vertical = 10
Horizontal = 10
Opacity = 20
Blur = 20.00
Shadow Color = Black
Fill interior with color = Unchecked
26. Finish off the center of the flower with a drop shadow (Effects > 3D Effects > Drop Shadow).
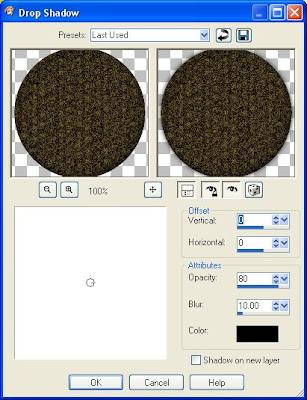
Vertical = 0
Horizontal = 0
Opacity = 80
Blur = 10.00
Color = Black
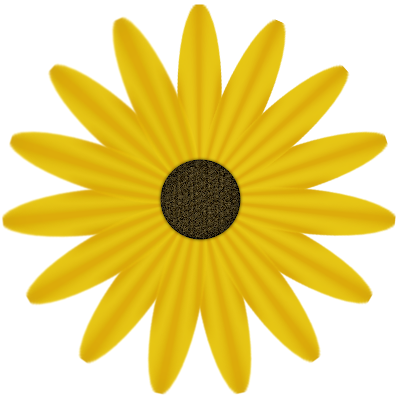
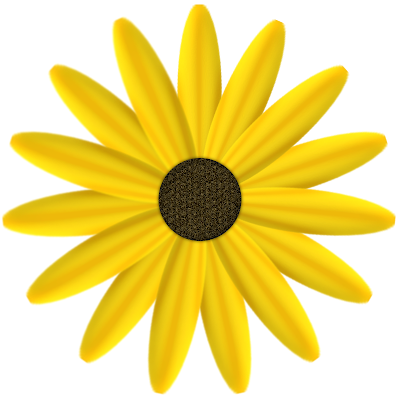
The flower is now complete. If the non-plugin method was used, then everything is still in layers. I moved the petal layers around to give the flower a two-layer effect. Here is a comparison of the flower without the optional inner bevel step...
 ...and with the inner bevel step.
Anything you make from this tutorial is yours to do with as you see fit.

Thank you! Your blog post will be advertised on the DigiFree Digital Scrapbooking Freebie search engine today (look for timestamp: 24 May [LA 07:00pm, NY 09:00pm] - 25 May [UK 02:00am, OZ 12:00pm] ).
ReplyDeleteWow, you make it look so easy. I'm going to try and see if I can come up with the same results. Thanks a million for sharing this information you are a sweetheart!
ReplyDeleteThank you so much for this Freebie. I want to let you know that I posted a link to your blog in Creative Busy Hands Scrapbook Freebies Search List, under the Photoshop/Gimp Resource(s) (Brush(es), Swatch/Palette, ...) post on May. 25, 2009. Thanks again.
ReplyDelete