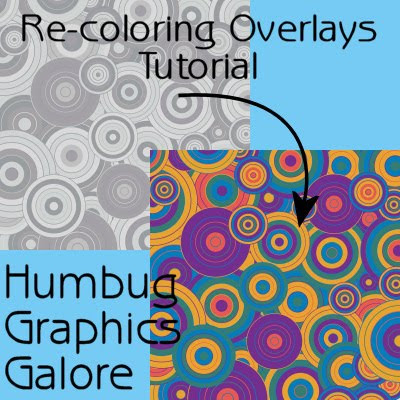
I wrote this tutorial because I didn't want to forget how I tweaked a JPEG overlay to have multiple colors. Lots of people offer free overlays and because of size, these overlays are saved in JPEG format. In general, with an overlay, you are supposed to make it a new layer on your canvas, then change the color and blend mode of the overlay layer. However, what happens when you see an overlay and you say, hey, I wish I could color the overlay different colors? It doesn't work very well because when an overlay is saved as JPEG "from any software package, the file information is compressed to create a smaller file. The compression produces artifacts-unwanted image problems—that can appear as halos or color leakage beyond the edges of objects, checkerboard problems on smooth backgrounds, or blocky-looking areas in an image."1 Artifacts even happen even at low levels of compression. So, I have worked out a way to modify the speckling so that it is still possible to manually change individual elements of an overlay.
I will be using the Retro Circle overlays from Scrapping Cop in my example. Deb has kindly provided permission. If you want the overlays, you can get them at her blog.
Supplies:
Retro Circle overlays
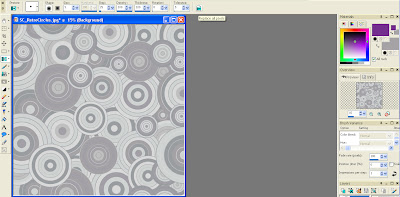
1. Open an overlay in Paint Shop Pro.
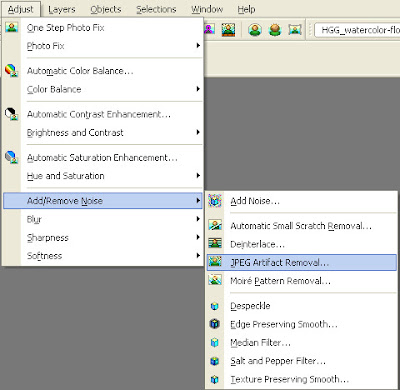
2. Go to Adjust > Add/Remove Noise > JPEG Artifact Removal.
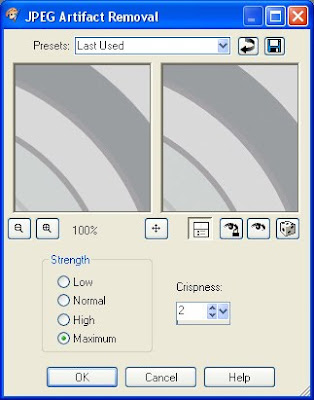 Strength = Maximum
Crispness = 2
3. Go to the Color Replacer tool.
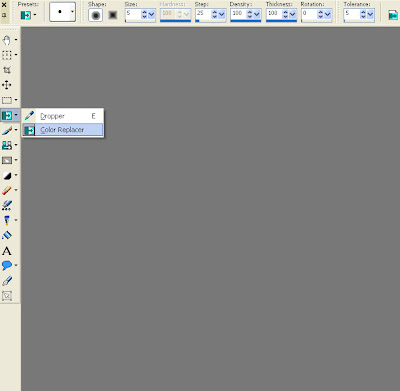
4. Set your background color to the color that you want to replace and your foreground color to the new color that you want.
 Brush = +Default
Shape = Circle
Size = 5
Step = 25
Density = 100
Thickness = 100
Rotation = 0
Tolerance = 5
5. Click on the Replace All Pixels button.
This is what it looks like if you do not try to remove the artifacts.
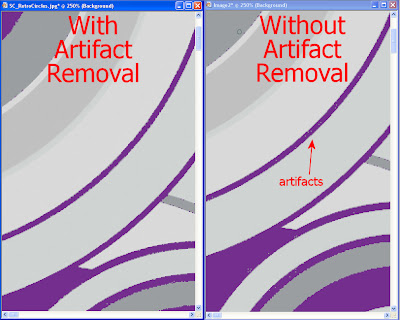
6. Repeat steps 4 and 5 until all the colors in the overlay have been changed.
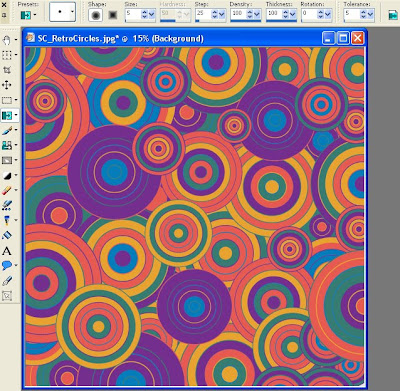
7. From afar, the image looks nice, but when you zoom in to 100%, you can see ugliness at the edges where the colors meet.
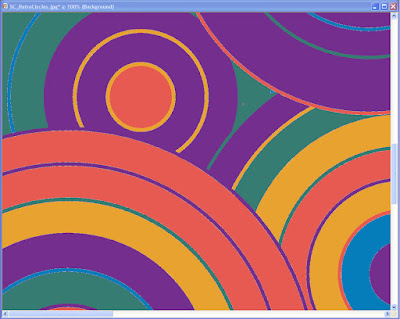
8. We are going to apply the Median filter to smooth out the edges (Adjust > Add/Remove Noise > Median Filter).
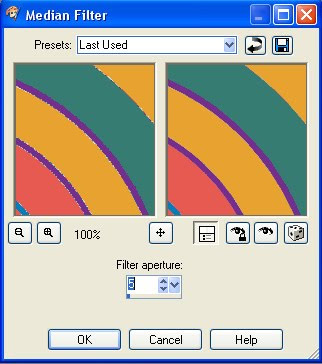 Film aperture = 5
9. Then we'll recover the edges with the Edge Preserving Smooth filter (Adjust > Add/Remove Noise > Edge Preserving Smooth).
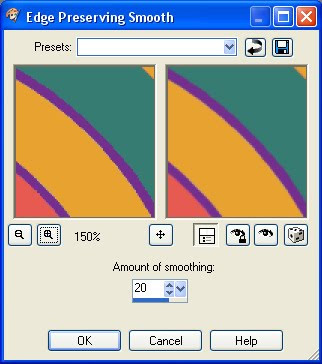 Amount of Smoothing = 20
Coloring is now complete. If you want the overlays that I colored, then you can get them as my part of the Funkadelic Blog Train.
1 Paint Shop Pro Help Files

This is very cool Spencer....thank you.
ReplyDeletePaulette
I tried to follow your psp instructions working with Photoshop but not with much luck.
ReplyDeleteWould there be any chance of you writing a tutorial for this and the Swirls tut using Photoshop?
I really would like to learn how to to do these in Photoshop.
Thanks so much
Great Tut Spencer! I'm sure it will be very helpful for everyone who uses PSP. Thanks for the link back, I'm glad you can find my freebies useful!
ReplyDeleteThis is fantastic!!! It is something I will get a lot of use out of. Thank you so much.
ReplyDeleteBig Hugs
Val
Spencer,
ReplyDeleteThanks so much for this. I remembered you writing this tut and came looking for it when I needed it. you are an invaluable resource!!
Carolyn
Awesome Spencer thanks so much for this tut!
ReplyDeleteI GOTTA bookmark your blog! This is so helpful. I had about 1/3 of it right, but it never looked good - now I know why! Thank you!!!!
ReplyDeleteThank you for these wonderful overlays and for your tutorials. They are a great help!
ReplyDeleteLove Love Love it!!!
ReplyDelete