Sarah left a comment asking for a tutorial on how layer and blend overlays in Paint Shop Pro. I am being bribed with cookies and chocolate.
You can be very complex or very simple with overlays. This will be a very simple tutorial on layering and blending overlays. I will not go into great detail on re-coloring overlays, though you can do this to make your papers even more varied.
Supplies:
Square Overlay Set
1. Open up an existing paper that you want to change or open up a new canvas the desired size of your paper and fill with the color of your choice. For demonstration purposes, I filled my canvas with a red gradient.
2. Open the overlays in the square overlay set.
3. Select an Overlay. I chose Overlay01. Ctrl + C to copy the overlay.
4. Go to your paper. Ctrl + L to paste the overlay as a new layer (or Edit > Paste > Paste as New Layer).
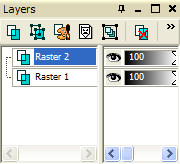
5. In the layers palette, right-click on the overlay layer.
6. Select Properties from the menu.
7. Change the blend mode (and, optionally, the opacity) of the layer. I changed mine to overlay.
8. Repeat steps 3 -7 for all the overlays that you wish to use.
9. Optional. To change the color of an overlay, use the manual color correction tool (Adjust > Color Balance > Manual Color Correction).
Or, if you have a version of PSP where the Manual Color Correction tool has been removed and you cannot find it, you can easily change the color using the Color Replacer Tool.
Set the Background Material to the color that you want to replace. Set the Foreground Material to the new color.
Click the Replace All Pixels button in the Tool Palette.
Here is my example with the different actions for each overlay layer.
Overlay01 = Overlay
Overlay02 = Screen, Opacity @ 80%
Overlay03 = Normal, Changed Color to Teal
Overlay04 = Normal
Overlay05 = Normal, Changed Color to Purple


Cookies are baking right this moment, lol!! TY soooo much, off to work at this!--
ReplyDeleteI just love this overlay
ReplyDelete