 I will be using the Retro Circle overlays from Scrapping Cop in my example. Deb has kindly provided permission. If you want the overlays, you can get them at her blog.
Supplies:
Retro Circle overlays
It is more difficult to color an overlay in Photoshop than in Paint Shop Pro because the basic color selection tools are designed to be fuzzy since with a photograph or artwork, it is better to have edges that blend well.
1. Open up the overlay.
2. The overlay will serve as a template. Because the basic image is in shades of gray, in order to obtain clean selections we must increase the contrast. Image > Adjustment > Auto Contrast or Alt + Shift + Ctrl L to make the shades of gray distinctly different from each other. It is possible to see the ugly artifacts caused by the JPEG compression after the auto-contrasting.

3. Next, we must fix the artifacts on the overlay. Apply the median filter (Filter > Noise > Median) with a radius of 2 pixels to smooth out the artifacts. If the JPEG has been suffered from high compression, the size of the radius may need to be increased.

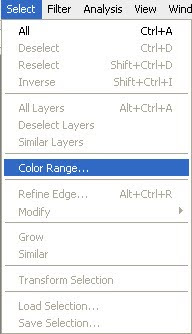
4. All the coloring will be done on a new layer. However, first we must set up the selections for coloring the new layer. Go to Select > Color Range. Use the dropper tool to pick a color from the overlay.


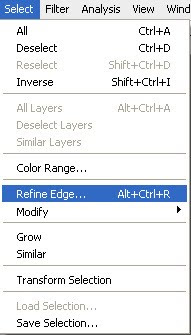
5. We need to fix the selection so that it isn't quite so ugly. Go to Select > Refine Edge or Alt + Ctrl + R.

6. Modify the selection.

Radius = 1.0
Contrast = 50
Smooth = 1
Feather = 1.0
Contract/Expand = +1
7. Go to Select > Save Selection. Give the new selection a name. I called it Color 1 because I'm unimaginative. Click Ok to save the selection.

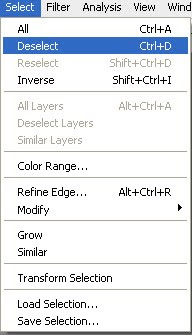
8. Go to Select > De-Select or Ctrl + D to unselect the selection.

9. Repeat steps 4-8 until all the colors have been saved as selections.
10. Create a new layer (Layer > New > Layer or Shift + Ctrl + N).

11. Go to Select > Load Selection and load your first selection. In my case, this is Color 1.

12. Fill the selection with the color, gradient or pattern of your choice (Edit > Fill or Shift + F5).

13. Repeat steps 11 and 12 for each color.
14. Go to Select > De-Select or Ctrl + D to unselect the selection.
15. Apply the Median Filter with a radius of 4 to get rid of the jagged edges.

The overlay is now re-colored.

Another fantastic tutorial Spencer! Thanks again! I really appreciate all the great work you do!
ReplyDeleteI definitely love all your Photoshop tutorials! Thank you so much for sharing this and the swirled brad tuts in Photoshop. I so very much appreciate the time you have taken to do this.
ReplyDeleteAs a side note, many of us are using Mac computers and psp is not made for the Mac so I and many others do not have the choice to chose using PSP. We cannot even open a psp file on a Mac. They need to be in psd or png format. And no, I am not going to go buy a new computer just so I can use psp.
Photoshop is intensive, but I love learning new tips and tricks as I use it.
Thanks again for helping me along the way to more learning.
Wow great tutorial! I never thought about applying the Median filter to get rid of thos problem areas in JPGs. Awesome!
ReplyDeleteI used PSP for 10 years and I taught myself Photoshop 2 years ago. I know so little about PS every time I use it so your tutorials, now that I found them, will be most handy. Thank you!
Hi Spencer!
ReplyDeleteThanks for sharing your knowledge.
juno
xx
junosplace.wordpress.com
cardsbycarol.wordpress.com
Thanks so much. Please keep posting your excellent Photoshop tutorials.
ReplyDeleteCindy
A really excellent Photoshop Tutorial.
ReplyDeleteI learned a lot
Sonia
Thank you so much for this work of art. I want to let you know that I posted a link to your blog in
ReplyDeleteDigiGift - The Digital Scrapbooking Freebies List, different to also find out can about Your works. Look at the post:
28 August 2009 - freebies and tutorials list 2 of 2
Thanks again.
Thanks for taking the time to write this tutorial and share it here. I have a lot of overlays I can use this with. Thanks for your generosity in sharing your great freebies too!
ReplyDeleteThank you so much for sharing your tut here - that's great!!
ReplyDeleteAnd please don't feel abused - you do wonderful work! *hugs*
I will save this in my favorites...just landed
ReplyDeletehere by accident but very interesting tut. I
never really thought about coloring the overlays
like this before but opens up a whole new way to
be creative with "papers". Thanks for your
instructions...I'll try it this next week!
thank you so much for your tuts, i am very grateful, please keep doing them as you help newbies like me so much, i have added you to my favourites list and will pop by often
ReplyDeletewendy x
oh my, please don't be so discouraged... I just received Photoshop CS3, and am just begining my venture into digital scrapping... thank you for sharing your time and talent with the Photoshop community... have a wonderful and blessed day :)
ReplyDeleteHey, I just found your blog and tutorials tonight and I am SO EXCITED that you have so many and am going to give most of them a try. PLEASE don't stop writing them!!!!! I'm sure alot of people read and follow them, but are just too lazy to say thanks. On behalf of them and myself: THANKS!!!!!
ReplyDeletethank you very much!! you can not imagine what I have found some tutorial on how to color an overlay, and finally found it!!thanks again. Sorry to write errors and I use a translator
ReplyDeleteHi Spencer, Please know that your time is NOT wasted on writing Photoshop Tutorials! I post a link to your blog on every site I can, for anyone who might be looking for Ps Tutorials, because they are very well written and so easy to follow. Thanks for sharing your time and talent, as well as your knowledge and understanding of the Photoshop program.
ReplyDelete