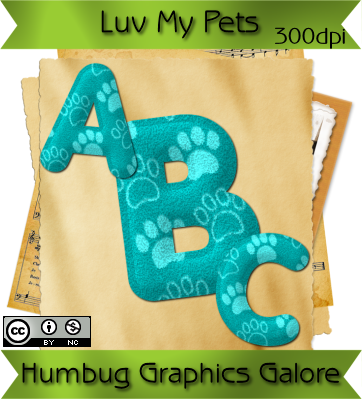
 Another day, another alpha. Here is the fourth alpha for Luv My Pets. Only one more left in the series.
Donations Welcome
I am currently saving toward a new version of Paint Shop Pro. If you wish to help me out, then please donate.
Larger versions of images can be seen by clicking on the image. Also, thank you for your kind and encouraging comments. I love reading the comments. If you use my any of freebies, I would be overjoyed with a comment containing a link to your item. I love seeing any of my freebies in use.
Saturday, May 30, 2009
Luv My Pets - Aqua Felt Alpha
 Another day, another alpha. Here is the fourth alpha for Luv My Pets. Only one more left in the series.
Friday, May 29, 2009
Flower Pot Tutorial
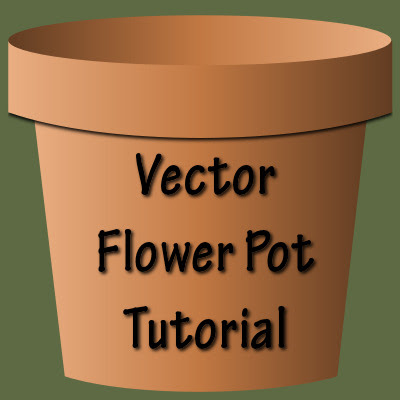
This tutorial will show you how to make a vector flower pot. This tutorial is based on Arizona Kate's Realistic Clay Flower Pot Tutorial, but updated for PSP9. You can make a gradient according to her tutorial or download my premade gradient.
Supplies:
Terra Cotta gradient
Creating the Rim of the Pot
1. Open a new canvas, 800 x 800.
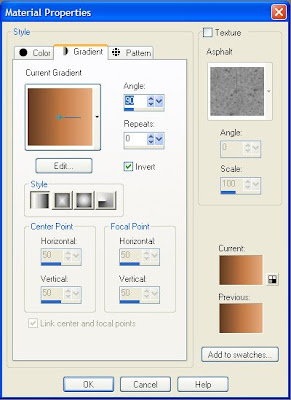
2. Set the terra cotta gradient as the background.
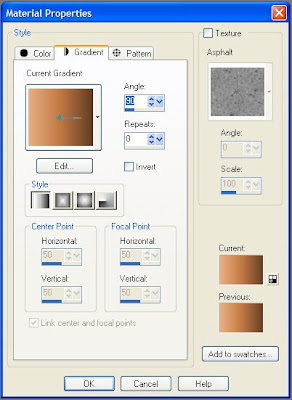
Gradient = Linear
Angle = 90
Repeats = 1
3. Select Preset Shapes and draw out a rectange. Rename the object to Pot Rim.
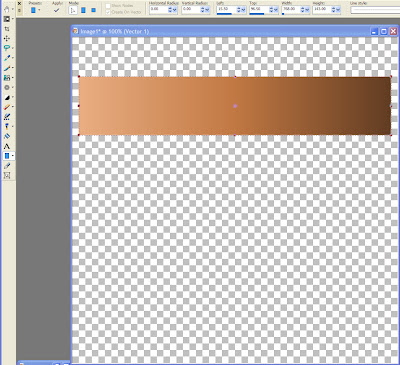
4. Convert the vector shape to a path.
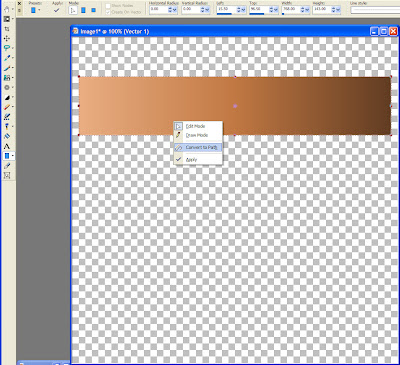
5. Switch to the Pen tool.
6. Make sure that you are in edit mode (with the arrow head selected).
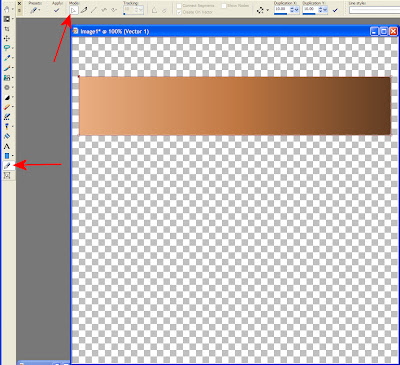
7. Click the upper left corner of the rectangle.
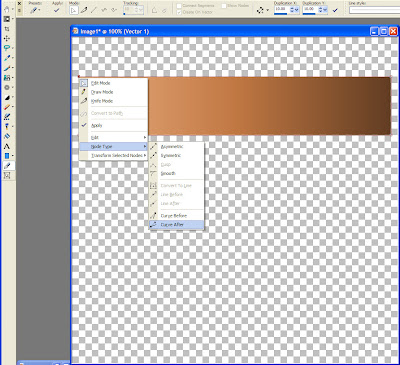
8. Right click and change the node type to Curve After.
9. Pull the handle on the node toward the bottom of the canvas to create a curve.
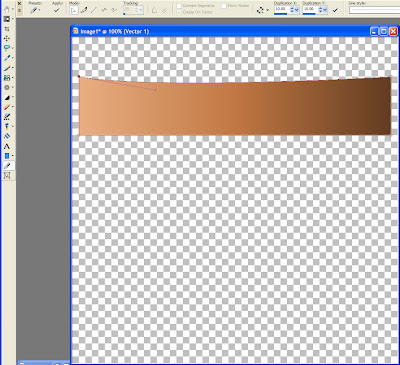
10. Click on the upper right corner of the rectangle.
11. Right click and change the node type to Curve Before.
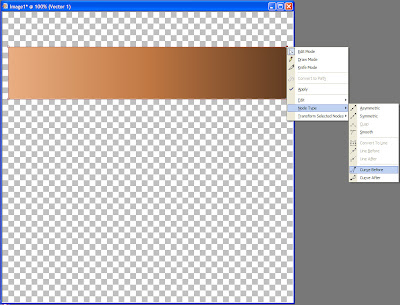
12. Pull the handle on the node to create a curve.
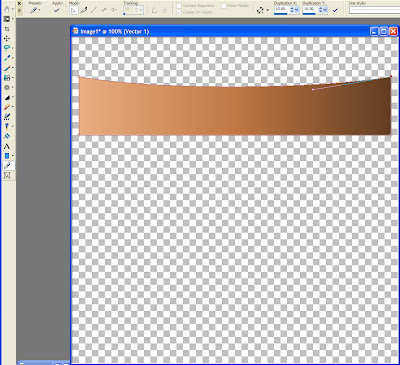
13. Click on the lower left corner of the rectangle.
14. Change the node type to Curve Before.
15. Pull the handle on the node to create a curve.

16. Click the lower right corner of the rectangle.
17. Change the node type to Curve After.
18. Pull the handle on the node to create a curve.
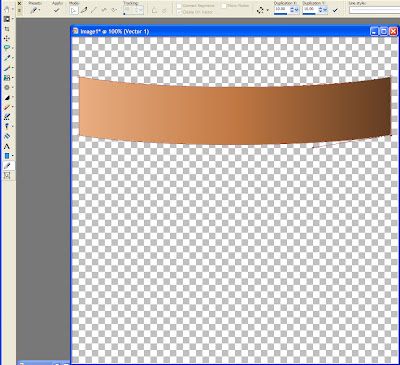
Creating the Main Body of the Pot
19. Go to Preset Shapes and draw out a rectangle from under the pot rim to the bottom of the canvas. Rename the object to Pot Main.
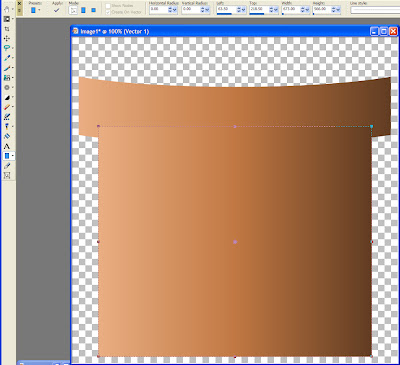
20. Convert the vector shape to a path.
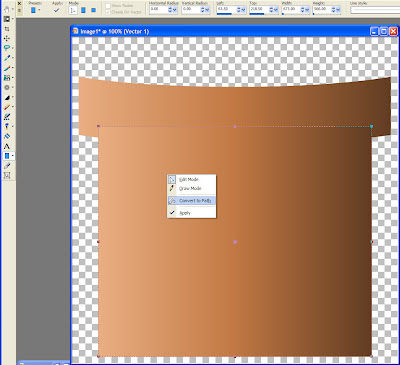
21. Switch to the Pen Tool and make sure that edit mode is selected.
22. Click the lower left corner of the rectangle. Pull the corner toward the middle of the pot to create a narrowed base.
24. Click the lower right corner of the rectangle. Pull the corner toward the middle of the pot to create a narrowed base.
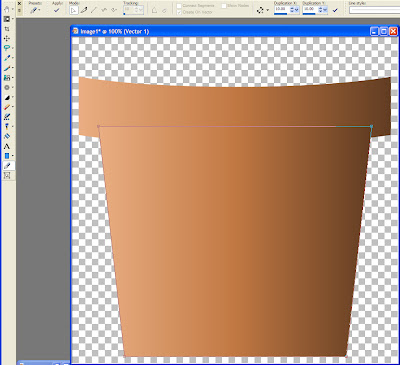
22. Click the lower left corner of the pot.
23. Change the node type to Curve Before.
24. Pull on the handle to create a curve for the bottom of the pot.

25. Click on the lower right corner of the pot.
26. Change the node type to Curve After.
27. Pull on the handle to create a curve for the bottom of the pot.
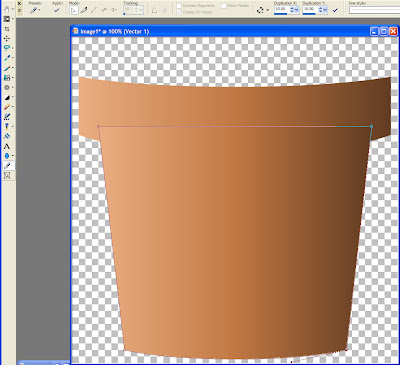
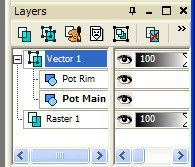
28. In the layers palette, slide the Pot Main rectangle under the Pot Rim rectangle.
Creating the Interior of the Pot
29. Got to Preset Shapes and select the ellipse.
30. Go to the background material and invert the gradient.
31. Draw out an ellipse from one side of the Pot Rim rectangle to the other to create the inside of the pot. You may need to move the ellipse up or down so that it is properly seated over the rim. Rename the object to Pot Interior.
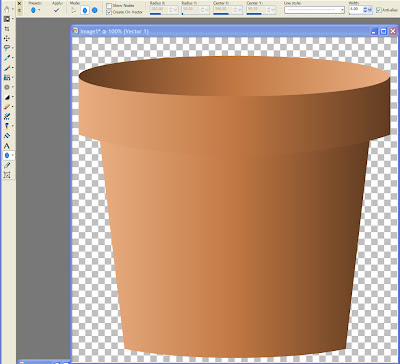
Adding a Drop Shadow to the Rim of the Pot
32. Use the Object Selection Tool to choose the Pot Rim.
33. Obtain the selection from the vector object (Ctrl + Shift + B).
34. Create a new Raster Layer over the Vector Layer.
35. Add the drop shadow (Effects > 3D Effect > Drop Shadow).
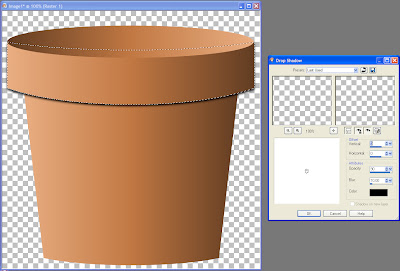
Vertical = 5
Horizontal = 0
Opacity = 90
Blur = 10.00
Color = Black
36. Select None (Ctrl + D).
37. Use the eraser to remove any bits of shadow that are in the wrong place (look where the red arrow is pointed).
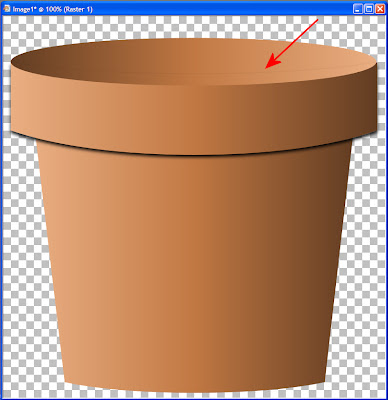
The flower pot can now be personalized. I recently started using the QuickScript functionality in PSP, so I turned my steps in this tutorial into a script. The script leaves all the vector layers, so you can customize the gradient or texturize once the script is complete. I'm making the script available for download for those of you who want it. It isn't as dynamic as some of my other scripts, but it makes a usable flower pot. Also, after several rounds of de-bugging, the script works in PSP9, PSPX, PSPX1 and PSP X2.
Daisy in a Flower Pot
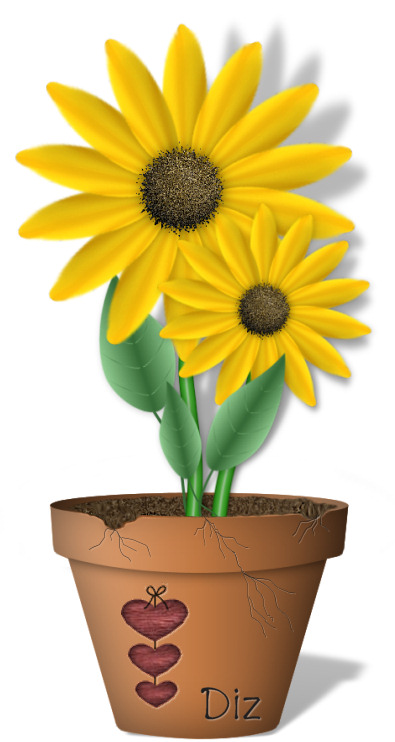
I thought this was a really cute use of my daisy flower tutorial and Diz has allowed me to share it with everyone. It really encouraged me to work out how to make a flower pot in PSP 9. See the next entry for the flower pot script.
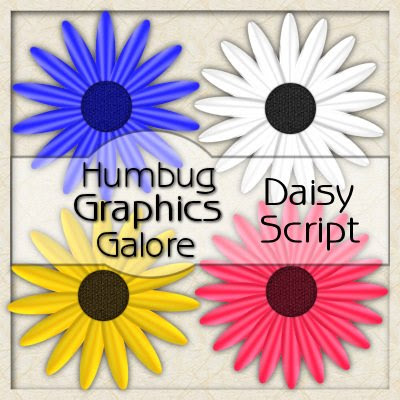
Here the script for the daisy from the tutorial. I've customized it so that you can either choose the default colors from the tutorial or select your own color, gradient or pattern. Also, you can choose any number of petals from 5-50. I forgot to write into the preview that the script is commerical use ok.
Thursday, May 28, 2009
Luv My Pets - Orange Felt Alpha
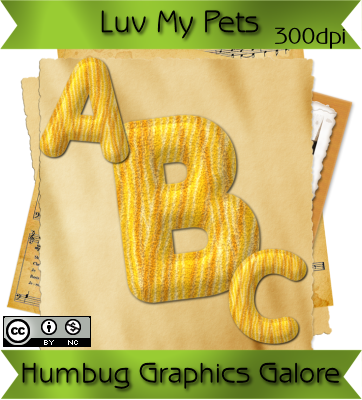
Here is the orange felt alpha for Luv My Pets. I wanted to make an tabby stripe, like in a marmalade kitty. I don't think I succeeded, but I do like this pattern all the same.
Wednesday, May 27, 2009
Luv My Pets - Red Felt Alpha
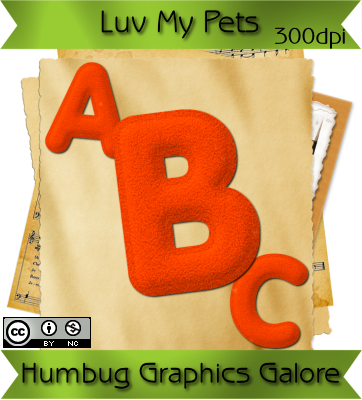
I'm calling this red because I have another felt alpha that I decided to call orange. However, I'm not certain this is red. Maybe a neon red, though it has definite orangish hues. There are a total of five alphas for the Luv My Pets kit. This is the second one in the series.
Tuesday, May 26, 2009
Cloud and Tree Quick Pages
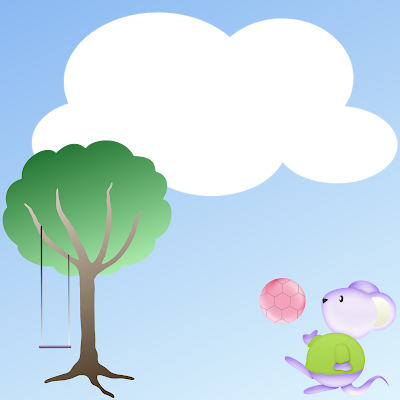

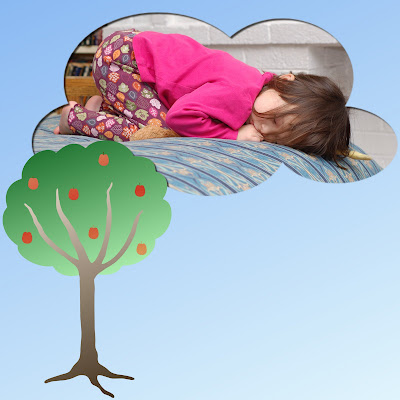
I was editting a tree script for Lena and decided to make some quick pages out of the tree that I made to test the edits. You can get the script at Lena's blog. There are three quick pages, two with mice from Americo and one plain. I happen to really like Americo's cute mice, but perhaps not everyone is a rodent-lover. There is plenty of room on the plain one for journaling or further decorating. I'm debating whether or not to make a cloud alpha to go with this. Leave a comment if you are interested in the cloud alpha or not. Help me decide!
Monday, May 25, 2009
Luv My Pets - Green Felt Alpha
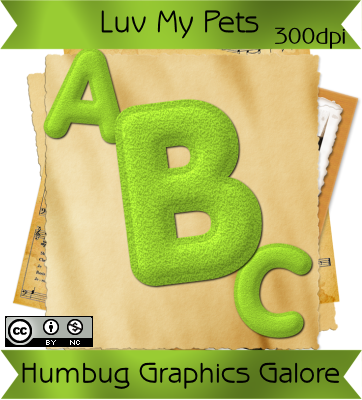
I made a series of five puffy felt alphas to go with my Luv My Pets kit since I worked out the method for making my own felt textures. Please come back tomorrow for the next alpha in the series. The kit will be posted last, since I want to post it with the Scrap Kit Challenge blog train links for this month.
Sunday, May 24, 2009
Daisy Flower Tutorial
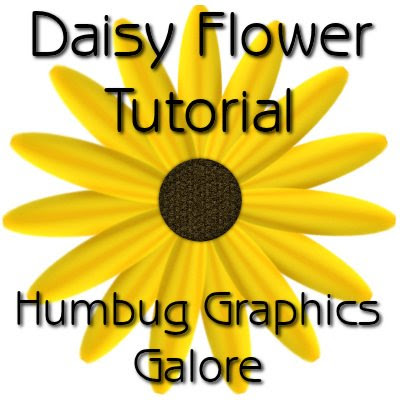
This tutorial will show you how to make a daisy-like flower. The tutorials that I have seen all require use of the burn/dodge brush or the darken/lighten brush. As I have no artistic skills and no Wacom tablet, I find it very difficult to draw on the petal with a mouse. So, I came up with this method for making flowers without needing to use any brushes. I have provided the ellipse selection (so that the halftone settings work out perfectly) as well as some additional petal shapes.
Supplies:
Petal Selections (Optional)
1. Open a 800 x 800 canvas.
2. Go to the Selection Tool and choose the Ellipse Selection. Create an elliptical selection in the upper middle of the canvas by clicking between the middle and the top of the canvas and then dragging the shape until the selection touches the top of the canvas.
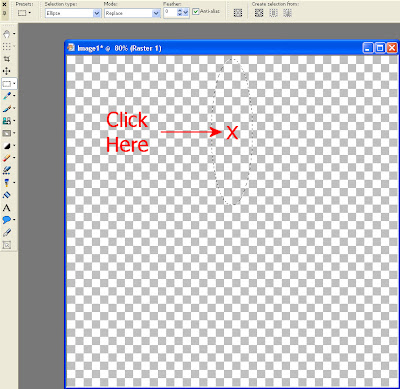
Selection Type = Ellipse
Mode = Replace
Feather = 0
Anti-alias = Checked
Or go to Selections > Load/Save Selections > Load Selection from Disk and load HGG_petal1.
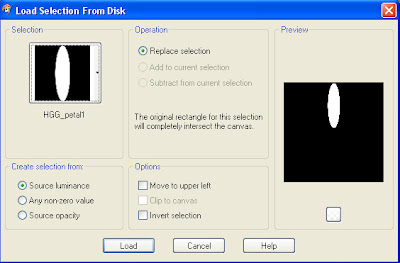
3. Fill selection with a color. I used #e8c818.
4. Go to Effect > Artistic Effects > Halftone and create lines using the following settings:
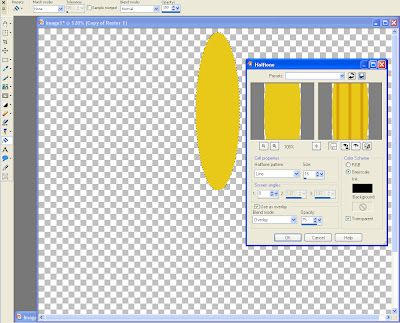
Halftone Pattern = Line
Size = 16 (may have to be adjusted depending on size of ellipse)
Screen Angles:
1 = 0
2 = 0 (will be greyed out when you choose Greyscale)
3 = 0 (will be greyed out when you choose Greyscale)
Use as overlay = Checked
Blend Mode = Overlay
Opacity = 75
Greyscale = Checked
Ink = Black
Background = Null
Transparent = Checked
5. Duplicate the layer (Layers > Duplicate).
6. Adjust > Blur > Gaussian Blur with radius of 4.0.
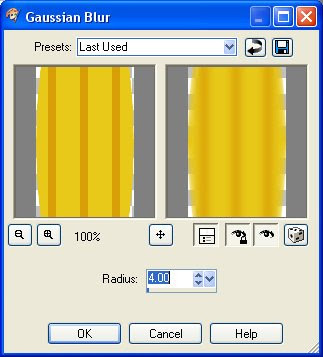
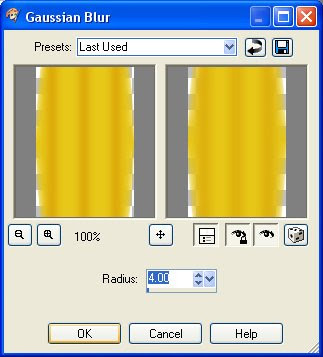
7. Duplicate the layer (Layers > Duplicate).
8. Adjust > Blur > Gaussian Blur with radius of 4.0.
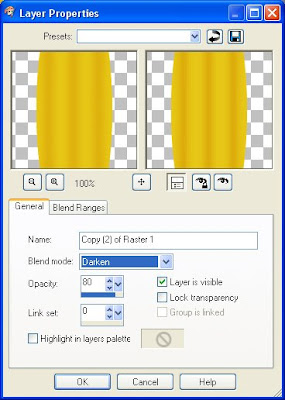
9. Go to Layer Properties for the top most layer and change the blend mode to darken and the opacity to 80.
10. Layers > Merge > Merge Visible.
11. Select None (Ctrl + D).
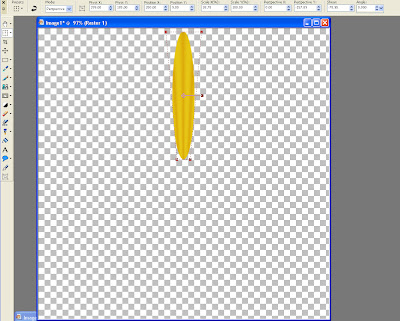
12. Select the Deformation Tool and choose Perspective.
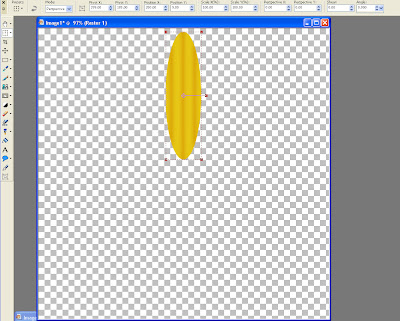
13. Click one of the squares at the bottom of the petal and push in to narrow the bottom of the petal.
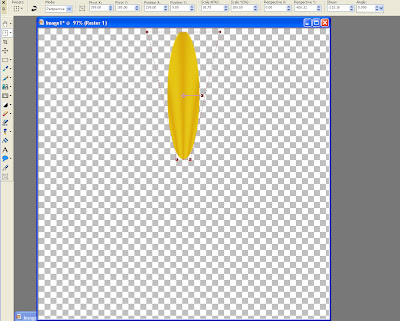
14. Click one of the squares at the top of the petal and pull out to widen the top of the petal.
15. Optional. Apply an inner bevel to provide a greater illusion of depth.
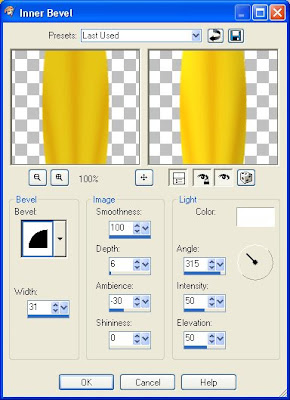
Bevel = 2
Width = 31
Smoothness = 100
Depth = 6
Ambience = -30
Shininess = 0
Color = White
Angle = 315
Intensity = 50
Elevation = 50
16. There are two different ways to make the ring of petals.
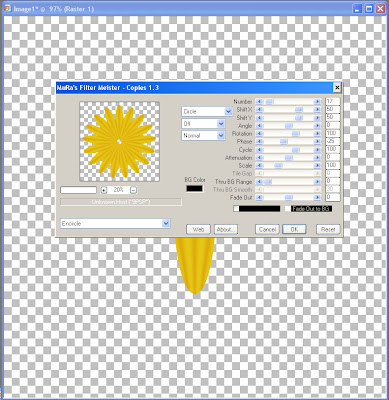
A. Plugin Method requires Mura Meister's Copies.
A1. Center the petal on the canvas.
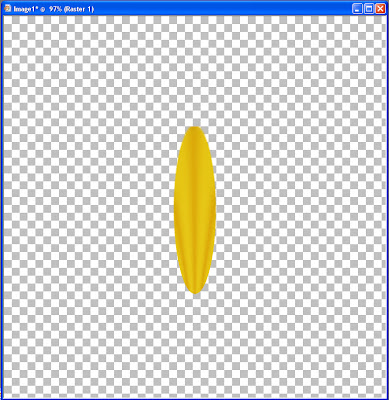
A2. Apply Mura Meister's Copies. Choose the Encircle preset, then change Number to however many petals you want.
B. Plugin-Free Method. Decide on the number of petals. Divide 360 by the number of petals to obtain the rotation angle (360 degrees / 15 petals = 24).
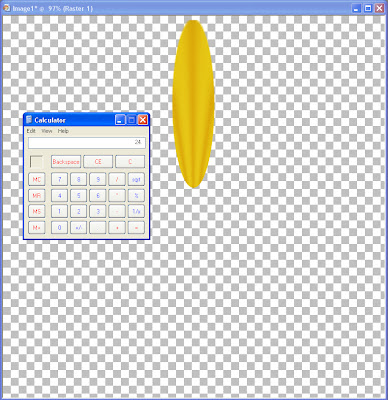 B1. Duplicate the layer.
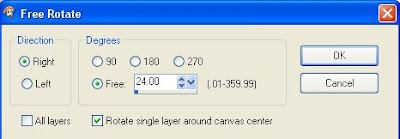
B2. Go to Image > Rotate > Free Rotate.
B3. Select Free. Enter the rotation angle. Select Rotate Single Layer Around Canvas Center.
Repeat steps B1-B3 for each petal. In this example, repeat 15 times for 15 petals.
17. Create a new raster layer (Layer > New Raster Layer).
18. Go to the selection tool and choose Circle as the selection shape. Make a circular selection in the middle of the canvas.
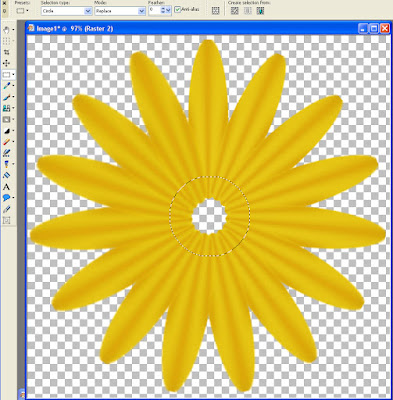
19. Fill the selection with a color. I used #322502.
20. Effects > Textures Effects > Tiles.
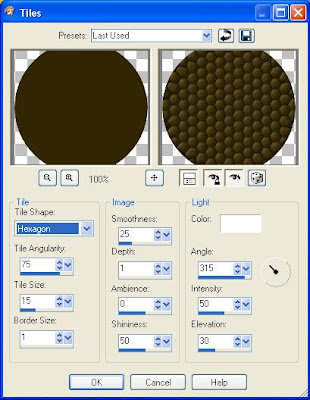
Tile Shape = Hexagon
Tile Angularity = 75
Tile Size = 15
Border Size = 1
Smoothness = 25
Depth = 1
Ambience = 0
Shininess = 50
Color = White
Angle = 315
Intensity = 50
Elevation = 30
21. Effects > Distortion Effects > Pixelate.
22. Adjust > Add/Remove Noise > Add Noise.
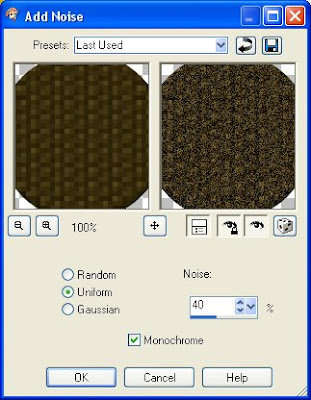
23. Float the selection (Ctrl + F).
24. Apply Cutout to give the center of the flower some depth (Effects > 3D Effects > Cutout).
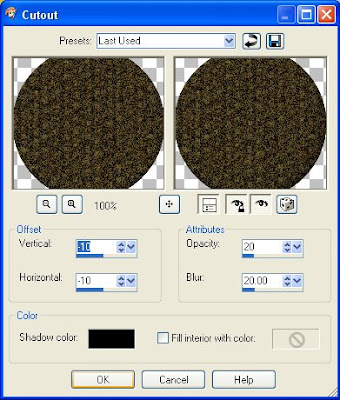 Vertical = -10
Horizontal = -10
Opacity = 20
Blur = 20.00
Shadow Color = Black
Fill interior with color = Unchecked
25. Apply the Cutout effect a second time, changing the Vertical and Horizontal from -10 and -10 to 10 and 10 (Effects > 3D Effects > Cutout).
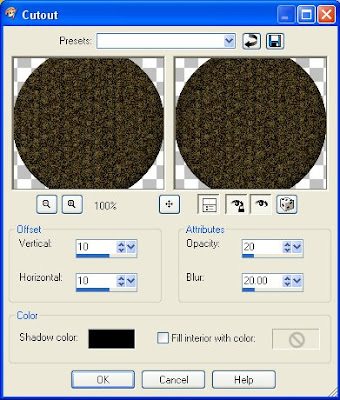 Vertical = 10
Horizontal = 10
Opacity = 20
Blur = 20.00
Shadow Color = Black
Fill interior with color = Unchecked
26. Finish off the center of the flower with a drop shadow (Effects > 3D Effects > Drop Shadow).
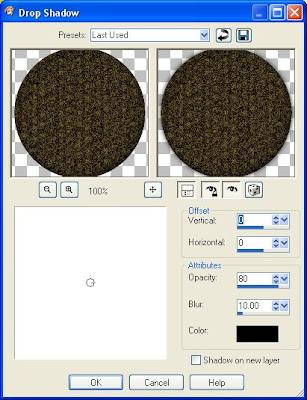
Vertical = 0
Horizontal = 0
Opacity = 80
Blur = 10.00
Color = Black
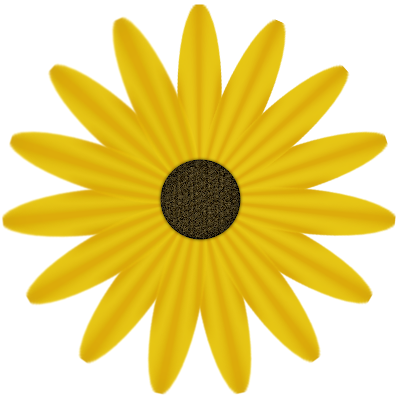
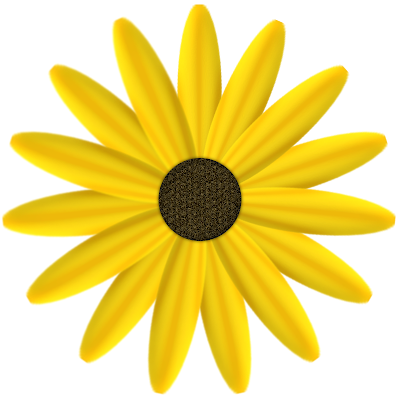
The flower is now complete. If the non-plugin method was used, then everything is still in layers. I moved the petal layers around to give the flower a two-layer effect. Here is a comparison of the flower without the optional inner bevel step...
 ...and with the inner bevel step.
Anything you make from this tutorial is yours to do with as you see fit.
Subscribe to:
Comments (Atom)
