Donations Welcome

I am currently saving toward a new version of Paint Shop Pro. If you wish to help me out, then please donate.

Larger versions of images can be seen by clicking on the image. Also, thank you for your kind and encouraging comments. I love reading the comments. If you use my any of freebies, I would be overjoyed with a comment containing a link to your item. I love seeing any of my freebies in use.

Sunday, May 3, 2009

Round Bow Script


I wrote this script based on the button bow script and used it to make bows for the Airs of Spring kit. It makes a 1000 x 1000 bow, so I actually had to re-size the items for the smaller kit. Everything is left in layers so that you can add finishing touches once the script is complete.

Saturday, May 2, 2009

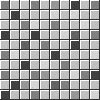
Criss-Cross Checks Script

I wrote this script to make seamless tiles for the Airs of Spring kit. I thought people might enjoy using it.

Friday, May 1, 2009

Feel the Music Blog Train Coming


I've signed up to take part in the Feel the Music Blog Train. There are freebies available at the station with more being posted every day until the train leaves the station on May 18th. I am also providing a pre-launch freebie. It is a piece of word art. I hope it provides a hint towards what my kit is going to contain.


Airs of Spring Blog Train

Abba Dabba Scraps (Host, go here if you get lost)
The Cat's Meow
Candy's Treasures
XelaxScrapFree
Boonie Scraps
Tabby's Digi Designs
Designs By Foxylady Creations
This Complicated Life
Humbug Graphics Galore
Gothic Inspirations

and Amber, who does not have a blog. (You can find her download at Abba Dabba Scraps)

I am trying to acquire Filter Forge, a plugin for PSP and PS. I cannot afford to buy it right now, but I am hopeful that people who visit this blog might help me out. This is a trial of the donation button as I'm not certain people would be willing to help me out. If you are willing to help me buy Filter Forge so that I can make more nifty things for you, then please make a donation.


My portion of the blog train:


This tagger-size kit comes with:

16 papers
7 butterflies
4 bows
5 tags
5 sets of photo corners
5 flowers
3 alphas

Thursday, April 30, 2009

Bow Script


While I was trying to figure out the AV Bros. Page Curl Pro settings for this bow for some people in Scrap Stuff with PSP and PS, I ended up scripting it. The original tutorial for this bow does not include the settings, but my settings are stored in this script. I would much prefer offering a bow script that didn't require plugins, but I haven't figured out how to make the bow without Page Curl Pro yet.

Tuesday, April 28, 2009

Personalized Pennants Pickup


Pennant requests are now closed. Quite a few people did not leave contact information so there is no way for me to let them know that their pennants are complete. All requested pennants have been uploaded to 4shared and will remain there until May 21. I will delete the pennants on May 21 due to the space issues, so please download your requested pennant if you have not already done so.

There are 233 pennants in the directory, so feel free to browse and snag a pennant if it strikes your fancy.

Download Link Expired

White Wooden Lattice Tutorial

Currently, I'm writing tutorials so that I won't forget how I did something. I spent an hour trying to perfect a white wooden lattice. I now have a seamless white wooden lattice tile and nothing to do with it.

1. Open a new transparent canvas. I used 600 x 600.

2. Using the Eye Candy 5 Textures: Weave plugin, create a seamless tiling lattice.


Basic
Pattern = Plain
Texture Orientation = 45
Ribbon Width = 40.00
Ribbon Color = Solid Colors
Horizontal Ribbon Color = White
Vertical Ribbon Color = White
Gap Width = 75.00
Gap Fill = Make Gaps Transparent
Shadow Strength = 10
Seamless Tile = Checked

Advanced
Thread Detail = 25
Thread Smear = 25.00
Distortion = 0
Edge Roughness = 0

3. Add a drop shadow (Effects > 3D Effects > Drop Shadow).

Vertical = 0
Horizontal = 2
Opacity = 100
Blur = 5.00
Color = Black
Shadow on new layer = Unchecked

4. Notice that the crossover regions of the lattice do not have a drop shadow.


5. To add shadow to the crossover regions, select part of the latticework next to a crossover region. I tried the make the selection the same length as the crossover region and the same width as the shadow.


6. Feather the selection by 1 (Ctrl + H).

7. Copy the selection and then paste the selection on all the crossover regions.


8. To fill in the crossover regions which are cross-wise, paste the selection (Ctrl+E), rotate (Ctrl+R) it 90 degrees to the left and copy the selection.


9. Now paste the selection on the remaining crossover regions.


The completed seamless lattice. This is a 600 x 600, 300 dpi seamless tile. Feel free to download it and use it.

Monday, April 27, 2009

Animated Mosaic Glitter Tile Tutorial

I like to use mosaic glitter tiles as fills in my animated alphabets, but I always forget how to make the tile, so I wrote up this tutorial help me remember the steps.

Plugins Needed: Tormentia or Toadies or VM Toolbox plugin
Simple Filters plugin

1. Open 100 x 100 canvas with transparent background.

2. Fill canvas with white.

3. Use Tormentia Criss-Cross plugin to make the mosaic pattern. My settings are for creating a greyscale tile which I will colorize later. If you want to make a colored tile, then change the Red, Green and Blue settings to your color.


Horizontal = 205
Vertical = 205
Opacity = 255
Red = 0
Green = 0
Blue = 0

Or, use Toadies Plain Mosaic for the same effect.

Cell Width = 28
Cell Height = 28
Cell Edges = 9

Or, use VM Toolbox: Grid.


Grid Size = 55
X-Adjust = 0
Y-Adjust = 0
Line Width = 0
Red = 0
Green = 0
Blue = 0
Transparency = 255

4. Flip canvas (Ctrl + I).

5. Mirror canvas (Ctrl + M).

6. Use the magic wand and select the white.


Mode = Replace
Match mode = RBG Value
Tolerance = 25
Sample merged = Unchecked
Contiguous = Unchecked
Feather = 0
Antialias = Unchecked

7. Cutout with white. Fill the interior with the color of your choice. I chose grey to make a greyscale tile that I could colorize.


Vertical = 1
Horizontal = 1
Opacity = 100
Blur = 0
Shadow Color = White
Fill interior with color = Checked
Interior Color = #c0c0c0

8. Invert the selection (Ctrl + Shift + I).

9. Adjust the Brightness/Contrast (Shift + B).


Brightness = 50
Contrast = 0

10. Select None (Ctrl + Shift + D).

11. With the Fill bucket, fill the individual squares with shades of your color. I filled with shades of grey.


Match mode = RGB Value
Tolerance = 2
Sample merged = Unchecked
Blend mode = Normal
Opacity = 100

12. Colorize the tile.


13. Duplicate the layer.

14. Wrap the layer using the Simple filters Half Wrap. For some reason, the Paint Shop Pro Offset cuts off one column, a single pixel wide, which leaves a white stripe down the middle of the image.

15. Duplicate the layer.

16. Wrap the layer using the Simple filters Top Bottom Wrap.

17. Save the image as a PSP file version 7 or below. Use the .psp extension.


18. Open the image in Animation Shop.


19. Save the image as an animated gif.

Saturday, April 25, 2009

Screw Script


The screw script makes three types of screws, flat head, phillips and allen head. Each screw is a separate layer. I forgot to write into the preview, but the script is commercial use ok.

Friday, April 24, 2009

Home Improvement

This month, the theme for Scrap Kit Challenge was Home Improvement. I wasn't extremely inspired by the theme, so my contribution to the mega-kit is very small.


This kit comes with:

4 papers
2 keyhole frames
2 seamless tiles
8 flathead screw brads
4 alphas
2 seamless tiles


The kit has the following designer resource add-ons:

1 overlay
2 cabinet templates (in PSD format)
1 Screw Script (for PSP), see next post for link.


I forgot to write it into the previews, but both the screw script and the overlay are commercial use ok.

Some members of the group have posted their kits to their blogs. Take a ride on the train to snag the pieces of the kit. As always, some designers may have more than one part to their kit, so be sure to look around their blog before moving on to the next stop.

Blog Train Links:
A Fish Design
Greyashowl
Humbug Graphics Galore <--- You Are Here
Ryn Creations
Trixy DoodleBugs
4 Heart Design