

This tutorial will show you how to make a pinwheel (though my daughter's Winnie the Pooh book calls it a whirly twirly) in Paint Shop Pro.
1. Open a new canvas with a vector layer. Mine is 1000 pixels x 1000 pixels.
2. Select the rectangle tool. Set your foreground color to transparent and your background color to the color of your pinwheel.
3. Select the Draw Square button on the toolbar.
Show Nodes = Checked
Create on Vector = Checked
4. Draw out the square on the canvas.

5. Right-click on the square and select Convert to Path.

6. Select the Object Selection /Pick Tool. Click Center on Canvas on the toolbar.
7. Select the Pen Tool. Make sure that Connect Segments, Show Nodes and Create on Vectore on selected. If they are not, switch to Draw Lines mode to select them then choose Edit Mode.
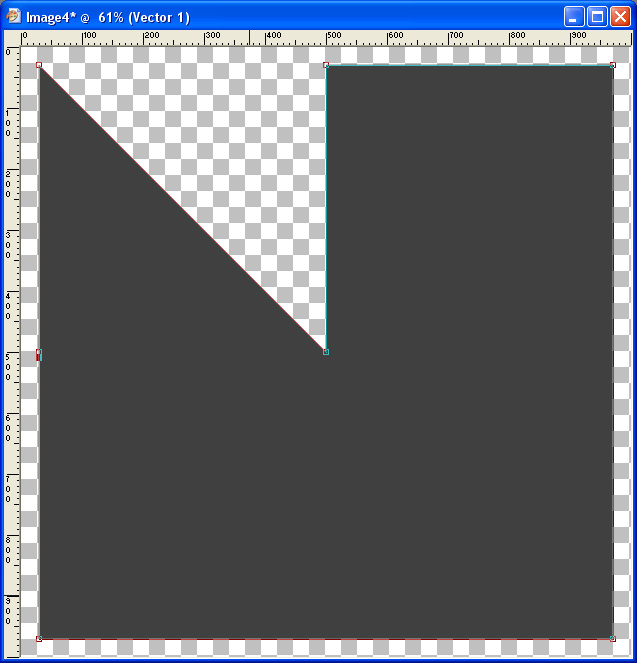
8. Press the Ctrl key and keep it depressed, then click the middle of the top of the square twice to add 2 nodes.

9. Select on of the new nodes and drag it to the center of the canvas. I dragged the node on the left.

10. Press the Ctrl key and keep it depressed, then click the middle of the left side of the square twice to add 2 nodes.
11. Select a node and drag it to the center of the canvas. I dragged the node on the bottom.

12. Press the Ctrl key and keep it depressed, then click the middle of the bottom of the square twice to add 2 nodes.

13. Select a node and drag it to the center of the canvas. I dragged the node on the right.

14. Press the Ctrl key and keep it depressed, then click the middle of the right side of the square twice to add 2 nodes.

15. Select a node and drag it to the center of the canvas. I dragged the node on the top.

16. Duplicate the layer (Layers > Duplicate).
17. Rotate the new layer (Image > Rotate > Free Rotate or Ctrl + R) 40 degrees.

18. Click the object on the duplicate layer to select it (and de-select the original object).

19. Change the color of the object by editting the object properties (Right-click and select Properties).

20. Increase the size of the canvas to accommodate the entire image (Image > Canvas Size). I enlarged my canvas to 1400 pixels x 1400 pixels.

21. Create a new vector layer (Layers > New Vector Layer). I called mine Pin as this will be for the pin that holds the pinwheel to the stick.
22. Select the Ellipse tool and choose the Draw Circle mode.
23. Draw out a circle somewhere on the canvas.

24. Select the Object Selection /Pick Tool. Click Center on Canvas on the toolbar.
25. Optional. Right-click on the circle, select properties and change the color of the circle.

26. Optional. To make a stick for the pinwheel, increase the height of the canvas (Image > Canvas Size). I increased mine to 2000 pixels high.

27. Optional. Create a new vector layer (Layers > New Vector Layer). I called it Stick.
28. Optional. Move the Stick layer under the layer with the circle (the Pin layer).

29. Optional. Select the Rectangle tool and choose Draw Rectangle as the mode.
30. Optional. Draw out a rectangle starting from the middle of the pin down to the bottom of the canvas.

31. Optional. Select the Object Selection /Pick Tool. Click Align Horizontally Center on Canvas on the toolbar.
32. Optional. Right-click on the rectangle, select properties and change the color of the rectangle.
Wonderful tutorial..thanks so much cant wait to try it...Hugs Sheri
ReplyDelete