Donations Welcome
I am currently saving toward a new version of Paint Shop Pro. If you wish to help me out, then please donate.
Larger versions of images can be seen by clicking on the image. Also, thank you for your kind and encouraging comments. I love reading the comments. If you use my any of freebies, I would be overjoyed with a comment containing a link to your item. I love seeing any of my freebies in use.
Wednesday, March 2, 2011
Waterdrops Scatter
This tutorial will show you how to make a scatter that looks like water drops (or rain drops for SNL participants) in Photoshop.
1. Open up a new canvas that is 3600 pixels wide and 600 pixels high.
2. Select the Hard Round brush. This brush is usually available as the Hard Round 19 and is a Photoshop Default brush.
Diameter = 150px
Angle = 0
Roundness = 80%
Spacing = Checked
Spacing = 140%
Smoothing = Checked
I'm not very artistic, so I am unable to paint a pretty random scatter across the canvas. Therefore, I set up the brush to do the scattering for me.
Shape Dynamics
Size Jitter = 56%
Control = Pen Pressure
Minimum Diameter = 0%
Angle Jitter = 35%
Roundness Jitter = 35%
Minimum Roundness = 25%
Scattering
Both Axes = Checked
Scatter = 200%
Count = 1
3. Click once on the right side of the canvas. Press down the Shift key and hold it. Click once on the left side of the canvas. The color doesn't matter because the fill opacity will be set to 0% later.
4. Optional. If you want to make the water drops more irregular, apply a deformation. I chose the Wave deformation (Filter > Distort > Wave).
Number of Generators = 2
Wavelength Min = 25
Wavelength Max = 50
Amplitude Min = 25
Amplitude Max = 50
Scale Horiz = 5
Scale Vert = 7
Type = Sine
Undefined Areas = Repeat Edge Pixels
5. Go to Layer Styles (Layer > Layer Style > Blending Options) and change the fill opacity to 0%.
6. Apply a Drop Shadow.
Blend Mode = Multiply
Opacity = 14
Angle = 90
Use Global Light = Checked
Distance = 15
Spread = 4
Size = 15
Contour = Cone
Anti-aliased = Checked
Noise = 0
Layer Knocks Out Drop Shadow = Checked
7. Apply an Inner Shadow.
Blend Mode = Multiply
Color = #000000
Opacity = 15
Angle = 90
Use Global Light = Checked
Distance = 15
Choke = 0
Size = 15
Contour = Linear
Anti-aliased = Unchecked
Noise = 0
8. Apply an Inner Glow.
Blend Mode = Multiply
Opacity = 23
Noise = 0
Color = #000000
Technique = Softer
Source = Edge
Choke = 0
Size = 15
Contour = Linear
Anti-aliased = Checked
Noise = 0
9. Apply a Bevel to give the drops a glassy look.
Style = Inner Bevel
Technique = Smooth
Depth = 70
Direction = Up
Size = 50
Soften = 0
Angle = 90
Use Global Light = Checked
Altitude = 70
Gloss Contour = Linear
Anti-aliased = Unchecked
Highlight Mode = Normal
Highlight Color = #FFFFFF
Highlight Opacity = 80
Shadow Mode = Lighten
Shadow Color = #FFFFFF
Shadow Opacity = 90
The scatter is now complete. NOTE: I added a layer in gray below the waterdrops layer to make it easier to see the droplets.
Tuesday, March 1, 2011
Raindrops Scatter
Scatters (a sprinkling of an element across a page) are a very popular element at DSP. This tutorial shows you how to make a raindrop scatter in Paint Shop Pro. This tutorial uses the Water Drops effect from the Eye Candy 5: Nature plug-in. However, Water Drops is available in Eye Candy 3, so I am providing a link to a free download for that version.
Supplies:
Eye Candy 3 (free)
1. Open up a new canvas that is 3600 pixels wide and 600 pixels high.
2. Choose the Freehand Selection Tool.
3. Use the Freehand Selection Tool draw a wiggly selection across the canvas.
4. Open up the Water Drops effect from Eye Candy 5: Nature (or Eye Candy 3, if you are using the free download).
Drop Size = 100.00
Coverage = 50
Clumping = 50
Focus = 94
Refraction =71
Opacity = 10
Tinting = 31
Liquid Color = #E8EEF3
Lighting Direction = 78
Lighting Inclination = 50
Highlight Brightness = 86
Highlight Size = 62
Highlight Color = #FFFFFF
5. Ctrl + D to Select None.
6. Apply the Wave deformation effect ( Effects > Distortion Effects > Wave) to make the drops less linear.
Horizontal displacement
Amplitude = 1
Wavelength = 60
Vertical displacement
Amplitude = 2
Wavelength = 60
Edge mode = Transparent
The scatter is now complete. NOTE: In order to see the raindrops better, I have created a gray layer under my working layer.
Wednesday, February 23, 2011
Rainbow in Photoshop
This tutorial will show you how to make a simple rainbow in Photoshop.
1. Open up a new canvas of equal width and height. Mine is 1200 x 1200 pixels.
2. Select the Rectangle Tool. Set the color to be the one for the first band in the rainbow. Then, click on the rectangle next to the Preset Shape to access the Options menu. Set the Options to Fixed Size and make the width the same as your canvas and your height to 100 pixels.
Fixed Size = Check
Width = 1200 px
Height= 100 px
3. Click the canvas to create the rectangle then switch to the Mover tool.
4. Use the Mover tool to move the rectangle so that it is even with both the left and right sides of the canvas and there is a space between the rectangle and the bottom of the canvas.
5. Right-click on this shape layer in the layer palette and select 'Duplicate Layer' from the menu.
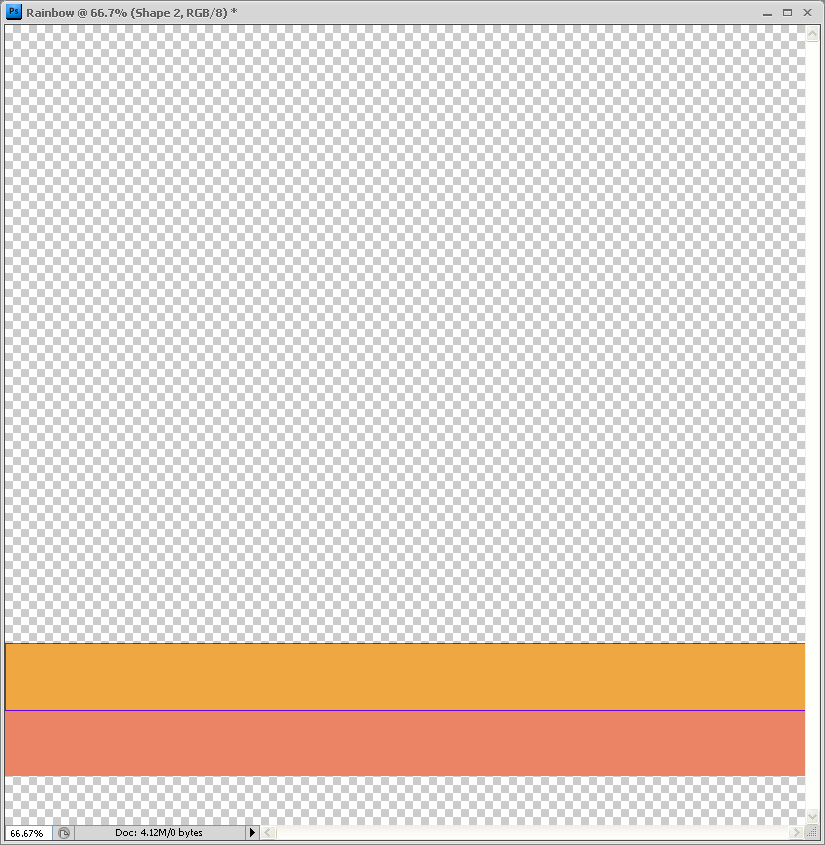
6. Optional. Change the name of the new layer to something more informative than 'Shape 1 copy'. I named mine Shape 2.
7. Click the Color Fill on the new shape layer. Select the color for the second band in the rainbow.
8. Use the mover tool to move the new band to above the previous band.
9. Repeat steps 5-8 until your desired number of rainbow bands. I repeated 3 more times for a total of 5 bands. Here is my final canvas and layer palette.
10. Optional. If you want to use papers instead of flat colors, then clip the papers to the shapes.
11. Right-click on the layers palette and select 'Merge Visible' to reduce all the vector shape layers to a single raster layer.
12. Select the Polar Coordinates filter (Filter > Distort > Polar Coordinates) and select 'Rectangular to Polar'.
12. Select the crop tool and crop the canvas so that only the top half remains. If you have chosen to use a paper and the paper is not seamless, you may wish to first flip the canvas (Edit > Transform > Flip Vertical) before cropping so that there isn't a seam down the center of your rainbow.
The rainbow is now complete.
Tuesday, February 22, 2011
Rainbow
This tutorial will show you how to make a rainbow in Paint Shop Pro. If you don't want to follow the tutorial, I have a rainbow script that I released two years ago.
1. Open up a new canvas that is the same width and height. My canvas is 1200 x 1200.
2. Use the custom selection tool to create a 1200 x 100 selection across the bottom of the canvas.
Left = 0
Right = 1200
Top = 1100
Bottom = 1200
3. Fill the selection with the color, gradient or pattern desired for one band of the rainbow.
4. Use the custom selection tool to create a 1200 x 100 selection above the previous selection.
Left = 0
Right = 1200
Top = 1000
Bottom = 1100
5. Fill the selection with the color, gradient or pattern desired for one band of the rainbow.
6. Repeat step 3 and step 4 another 3 more times for a rainbow with 5 bands. I have included screenshots of the custom selections for each repeat.
Left = 0
Right = 1200
Top = 900
Bottom = 1000
Left = 0
Right = 1200
Top = 800
Bottom = 900
Left = 0
Right = 1200
Top = 700
Bottom = 800
7. Ctrl + D to Select None.
8. Use the Polar Coordinates effect (Effects > Distortion Effects > Polar Coordinates) to create a circle out of the selections.
Rectangle to polar = Checked
Edge mode = Transparent
9. Crop the canvas to half the size of the original. Choose the upper half of the canvas.
The rainbow is now complete.
Tuesday, February 8, 2011
Using any B&W Image as a Mask in PS
This tutorial will show you how to use any black and white image as a mask on a paper in Photoshop.
Supplies:
B&W Heart
Unryu Paper Pack
1. Open the black and white image in Photoshop. For this tutorial, I have provided the image of a heart.
2. Open up your paper. I am using one of the mulberry rice papers from my Unryu Paper Pack.
3. If you image is a JPEG, promote the background to a layer (Layer > New > Layer From Background).
4. Ctrl + A to Select All.
5. Ctrl + C to Copy the mask image.
6. Select the paper. Promote the paper to a layer if it is a JPEG (as in Step 3).
7. Now it is possible to add a mask layer. At the bottom of the layer palette, click the 'Add Layer Mask' icon.
8. A white square appear will appear on the paper layer. This is the mask thumbnail. It should be currently selected (as seen by the highlight around the square).
9. Press the Alt key and click on the mask thumbnail (white square). Your paper should turn completely white.
10. Ctrl + V to paste the copied mask into the layer mask.
11. Press the Alt key and click on the mask thumbnail to switch back to viewing the paper.
12. The black part of the mask image hides and the white part of the mask image reveals. I have placed another paper underneath so that the image can be seen better.
Supplies:
B&W Heart
Unryu Paper Pack
1. Open the black and white image in Photoshop. For this tutorial, I have provided the image of a heart.
2. Open up your paper. I am using one of the mulberry rice papers from my Unryu Paper Pack.
3. If you image is a JPEG, promote the background to a layer (Layer > New > Layer From Background).
4. Ctrl + A to Select All.
5. Ctrl + C to Copy the mask image.
6. Select the paper. Promote the paper to a layer if it is a JPEG (as in Step 3).
7. Now it is possible to add a mask layer. At the bottom of the layer palette, click the 'Add Layer Mask' icon.
8. A white square appear will appear on the paper layer. This is the mask thumbnail. It should be currently selected (as seen by the highlight around the square).
9. Press the Alt key and click on the mask thumbnail (white square). Your paper should turn completely white.
10. Ctrl + V to paste the copied mask into the layer mask.
11. Press the Alt key and click on the mask thumbnail to switch back to viewing the paper.
12. The black part of the mask image hides and the white part of the mask image reveals. I have placed another paper underneath so that the image can be seen better.
Subscribe to:
Posts (Atom)