Donations Welcome
I am currently saving toward a new version of Paint Shop Pro. If you wish to help me out, then please donate.
Larger versions of images can be seen by clicking on the image. Also, thank you for your kind and encouraging comments. I love reading the comments. If you use my any of freebies, I would be overjoyed with a comment containing a link to your item. I love seeing any of my freebies in use.
Tuesday, February 28, 2012
Opal Gemstone
Opal is not a faceted gemstone, but if I didn't make it, then October is without a birthstone. This is it for the series if no other ideas pop into my head.
Monday, February 27, 2012
Customizable Stencil Chipboard
I made this alpha for SNL73. I am posting it because someone request an alpha that they could fill with their own image. It is customizable. Select the white space inside each letter and fill or clip with the paper or image of your choice.
Sunday, February 26, 2012
Sticker Alphabet
This tutorial will show you how to make a paper sticker alphabet in Photoshop.
Supplies:
6x6 Grid Template
1. Open up the 6x6 grid template. It is 3000 x 3000 pixels and will create 36 500x 500 characters so that you can have 26 letters and 10 numbers. You can also make one letter at a time and not use the grid template. I think it is easier and faster to make all the letters at once.
2. Select a nice font. I am using Copse. It is a commercial use ok font from Font Squirrel. With the text tool, write out your letters and numbers as vectors. Try to position each letter in the middle of a grid square. Choose any color you like.
3. With the Move Tool or in the Layer Palette, select all the letters or type layers.
4. In the Layer Palette, right-click the selected layers and choose 'Rasterize Type' from the menu.
5. In the Layer Palette, right-click on the selected layers and select 'Merge Layers' from the menu. This should merge all the letter layers but not the grid template layer.
6. Select the paper of your choice and open it in Photoshop.
7. Drag the paper on top of the layer with the alpha by selecting the Move Tool. Next, left-click on the paper, then while holding down the button, drag it over to the canvas holding the alpha.
8. Right-click on the new layer that is your paper and select 'Create Clipping Mask'.
9. The paper is now clipped to the text.
10. Select the layer with the text and apply a white outer stroke using the Layer Styles (Layer > Layer Style > Stroke) the letters in white.
Size = 20 px
Position = Outside
Blend Mode = Normal
Opacity = 100%
Fill Type = Color
Color = White (#FFFFFF)
11. Hide the grid template layer by clicking the eye next to the layer and the alphabet is ready to be saved as either a single sheet or sliced into individual files. If you have used my grid template, then you can use my Alpha Cutter Action to slice the image into individual files.
Saturday, February 25, 2012
Just Hatched
I made alphas and some decorative items (grass, chicks and wordart) for SNL 60 and then I forgot to post it last year. There are two zip files, one with all the different alphas and one with the decorative items.
Friday, February 24, 2012
Thursday, February 23, 2012
Wednesday, February 22, 2012
Monday, February 20, 2012
Black Diamond
This is just for fun because I don't think you can actually buy black diamonds anywhere. I used to think that synthetic diamonds were cubic zirconia, but Wikipedia claims that we can now artificially make gemstone quality diamonds. So, I guess it might be possible to make a synthetic black diamond.
Saturday, February 18, 2012
Friday, February 17, 2012
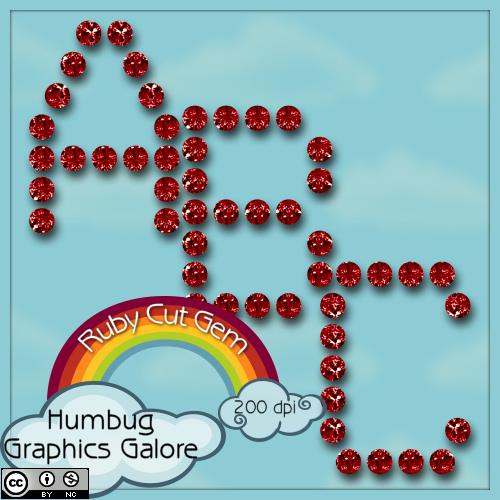
Ruby Cut Gem
Most real rubies that I see are much more pink, but when I think of ruby, I like a deep rich red, so this is sort of a fantasy ruby alpha.
Thursday, February 16, 2012
Apatite Cut Gem
I am sick with the disease that will not go away.
Wikipedia says:
Apatite is infrequently used as a gemstone. Transparent stones of clean color have been faceted, and chatoyant specimens have been cabochon cut. Chatoyant stones are known as cat's-eye apatite, transparent green stones are known as asparagus stone, and blue stones have been called moroxite.
I don't know that I have ever seen apatite as a gemstone, but I was Googling for a cut stone that would match this color.
Monday, February 13, 2012
Sunday, February 12, 2012
Tanzanite Cut Gem
I've always wanted tanzanite jewelry, but I read that it is worse than blood diamonds. At least nobody died for these.
Wednesday, February 8, 2012
Bracket Frame Sample
An anonymous person left a comment that he/she/it wanted the bracket frame sample that I made for my bracket frame tutorial. So, here it is.
You will need to click on the image to go to the largest size. Then right-click to save it.
You will need to click on the image to go to the largest size. Then right-click to save it.
Friday, February 3, 2012
Sapphire Cut Gem
This series isn't being posted in any particular order, but I do happen to like Sapphire a lot.
Thursday, February 2, 2012
Bent Photo Frame
This tutorial will show you how to make a bent photo frame in Photoshop. At the end of the tutorial, you will have a template to which you can clip a photo.
1. Open a new canvas the size of the photo you want to frame. I am going to make mine a 4 x 6 because that fits well on a scrapbook page.
2. Fill the layer with 50% grey (Shift + F5 or Edit > Fill).
3. Increase the size of the canvas so that there will be room for the shadow.
5. Add a drop shadow to the layer.
Blend Mode = Multiply
Opacity = 85%
Distance = 50 px
Spread = 15%
Size = 75 px
6. In the layer palette, right-click on the effect (not the layer) to get a menu where you can create a layer from the drop shadow effect. Select 'Create Layer' from the menu.
7. Optional. You may receive a warning message. If you do, select 'OK'.
8. Now you should have two layers. One is the frame and one is the shadow. Choose the layer with the frame.
9. From the Edit menu, select 'Warp (Edit > Transform > Warp).
10. Click the square on the bottom left and drag it up and to the left.
11. Click the square on the top right and drag it up and to the left.
12. Now any photo you clip to this frame will like it is bending off the page. It is complete if you don't want a border around the photo.
13. Optional. To add a border to the frame, load the opaque region of the image as a selection (Select > Load Selection).
14. Optional. Contract the selection (Select > Modify > Contract). I made mine 50 pixels but you can make it any size.
15. Optional. Ctrl + Shift + I to invert the selection.
16. Optional. Intersect the transparent region of the layer with the current selection (Select > Load Selection). Go to Load Selection but choose 'Intersect with Selection' as the Operation.
16. Optional. Ctrl + J to create a new layer via copy. The template now has all the necessary layers.
17. Optional. Afterwards, you may wish to fill your selection with a different color so that you can see the frame better. I did this by loading the selection as in Step 13. Then I filled with a color as in Step 2.
I have made the frame template that I generated from this tutorial available. I hope people can use it.
Garnet Cut Gem
As I was working on this series, I decided to make at least one cut gem alpha for every month so that these could be used as birthstones. Here is another one because I have some free time this morning.
Wednesday, February 1, 2012
Subscribe to:
Comments (Atom)


