Donations Welcome
I am currently saving toward a new version of Paint Shop Pro. If you wish to help me out, then please donate.
Larger versions of images can be seen by clicking on the image. Also, thank you for your kind and encouraging comments. I love reading the comments. If you use my any of freebies, I would be overjoyed with a comment containing a link to your item. I love seeing any of my freebies in use.
Monday, June 14, 2010
Removing Background in Photos
Tonight I decided to explore whether or not background removal in Photoshop was as fast and easy as people tried to portray. I decided to document my testing in case anyone else wanted to try, but my conclusion is that NO, background removal in Photoshop is not fast and easy.
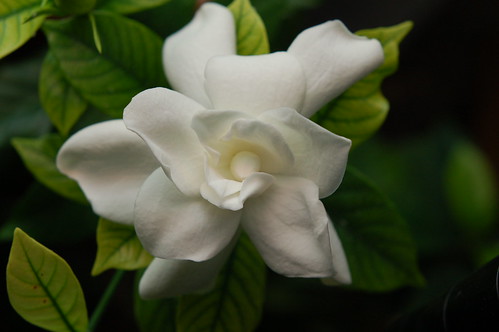
1. Open the photograph. I chose a picture of a gardenia that I took last year as it had nice contrast between the background and the flower. I figured it would be easy to extract the gardenia given the strong differences in color.
2. The extract tool is located in Filter > Extract (or Alt + Ctrl + X).
3. Select the highlight tool and set the brush size to so that you can easily trace the edges of the part of the image you wish to keep.
4. Try to trace only the edge of your object. Covering too much of the object itself will result in too much removal. I went with a brush size of 50. As you will see later, it removed a lot of the flower that I wanted to keep.
5. Optional. If you have a well-defined edge, select Smart Highlighting as it will create a highlight that is just wide enough to cover the edge, regardless of the current brush size. I thought I had a well-defined edge so I tried it.
6. After completely tracing the object so that there are no gaps, select the Fill tool and click in the interior of the object to select the part of the object that you wish to keep.
This is where the Smart Highlight failed as it did not create a completely closed trace and the entire image was selected.
7. Click the preview button to see what the extracted image would look like.
8. Optional. If too much of the object has been removed, select the eraser then make sure both 'Show Highlight' and 'Show Fill' are checked. Use the eraser to remove the excess highlight. Use the Fill tool and fill in the object after you finish erasing the excess highlight marks as the first eraser stroke will remove the fill. Preview again to make sure the background has been removed as desired.
9. Select OK once you are satisfied. This will extract the image and remove the background. You may still have an image where too much of the object has been removed and extraneous background bits. I certainly did.
Here is a closeup of my extracted gardenia. Notice the dark shadow between the petal and the transparent region.
10. Select the history brush, go to the history palette and find the step before the Extract step. Click the square to the left of the step to set the source for the history brush.
11. Select a solid brush for the history brush. I chose a round brush at 32 pixels in size and removed any extras except for smoothing.
12. Choose the same brush for the eraser tool.
13. Use the history brush to brush back any parts of the object which have been removed incorrectly by the Extract filter. Alternate with the eraser tool to remove any parts of the background which are still present.
Here is my final image after application of the history brush and the eraser.
The most labor-intensive part of this process was using the eraser and history brush to "tidy" up the image. This is summarized into a single step, but it actually took the most time. Once again, not fast and not easy.
If you came here looking for gardenia clipart, I have also made my extracted image available for use.
Subscribe to:
Post Comments (Atom)


This was really helpful to me. Also I have learned how to use the background eraser tool in Psp X,all thanks to you! The things I have learned in your group are priceless to me! Thank you so much for sharing your knowledge! You're one smart cookie!♥
ReplyDeleteThank you not only for the tutorial, but also for the flower! You rock!
ReplyDeleteThank you again for taking the time to write this tut, it is sooooo helpful. Shazie
ReplyDeleteI really appreciate the effort put into writing tutorials to share...They are very helpful - Thank you!
ReplyDeletei read this details about background removing process, its very creative. thanks a lot for this good idea
ReplyDeleteI read your full post. It was very easy and helpful. Thank you for sharing.
ReplyDelete