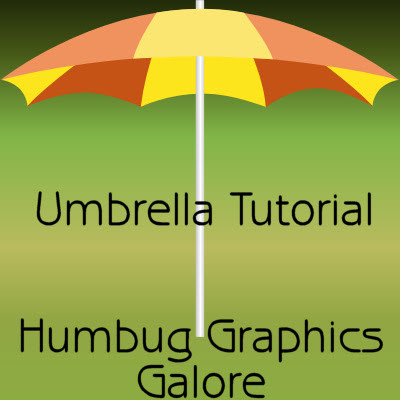
This tutorial goes through all the steps to make a vector umbrella. For PSP X and up, I believe you substitute Pick for the Object Selection Tool.
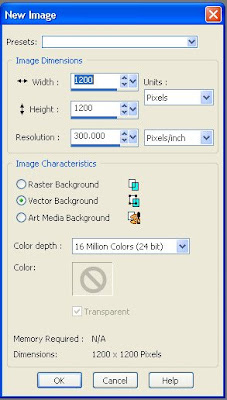
1. Open a new 1200 x 1200 canvas with an initial vector layer.
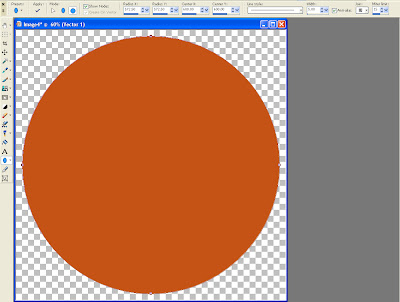
2. Set the foreground to transparent, then use the preset shapes tool to draw a circle.
3. Convert the circle to a path by right-clicking and then choosing convert to path.
4. Select the node at the bottom of the circle and push it up to the center.
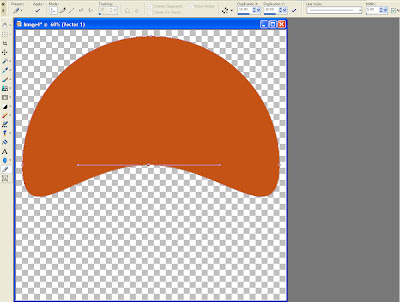
5. Switch to the pen tool and select the node on the left. Change the node type to Line Before.
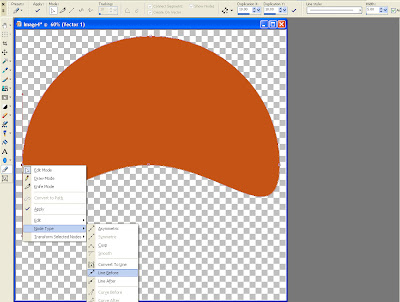
6. On the same node, change the node type to Line After.
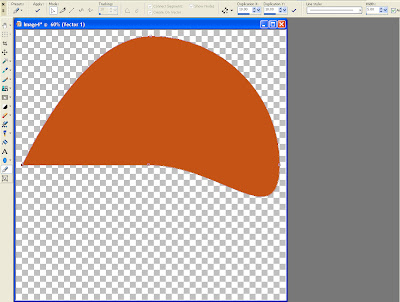
7. Select the node on the right, change the node type to Line Before. Repeat the node type change for Line After.
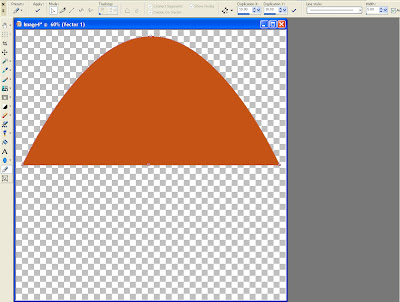
8. Duplicate the layer. Then go to the layer palette. Notice that both vectors sub-layers are dark (meaning that they are selected). Click on the 'New Ellipse' sub-layer on the copy layer to make it the only selected vector.
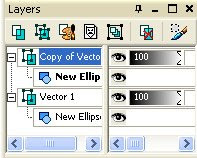
9. Switch to the Object Selection Tool and change the color of the vector to a shade lighter than the original color. I renamed the vector object to Front.
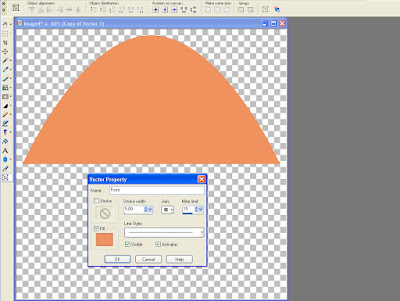
10. Resize Front so that it is about two-thirds its original height and the points touch the sides of the canvas.
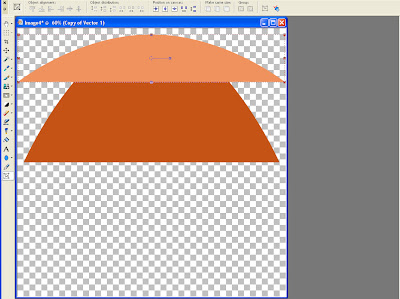
11. Switch to the Pen Tool. Select the node in the middle and push it to create a curve for the front of the umbrella.
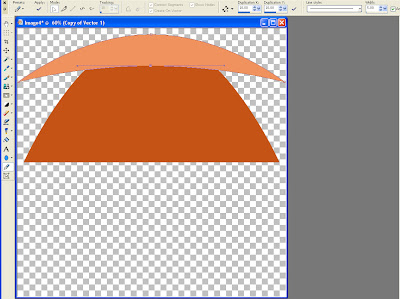
12. Select the original vector layer. I renamed the vector object to Back.
13. Hold down the Ctrl key and click on the vector to add nodes. Add two nodes on each side of the center node.

14. Push up every other node (nodes 1, 3, 5).
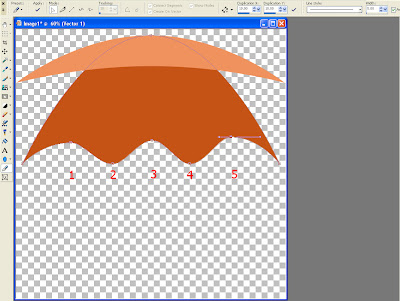
15. On the nodes that were not pushed (nodes 2,4), change their node types to Line Before and Line After.
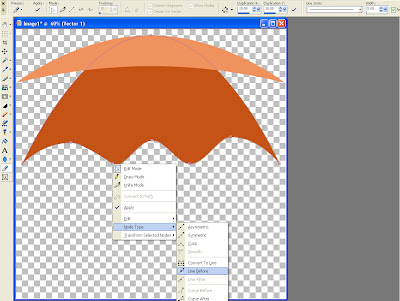
16. Switch to the Object Selection Tool and resize the Back vector so that it is twice as tall as the Front Vector. You can also narrow the vector 10 pixels on each side.

17. Create a new vector layer (Layers > New Vector Layer) and Ctrl+D to select none.
18. Change the background color to a contrasting color in a dark shade.
19. Switch to the pen tool and go to Draw Lines. Make sure Connect Segments, Show Nodes and Create on Vector are checked.

20. Click on the outermost point on the Top vector. While continuing to hold the mouse button down, draw a line to the outermost point on the Bottom vector.
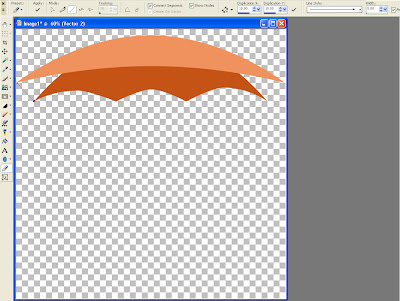
21. Click on a point inside the umbrella.
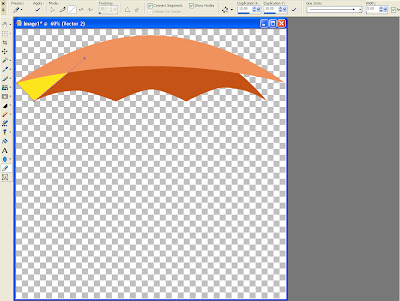
22. Click the Close selected open contours button. Now you have a triangle.

23. Click on the bottomost point of the triangle. Change the node type to Curve Before and Curve After.
24. Pull the handles toward the middle of the triangle to create a slight curve along the right edge and a larger curve along the left edge.
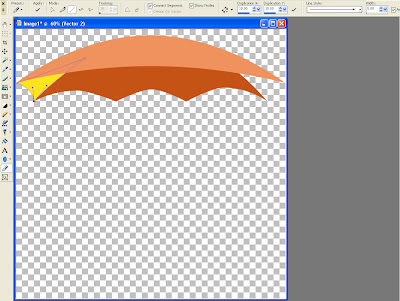
25. Duplicate the layer and Ctrl + M to mirror it. Now you have two outer vanes for the bottom of the umbrella. If needed, move the vane on the right so that it touches the outermost right point on the top and bottom parts of the umbrella.
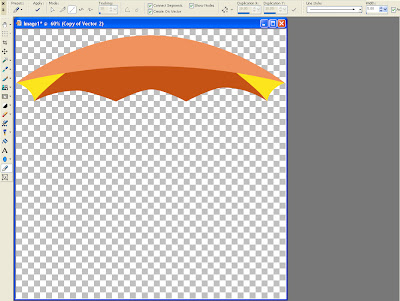
26. Select the layer that has an outer umbrella vane.
27. Click on the middle left point, then hold the mouse down and draw a line to the middle right point.
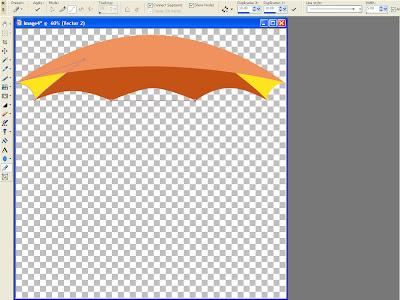
28. Click on two points near the top of the umbrella.
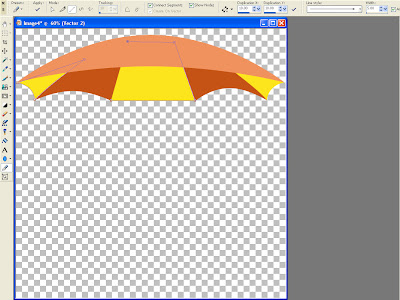
29. Click the Close selected open contours button so that a trapezoid is created.

30. Click on the bottom left corner of the trapezoid and change the node type to Curve Before. Pull on the handle to create a curve so that the trapezoid bulges outward.

31. Click on the bottom left corner of the trapezoid and change the node type to Curve After. Pull on the handle to create a curve so that the trapezoid bulges outward.
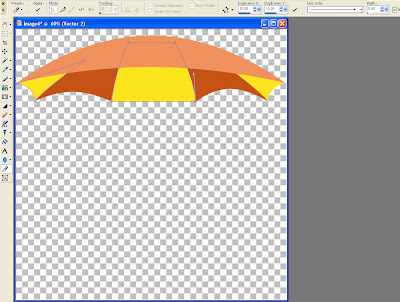
32. Hold down the Ctrl key and click in the middle of the bottom edge of the trapezoid to add a node. Change the Node Type to Smooth, Curve Before and Curve After. Push the node up and pull the handles out to create a curve that matches the curve on the umbrella Bottom.

33. Select the top vector layer and Ctrl + D to select none.
34. Switch to the pen tool and change the background color to a lighter shade of the contrasting color. Draw a trapezoid in the middle of the umbrella front.
35. Click on the Close selected open contours button.

36. Add a node to the top center of the trapezoid and change its Node Type to Smooth, Curve Before and Curve After. Push the node up and pull the handles to create a curve that matches the curve on the umbrella Front.
37. Repeat for the bottom center of the trapezoid.
38. Select the bottom left node and change the Node Type to Curve Before. Pull the handles to bulge the trapezoid outwards.
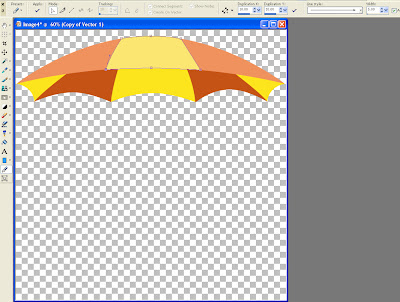
39. Select the bottom left node and change the Node Type to Curve After. Pull the handles to bulge the trapezoid outwards.

40. Ctrl + D to select none and choose the next layer down in the layer palette.
41. Use the rectangle preset shape to create a stick for the umbrella. Convert to a path.

42. Ctrl + A to select all, then rotate the umbrella to the left with the Object Selection Tool.
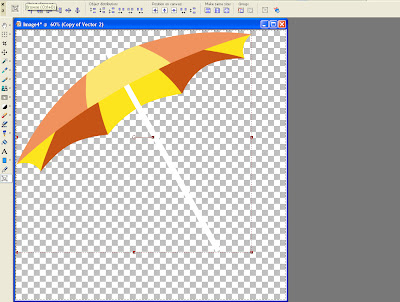
This is the basic umbrella. It can be further customized. I have not scripted the umbrella, yet, because there are so many steps that PSP has crashed twice on me. I guess I don't have enough RAM.

great tut! i'll try
ReplyDeleteThis is a wonderful tutorial... thankyou
ReplyDeleteThanks for this wonderful Tut, I have felt right at home using the dreaded vectors and pen tool lol, maily because of the way the tut is written Thanks again.
ReplyDelete