Donations Welcome
I am currently saving toward a new version of Paint Shop Pro. If you wish to help me out, then please donate.
Larger versions of images can be seen by clicking on the image. Also, thank you for your kind and encouraging comments. I love reading the comments. If you use my any of freebies, I would be overjoyed with a comment containing a link to your item. I love seeing any of my freebies in use.
Tuesday, July 13, 2010
Twill Ribbon Action
A member of my group offered up this action which she made following my twill tape tutorial. I am delighted to share it with everyone. The author of the action states that this item is commercial use ok.
Saving an Action
This tutorial covers the few brief steps necessary to save a Photoshop action to a file.
1. Select the set of actions that you wish to save by clicking on it. A set of actions has a file folder icon next to it. You can only save a set of actions, not an individual action. Of course, a set could only have a single action in it.
2. Click the three bars in the upper right hand corner of the palette. In CS2, this is a triangle in a circle.
3. This brings up the action menu. Select Save Actions.
4. This will bring up a file browser where you can move to a folder where you want to save the action. I save mine in My Documents > Adobe > Actions.
1. Select the set of actions that you wish to save by clicking on it. A set of actions has a file folder icon next to it. You can only save a set of actions, not an individual action. Of course, a set could only have a single action in it.
2. Click the three bars in the upper right hand corner of the palette. In CS2, this is a triangle in a circle.
3. This brings up the action menu. Select Save Actions.
4. This will bring up a file browser where you can move to a folder where you want to save the action. I save mine in My Documents > Adobe > Actions.
Monday, July 12, 2010
Adding Messages to Actions
A member of my group made an action out of my twill tape tutorial and asked me to share it with everyone. I thought this would be a good opportunity to write a tutorial to show how to add messages to a pre-existing action.
1. Record the action or load the action.
2. Select the step in the action prior to the step which needs the message. For example, I want to add a message on fill color. So, I select the step before the Fill command in the action.
3. Select the three bars in the upper right hand corner of the actions palette. This is a triangle in a circle in CS2.
4. This will produce the actions menu. Select Insert Stop from the menu.
5. A dialog will appear where you can type the text of the message box. Type your text then click OK.
5. In the actions palette, a Stop step has been inserted before the command that needs the message (in my case, the Fill command).
6. Now when the action runs, a message box will appear the Fill command to ask the user to set the foreground color and then press play.
1. Record the action or load the action.
2. Select the step in the action prior to the step which needs the message. For example, I want to add a message on fill color. So, I select the step before the Fill command in the action.
3. Select the three bars in the upper right hand corner of the actions palette. This is a triangle in a circle in CS2.
4. This will produce the actions menu. Select Insert Stop from the menu.
5. A dialog will appear where you can type the text of the message box. Type your text then click OK.
5. In the actions palette, a Stop step has been inserted before the command that needs the message (in my case, the Fill command).
6. Now when the action runs, a message box will appear the Fill command to ask the user to set the foreground color and then press play.
Recording an Action
This tutorial covers how to record a new action in Photoshop.
1. In the actions palette, click the three bars in the upper right corner. This is an triangle in a circle in CS2.
2. This will open the actions menu. Select New Action.
3. You will be asked to give the action a name and choose a set for the action. A set is a group of actions.
4. Click Record to begin recording the steps of your action.
5. Perform all the steps of the action then click the square button in the actions palette to Stop the action.
Your action is now recorded.
1. In the actions palette, click the three bars in the upper right corner. This is an triangle in a circle in CS2.
2. This will open the actions menu. Select New Action.
3. You will be asked to give the action a name and choose a set for the action. A set is a group of actions.
4. Click Record to begin recording the steps of your action.
5. Perform all the steps of the action then click the square button in the actions palette to Stop the action.
Your action is now recorded.
Loading Actions
This tutorial covers how to load an action into Photoshop CS3 for use or editting.
1. In the actions palette, click the three bars in the upper right corner. This is an triangle in a circle in CS2.
2. This will make the action menu appear. Select Load Actions from the menu.
3. This will take you to a files interface where you can browse to the location of your actions. Mine are in My Documents > Adobe > Actions. Select your action and then click Load.
4. The action is now loaded and located at the very bottom of the action palette.
1. In the actions palette, click the three bars in the upper right corner. This is an triangle in a circle in CS2.
2. This will make the action menu appear. Select Load Actions from the menu.
3. This will take you to a files interface where you can browse to the location of your actions. Mine are in My Documents > Adobe > Actions. Select your action and then click Load.
4. The action is now loaded and located at the very bottom of the action palette.
Sunday, July 11, 2010
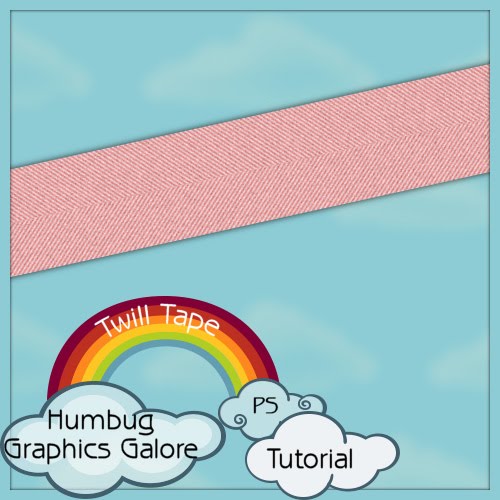
Twill Tape
This tutorial will show you how a make a twill tape (or ribbon) in Photoshop.
1. Open up a new canvas the width of your desired tape. Make the height the same as the width. My canvas is 3600 x 3600 because my final twill tape will be 3600 pixels wide.
2. Fill the canvas with a color of your choice.
3. Select the Halftone Pattern filter (Filter > Sketch > Halftone Pattern) not the Halftone filter in the Filter menu.
4. Change the size to make the pattern more or less obvious. Increase the contrast to sharpen the lines.
Size = 2
Contrast = 20
Pattern Type = Line
5. Go to the Image menu and select Arbitrary for Rotate Canvas.
6. Select 45-60 degrees as your angle of rotation. Choose CW for clockwise.
Angle = 45
CW = Checked
7. Select the bottom half the canvas with the rectangular marquee tool.
8. Flip the selection horizontally.
9. Ctrl + D to de-select.
10. Reduce the size of the canvas (Alt + Ctrl + C) to your desired width and reduce the height to 300 pixels.
Width = 3600
Height = 300
Anchor = Center
11. To give the tape some texture, add 15% noise (Filter > Noise > Add Noise).
Amount = 15
Distribution = Gaussian
Monochromatic = Checked
The twill tape is now complete.
Friday, July 9, 2010
The Anti-Doodle
This was my contribution to SNL62. The theme was Art Journal. I haven't had much time to scrap lately because of the holidays and work, so I thought I would share something old. This kit comes with:
- 6 papers
- 1 paint splotched overlay
- 1 doodled frame
- 1 doodled circle
- 5 doodle elements
Monday, July 5, 2010
Effects on Masks
This is a note to myself on how NOT to do something in PSP. I discovered this weekend that I could make a very interesting effect by creating a mask layer over an image and then applying an effect to the mask layer. Unfortunately, then I saved the file as a version 9 .pspimage file and now I can't open it anymore. I'm going to share how I did the effect on the mask layer as it was a nice way to preserve the original image up to the point where I wanted to save.
1. Create the original image. Mine is an alpha that I made for SNL challenge #64.
2. Select the area that you want to mask.
3. Create the mask from the selection.
4. Here is my original set of layers and my new set of layers.
5. With the mask layer selected, it is possible to apply an effect to the mask layer. I applied a texture using a plugin. I thought this would also be a good way to apply a grunge effect and preserve the original image.
6. However, in PSP 9 at least, once I saved the image, I could not open it again. I received the "This is not a valid Paint Shop Pro Image file" message. If the image is saved using only the effects in PSP (not a plugin), then the image will open. Odd, no?
In conclusion, you can apply effects to mask layers, but you cannot re-open a saved image if the effect is created using a plugin.
1. Create the original image. Mine is an alpha that I made for SNL challenge #64.
2. Select the area that you want to mask.
3. Create the mask from the selection.
4. Here is my original set of layers and my new set of layers.
| Original Layers | New Layers |
![]() | ![]() |
5. With the mask layer selected, it is possible to apply an effect to the mask layer. I applied a texture using a plugin. I thought this would also be a good way to apply a grunge effect and preserve the original image.
Before
After
6. However, in PSP 9 at least, once I saved the image, I could not open it again. I received the "This is not a valid Paint Shop Pro Image file" message. If the image is saved using only the effects in PSP (not a plugin), then the image will open. Odd, no?
In conclusion, you can apply effects to mask layers, but you cannot re-open a saved image if the effect is created using a plugin.
Saturday, June 26, 2010
Seamless Tile Script
It has been raining a lot here and I spent part of this week without power. My basement has also flooded twice. So, there hasn't been much scrapping as there has been a lot of cleanup to perform.
This is a utility script that I wrote while making patterns for a bunch of alphas. The script takes an image then mirrors it 3 times to create a seamless tile. It won't work with patterned images with directionality as the images will look like they are upside down. This script is a nice timesaver for me and I thought other people might find it useful so I am sharing it. It has not been tested, but I'm fairly confident that it will work PSP 9 and higher versions of PSP. If you use this script and it works for you, please leave a comment.
Friday, June 25, 2010
Triple Frame Scripts
This is a set of two scripts which make a set of triple frames. These scripts are the result of a request for scripts which make triple frames without embellishments. The scripts will take any color, gradient or pattern and turn them into a set of triple frames. I have not had these scripts tested, but they work for the requestor in PSP 9. I'm fairly confident that they will work in other versions of PSP. If you use these scripts in a different version of PSP and they work for you, then please leave a comment.
Subscribe to:
Posts (Atom)