
Supplies:
There has been an explosion of Fuzzle-making in Scrap Stuff with PSP and PS. I'm writing this post to collate all the different ways for making a Fuzzle.
1. Open a new image. The size I used for testing purposes was 600 x 600.
2. Choose the Ellipse tool, select the circle option, and make a circle.

3. Choose the Object Selection tool (or the pick tool in version 10 and up), then click Center in Canvas under Position on Canvas.

4. Go to Selections and choose From Vector Object (Ctrl + Shift + B).
5. If you do not have a raster layer, make one. Else, hide the vector layer and click on the raster layer.
6. Open up Eye Candy Animal Fur and apply the following settings.


 Pattern
Pattern Type: Tiger
Base Color:
Your ChoiceSpot Color:
Your ChoiceSpeckle: 100
Pattern Spacing: 15.00
Spot Size: 90
Pattern Variation: 70
Draw Outside Selection: Checked
Seamless Tile: Unchecked
HairsMain Hair Direction: 267
Hair Length: 60.00
Wave Strength: 40
Wave Spacing: 90.00
Stiffness: 65
Edge Cover: 100
LightingDirection: 94
Inclination: 23
Highlight Brightness: 75
Highlight Size: 15
Highlight Color: White
Shadow Strength: 70
Or, Feather the selection (Ctrl+H) by 25. Then apply KPT5 FiberOptix using the wavey preset that comes with it. I only changed the colors.

7. If you have a small fuzzle, then you can proceed with adding embellishments. Else, if you made your fuzzle too large (like I did), then you will need to increase the size of your canvas. I increased to 800 x 800.
Adding Eyes
8. Go to Preset Shapes and choose Button 035. Make sure retain style and create as vector are checked and draw out an eyeball.


9. Go to Preset Shapes and choose Button 012. Make sure retain style and create as vector are checked and draw out an iris.

10. Either repeat for the second eye or Select None (Ctrl+D), use the Vector Object Selection tool to pick the eyeball and iris, then copy and paste as a New Vector Selection.

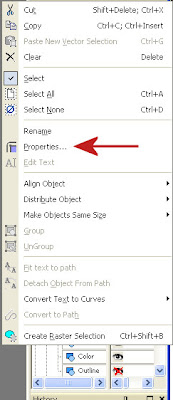
11. Notice that the objects were created as vector selections. When the Vector objects are expanded in the Layers palette (by clicking the + sign by the layer), then you can see vector objects for the highlight, shadow, color, etc. To change the color of the eye, click on the Shadow Layer, right-click for the layer menu, and select Properties. Click on Fill in the Properties Palette to change the color.

I changed my eye color and moved the highlight to the top of the eye. I also changed the shape of the eyeballs to oval.
Or, you can make eyes without using preset shapes.
A. Using the Ellipse tool, draw out a circle in white for the eyeball.

B. Inside the first circle, use the Ellipse tool to draw a second smaller circle for the iris.

C. Apply Eye Candy 5: Glass to the eye to make it look three-dimensional.

I used the same settings as for the feet (see the section on feet for the settings).
Add a Nose:
12. Go to Preset Shapes and choose Button 012. Make sure retain style and create as vector are checked and draw out a nose. Expand the vector object and change colors using the Properties palette.
Add a Mouth:
13. Go to Preset Shapes and choose Button 050. Make sure retain style and create as vector are checked and draw out a mouth. Expand the vector object and change colors using the Properties palette.

Or you can draw a line mouth using the pen tool.
Mouth using Pen ToolA. Select the type of line desired. I used the amc round ended solid, width=15 and drew a straight line. I've provided a screen shot of the style settings if you do not have this style and want to make your own.

B. Right-click the vector object and click Edit Mode.
C. Right-click the vector object again and click Edit, then choose Select None.

D. Hover the pen tool over the middle of the line. Press the Ctrl key and click the line to add a node.
E. Right-click the vector object again and click Edit, then choose Select None.
F. Hover over the newly added node with the pen tool and right-click. Select Node Type > Curve Before.

G. Hover over the node a second time, right-click, select Node Type > Curve After.
H. Click the node and drag it so that the mouth forms a smile (or a frown, depending on your tastes).

I. Add additional nodes following steps D-H until the mouth curves as desired.
J. To make the mouth look more like the nose and eyes, I converted the vector layer to raster, then applied Eye Candy 5: Glass with the following settings.


 Bevel
BevelBevel Width = 15.0
Bevel Smoothness = 30.0
Round Selection Corners = 0
Bevel Placement = Inside Selection
Glass Color = #c0c0c0
Opacity = 14
Tinting = 82
Refraction = 79
Inner Shadow Opacity = 19
Drop Shadow Opacity = 0
Shadow Offset = 0.0
Shadow Glow = 0
LightingDirection = 90
Inclination = 30
Highlight Brightness = 75
Highlight Size = 75
Highlight Color = White
Reflection Map = None
Bevel ProfileFactory Profile = Button
Adding Feet
14. Use the Ellipse Tool to draw a foot. I combined three ellipses to make a foot. Or, use my
foot template. I have provided it in both PSP and PNG format.
15. Apply Eye Candy Glass to the foot using the following settings
BevelBevel Width = 70.0
Bevel Smoothness = 30.0
Round Selection Corners = 0
Bevel Placement = Inside Selection
Glass Color = #c0c0c0
Opacity = 14
Tinting = 27
Refraction = 79
Inner Shadow Opacity = 19
Drop Shadow Opacity = 0
Shadow Offset = 0.0
Shadow Glow = 0
LightingDirection = 90
Inclination = 30
Highlight Brightness = 75
Highlight Size = 75
Highlight Color = White
Reflection Map = None
Bevel ProfileFactory Profile = Button
16. Effects > Geometric Effects > Perspective - Vertical.

That is it for a complete fuzzle. Here are the two fuzzles that I made. Click on the images to go to a large version for downloading.


