It was requested that I write up the Swirled Brad for Photoshop. However, it is much more difficult to make a swirled brad in Photoshop than in Paint Shop Pro, so my suggestion is to not use Photoshop unless you are a sucker for punishment.
Plugins Required:
Eye Candy 5: ImpactGraphics Plus1. Open a new canvas 200 x 400.

2. Fill the canvas with a color by going to Fill (Shift + F5) and then clicking the drop-down menu and selecting Color. You can then choose a color from an existing palette with the dropper or type in a hex code.

Mode = Normal
Opacity = 100%
3. Re-size the canvas (Alt + Ctrl + C) to 400 x 400. You may need to click on the drop-down menus to change from inches to pixels.

4. Go to Layer > New Fill Layer > Solid Color.

5. Click Ok on the New Layer dialog. Do not change the default name or later steps may be confusing.

6. This will bring up the Solid Color palette where you can either use the dropper to choose a color from an existing palette or type in a hex code.

7. Move the new color layer (Color Fill 1) under your original layer by clicking on it and dragging it down.
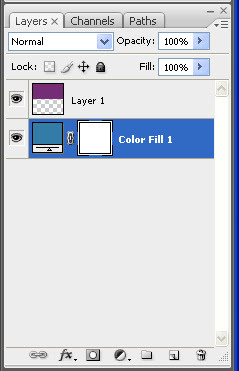
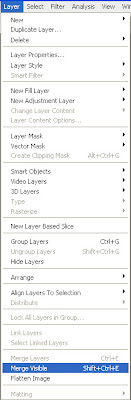
8. Merge the two layers (Layer > Merge Visible or Shift + Ctrl + E). Now you will have one layer called Color Fill 1.
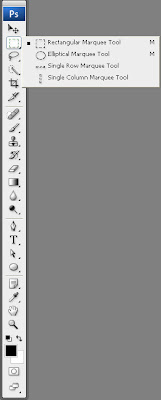
9. Select the Rectangular Marquee tool.
10. Turn on the rulers (Ctrl + R) for aid in selecting a 200 x 400 rectangle. If the ruler is in inches, right-click the ruler to change to pixels.

11. Select a rectangle that is 100 pixels from the top and 100 pixels from the bottom.

12. Edit > Transform > Flip Vertical.

13. Ctrl + D to De-select.
14. Use the Pinwheel plugin from GraphicsPlus to create the pinwheel of colors. GraphicsPlus is freeware.

Repeator =7
Spinner = 0
Scaler = 48
15. Filter > Distort > Twirl to spin the pinwheel.

Angle = -60
16. Use the Elliptical Marquee tool to select a circle.

17. Shift + Ctrl + I to invert the selection.
18. Clear the selection by pressing the delete key.

19. Shift + Ctrl + I to invert the selection.
20. Apply Eye Candy 5: Impact Bevel.
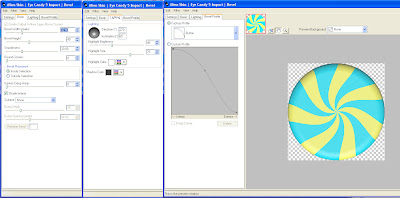 Basic
BasicBevel Width = 32.00
Bevel Height = 40
Smoothness = 30.00
Round Corners = 0
Bevel Placement = Inside Selection
Darken Deep Areas = 0
Shade Interior = Checked
Surface = None
LightingDirection = 270
Inclination = 75
Highlight Brightness = 40
Highlight Size = 75
Highlight Color = White
Shadow Color = #404040
Bevel Profile = Button
21. Apply Eye Candy 5: Impact Glass.
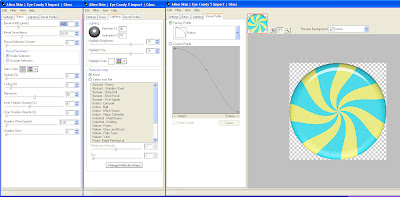 Bevel
BevelBevel Width = 32.0
Bevel Smoothness = 30.0
Round Selection Corners = 0
Bevel Placement = Inside Selection
Glass Color = #c0c0c0
Opacity = 0
Tinting = 8
Refraction = 50
Inner Shadow Opacity = 41
Drop Shadow Opacity = 0
Shadow Offset = 0.0
Shadow Glow = 0
LightingDirection = 90
Inclination = 70
Highlight Brightness = 75
Highlight Size = 75
Highlight Color = White
Reflection Map = None
Bevel ProfileFactory Profile = Button
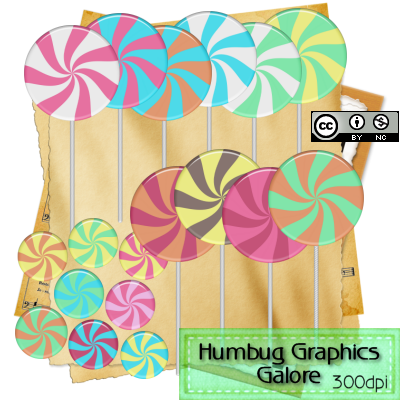
The swirled brad is now complete.