Donations Welcome

I am currently saving toward a new version of Paint Shop Pro. If you wish to help me out, then please donate.

Larger versions of images can be seen by clicking on the image. Also, thank you for your kind and encouraging comments. I love reading the comments. If you use my any of freebies, I would be overjoyed with a comment containing a link to your item. I love seeing any of my freebies in use.

Showing posts with label animation shop. Show all posts

Monday, September 5, 2011

Animated Alpha Name Tag


This tutorial details how to make a name tag with an animated alpha using Animation Shop.  Animation Shop is a program that used to come with Paint Shop Pro.  This program is no longer support.  I do not know if it works in Windows Vista or Windows 7.

Supplies:
Animation Shop
Animated Tiles Alpha

1.  Open up the letters of my Animated Tiles Alpha in Animation Shop.  You can do this using File > Open and then selecting the file or dragging the file into the program.

2.  Open a new animation (File > New) with a transparent background that will be large enough to hold the entire name tag.


3.  Look at the number of frames for the letters in the alpha.  There are 10 frames for each letter in this alpha.


4.  The new animation starts with one frame, so you need to add 9 more frames (total # of frames in letter -1) to the animation. Go to Animation > Insert Frames > Empty.


5.  For 'Number of Frames' enter the number that is the total # of frames in the letter - 1.  In this instance, it is 9.


6.  Now you have a blank animation with 10 empty frames moving at the speed of one frame per 10th of a second.  All the frames should be selected.  If not, Ctrl + A to select all the frames.


7.  In the edit menu, select 'Propogate Paste'.


8.  Go to the first letter of the word.  Notice that only the first frame is selected.


9.  Ctrl + A to select all the frames.


10.  Go to the empty animation and Ctrl + E to paste the letter into the blank animation.


11. Repeat steps 9 and 10 for each additional letter in the tag.


12.  Optional.  If the canvas is too big, then use the crop tool to remove the extra.  Select the crop tool.


13.  Optional.  Select the part of the image to be kept.


14.  Optional.  Click the 'Crop' button to finish the crop.


15.  Press F12 to save the image.  Select a file name and press 'Save'.


16.   Make sure the slider is all the way at the top for the best quality image.  Click 'Customize'.


17.  Choose the settings which will give you the best animation.  Here are my settings.


18.  Click 'Ok', then 'Next' 3 times, then 'Finish' to complete the process of saving the image.


It was hard to choose an alpha for this tutorial and this alpha may be harder than most to use as each color has a different timing. This is the timing for each of the different colors in this alpha.  I have also included a text file with the timing chart in the zip file.

Pink - No delay
Purple - 1/10 sec
Indigo - 2/10 sec
Blue - 3/10 sec
Teal - 4/10 sec
Green - 5/10 sec
Yellow - 6/10 sec
Brown - 7/10 sec
Orange - 8/10 sec
Red - 9/10 sec

Monday, April 27, 2009

Animated Mosaic Glitter Tile Tutorial

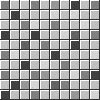
I like to use mosaic glitter tiles as fills in my animated alphabets, but I always forget how to make the tile, so I wrote up this tutorial help me remember the steps.

Plugins Needed: Tormentia or Toadies or VM Toolbox plugin
Simple Filters plugin

1. Open 100 x 100 canvas with transparent background.

2. Fill canvas with white.

3. Use Tormentia Criss-Cross plugin to make the mosaic pattern. My settings are for creating a greyscale tile which I will colorize later. If you want to make a colored tile, then change the Red, Green and Blue settings to your color.


Horizontal = 205
Vertical = 205
Opacity = 255
Red = 0
Green = 0
Blue = 0

Or, use Toadies Plain Mosaic for the same effect.

Cell Width = 28
Cell Height = 28
Cell Edges = 9

Or, use VM Toolbox: Grid.


Grid Size = 55
X-Adjust = 0
Y-Adjust = 0
Line Width = 0
Red = 0
Green = 0
Blue = 0
Transparency = 255

4. Flip canvas (Ctrl + I).

5. Mirror canvas (Ctrl + M).

6. Use the magic wand and select the white.


Mode = Replace
Match mode = RBG Value
Tolerance = 25
Sample merged = Unchecked
Contiguous = Unchecked
Feather = 0
Antialias = Unchecked

7. Cutout with white. Fill the interior with the color of your choice. I chose grey to make a greyscale tile that I could colorize.


Vertical = 1
Horizontal = 1
Opacity = 100
Blur = 0
Shadow Color = White
Fill interior with color = Checked
Interior Color = #c0c0c0

8. Invert the selection (Ctrl + Shift + I).

9. Adjust the Brightness/Contrast (Shift + B).


Brightness = 50
Contrast = 0

10. Select None (Ctrl + Shift + D).

11. With the Fill bucket, fill the individual squares with shades of your color. I filled with shades of grey.


Match mode = RGB Value
Tolerance = 2
Sample merged = Unchecked
Blend mode = Normal
Opacity = 100

12. Colorize the tile.


13. Duplicate the layer.

14. Wrap the layer using the Simple filters Half Wrap. For some reason, the Paint Shop Pro Offset cuts off one column, a single pixel wide, which leaves a white stripe down the middle of the image.

15. Duplicate the layer.

16. Wrap the layer using the Simple filters Top Bottom Wrap.

17. Save the image as a PSP file version 7 or below. Use the .psp extension.


18. Open the image in Animation Shop.


19. Save the image as an animated gif.