It took me some fiddling to figure out how to resize stencils in ArtRage, so I thought other people might like to know how to do it.
1. Assuming that you have an open painting in ArtRage, click the Stencils button at the bottom of the work area and choose your stencil. For the purposes of this tutorial, I chose a stencil that came with ArtRage, Sharp Ripple, but any black and white image can be used as a stencil by loading it via Tools > Stencil Options > Load a Stencil from Disk.
2. Select the mover tool (located next to the Stencil button) and place the stencil where you want it. I put in the center of the canvas so that I could easily enlarge it.
3. Select the magnifying glass located next to the Stencil button and hover over the stencil. You should see a magnifying glass show up.
4. Click on the stencil and then drag diagonally across the stencil to enlarge. If you start at the top and drag toward the bottom, then the stencil will increase in size. If you start at the bottom and drag toward the top, then the stencil will decrease in size.
Donations Welcome
I am currently saving toward a new version of Paint Shop Pro. If you wish to help me out, then please donate.
Larger versions of images can be seen by clicking on the image. Also, thank you for your kind and encouraging comments. I love reading the comments. If you use my any of freebies, I would be overjoyed with a comment containing a link to your item. I love seeing any of my freebies in use.
Showing posts with label artrage. Show all posts
Showing posts with label artrage. Show all posts
Tuesday, July 21, 2009
Monday, May 11, 2009
Metallic Glitter in ArtRage
This tutorial will show you how to make a the popular metallic glitter in Art Rage 2.5 which can then be used as a fill in Paint Shop Pro or a style in Photoshop.
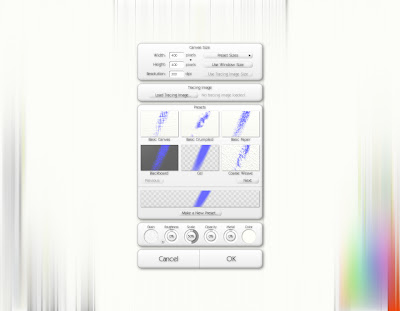
1. Open up a new painting in Art Rage. The example uses a 400 x 400 canvas at 300 dpi. Select Cell as your preset so that you can have a transparent background.
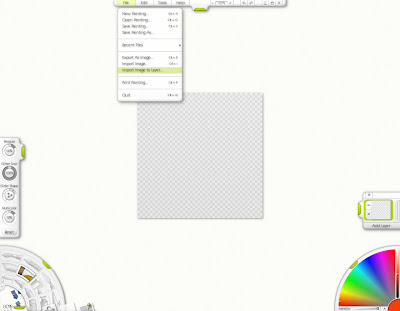
2. If you want to use a palette for color selection, import the palette as a layer. This will place the palette as the top layer. Skip steps 2, 3 and 4 if you are not using a color palette and select a color by clicking on the color wheel in the bottom right corner.
3. Click the bottom layer to make it active, then click the color picker in the lower left-hand corner. Click on the canvas to select your color of choice.
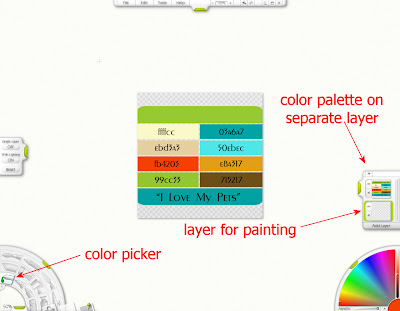
4. Click the eye next to the color palette layer to hide it.
5. To make the glitter metallic, go to the bottom right-hand corner and slide the metallic slider all the way to the right. Go to the bottom left-hand corner and select the glitter tool. After selecting the glitter tool, you can change the size of the glitter brush, click the +/- tabs located on the bottom and side of the quarter moon of this menu. The settings for the glitter are in the menu on the left side of the screen. This tutorial will focus on the effects of different glitter shapes.
Pressure = Density of the glitter. Higher pressure means greater density.
Glitter size = The size of the individual glitter pieces.
Glitter shape = Changes the shape of the glitter.
Multicolor = Changes the amount of other colors in the glitter. Lower percentage means addition of close, complimentary colors to your chosen color. Higher percentage means more hues.
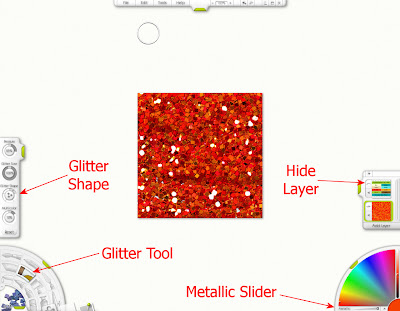
6. To choose a glitter shape either click on the little crescents surrounding the circle or click on the circle and a menu will appear with all the choices.
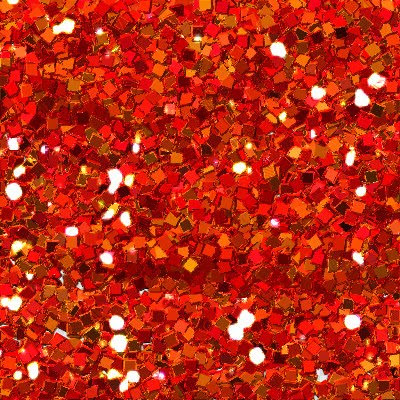
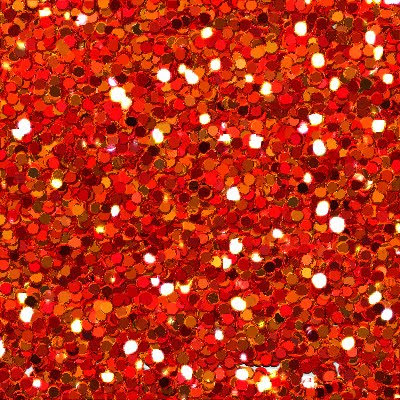
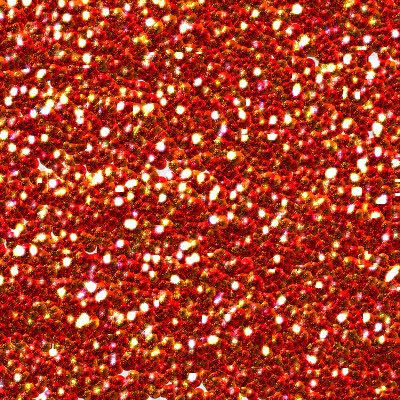
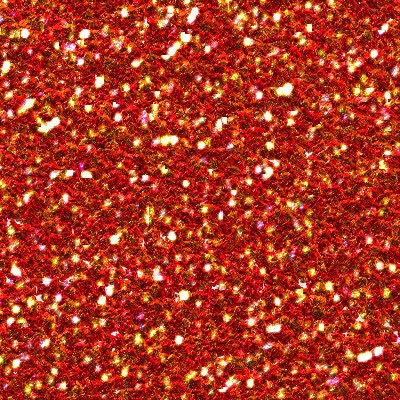
 7. Here is a comparison of the 5 different types of glitter shapes at 100% size.
Square:
Round:
Blob:
Grit:
Random:
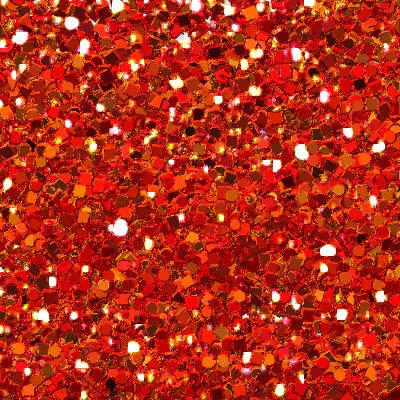
8. Fill your canvas with glitter.
9. Optional: You can follow steps 3-7 of my seamless glitter tutorial to make a seamless tile, but you will need to reduce the pressure.
10. Export the painting as a PNG file for use in Paint Shop Pro or Photoshop.
1. Open up a new painting in Art Rage. The example uses a 400 x 400 canvas at 300 dpi. Select Cell as your preset so that you can have a transparent background.

2. If you want to use a palette for color selection, import the palette as a layer. This will place the palette as the top layer. Skip steps 2, 3 and 4 if you are not using a color palette and select a color by clicking on the color wheel in the bottom right corner.

3. Click the bottom layer to make it active, then click the color picker in the lower left-hand corner. Click on the canvas to select your color of choice.

4. Click the eye next to the color palette layer to hide it.
5. To make the glitter metallic, go to the bottom right-hand corner and slide the metallic slider all the way to the right. Go to the bottom left-hand corner and select the glitter tool. After selecting the glitter tool, you can change the size of the glitter brush, click the +/- tabs located on the bottom and side of the quarter moon of this menu. The settings for the glitter are in the menu on the left side of the screen. This tutorial will focus on the effects of different glitter shapes.
Pressure = Density of the glitter. Higher pressure means greater density.
Glitter size = The size of the individual glitter pieces.
Glitter shape = Changes the shape of the glitter.
Multicolor = Changes the amount of other colors in the glitter. Lower percentage means addition of close, complimentary colors to your chosen color. Higher percentage means more hues.

6. To choose a glitter shape either click on the little crescents surrounding the circle or click on the circle and a menu will appear with all the choices.
 7. Here is a comparison of the 5 different types of glitter shapes at 100% size.
 Square:

Round:

Blob:

Grit:

Random:

8. Fill your canvas with glitter.
9. Optional: You can follow steps 3-7 of my seamless glitter tutorial to make a seamless tile, but you will need to reduce the pressure.
10. Export the painting as a PNG file for use in Paint Shop Pro or Photoshop.
Monday, March 9, 2009
Seamless Glitter in ArtRage
This tutorial will show you how to remove seams using ArtRage. Unless you have a perfect hand and can color without going over the edges of your canvas, it is impossible to create a seamless image in ArtRage alone. To make a seamless glitter tile using ArtRage, you will need a second program. I have listed the various options in step 4.
1. Open a new painting in ArtRage (this tutorial uses ArtRage 2.5). The tutorial uses a 600 x 600 image at 72 dpi.
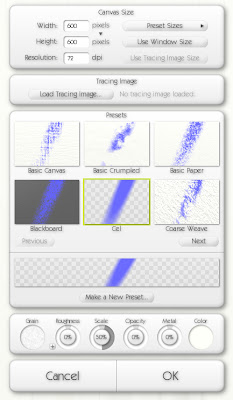
2. Fill the canvas with glitter. Click on the image to see my settings or use your own.
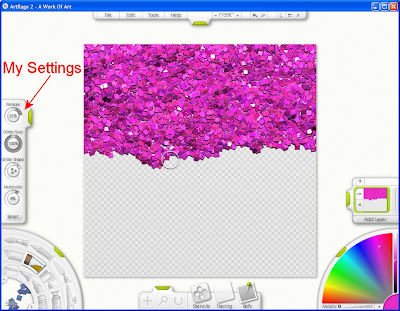
3. Export the image. I prefer to export as PNG.
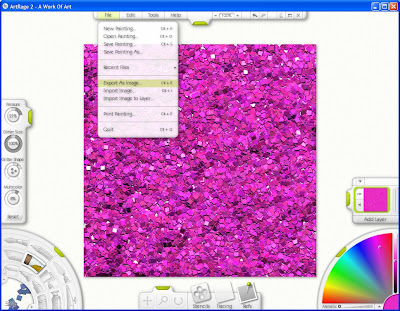
4. Now, the edges of the image must be swapped with the middle. This is accomplished by offsetting the vertical and horizontal by 50%. You can perform this action several ways though all require opening up the image in a different program. See the list.
A. Offset with Paint Shop Pro
Go to Effects > Image Effects > Offset.
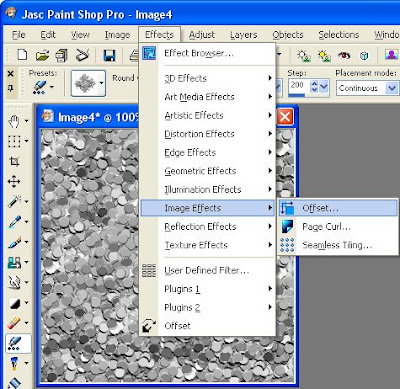
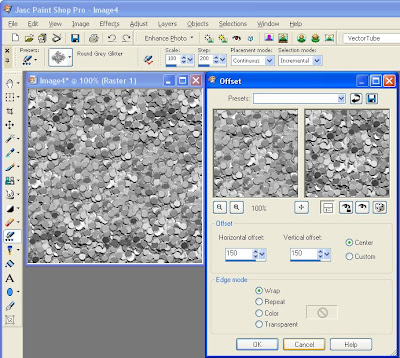
Horizontal offset = 300 (Or 50% the width of your image)
Vertical offset = 300 (Or 50% the height of your image)
Center = checked
Edge Mode = Wrap
NOTE: When you select center, the horizontal and vertical offset numbers will automatically change to be half of your image size.
B. Offset with Photoshop
Go to Filter > Other > Offset.
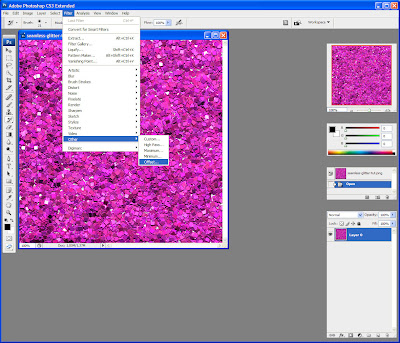
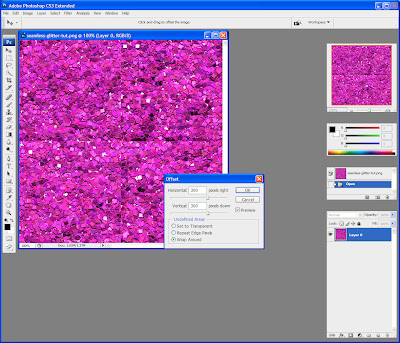 Horizontal = +300 (or 50% of your image width)
Vertical = +300 (or 50% of your image height)
Undefined Areas = Wrap Around
C. Simple Filters - Half Wrap
Simple Filters is a plugin for PSP (and perhaps Photoshop as well). The Half Wrap moves the image 50% down and 50% to the right.
D. Teph's Tricks - Wrap Filters
The Offset Wrap filter from Teph's Tricks is a plugin for PSP and Photoshop.
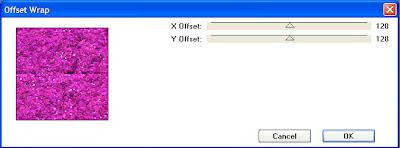 X Offset = 128
Y Offset = 128
Or you can use Slide X 50% filter followed by the Slide Y 50% filter. Both of these are also available from Teph's Tricks.
E. Offset with Gimp
Go to Layer > Transform > Offset. Click Offset by x/2, y/2. When you click Offset by x/2, y/2, Gimp will automatically fill in X and Y with the correct numbers.
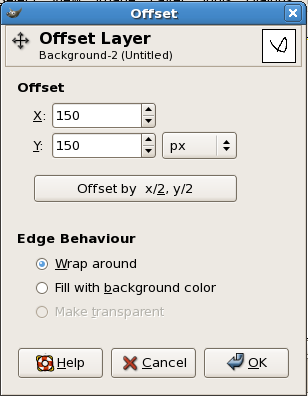 Edge Behaviour = Wrap Around
F. ImageMagick
The command line option for offsetting in ImageMagick is -roll {+-}x{+-}y
Though, if you are using ImageMagick, then you shouldn't be reading this tutorial because you already know far about image manipulation than this tutorial can provide.
5. Once the image has been offset so that the edges are now in the center, save it and import the image back into ArtRage (File > Import Image). Set Pressure to 14%. This will prevent the glitter from going off the edge of the canvas.

6. Put the glitter cursor at the top center of the image, directly over the seam, but without going over the edge of the canvas.
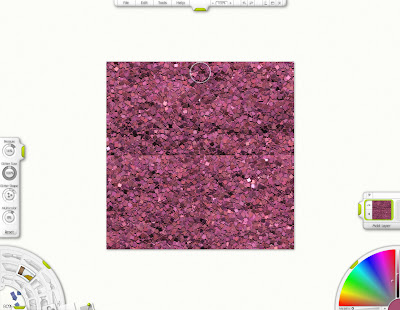
7. Glitter down the seam to the bottom of the canvas. Make sure not to go off the edge of the canvas. Repeat along the horizontal seam.
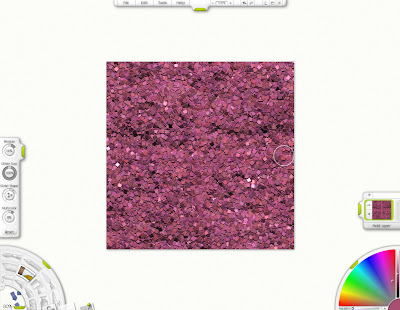
Now you have a seamless glitter tile.
1. Open a new painting in ArtRage (this tutorial uses ArtRage 2.5). The tutorial uses a 600 x 600 image at 72 dpi.

2. Fill the canvas with glitter. Click on the image to see my settings or use your own.

3. Export the image. I prefer to export as PNG.

4. Now, the edges of the image must be swapped with the middle. This is accomplished by offsetting the vertical and horizontal by 50%. You can perform this action several ways though all require opening up the image in a different program. See the list.
A. Offset with Paint Shop Pro
Go to Effects > Image Effects > Offset.


Horizontal offset = 300 (Or 50% the width of your image)
Vertical offset = 300 (Or 50% the height of your image)
Center = checked
Edge Mode = Wrap
NOTE: When you select center, the horizontal and vertical offset numbers will automatically change to be half of your image size.
B. Offset with Photoshop
Go to Filter > Other > Offset.

 Horizontal = +300 (or 50% of your image width)
Vertical = +300 (or 50% of your image height)
Undefined Areas = Wrap Around
C. Simple Filters - Half Wrap
Simple Filters is a plugin for PSP (and perhaps Photoshop as well). The Half Wrap moves the image 50% down and 50% to the right.
D. Teph's Tricks - Wrap Filters
The Offset Wrap filter from Teph's Tricks is a plugin for PSP and Photoshop.
 X Offset = 128
Y Offset = 128
Or you can use Slide X 50% filter followed by the Slide Y 50% filter. Both of these are also available from Teph's Tricks.
E. Offset with Gimp
Go to Layer > Transform > Offset. Click Offset by x/2, y/2. When you click Offset by x/2, y/2, Gimp will automatically fill in X and Y with the correct numbers.
 Edge Behaviour = Wrap Around
F. ImageMagick
The command line option for offsetting in ImageMagick is -roll {+-}x{+-}y
Though, if you are using ImageMagick, then you shouldn't be reading this tutorial because you already know far about image manipulation than this tutorial can provide.
5. Once the image has been offset so that the edges are now in the center, save it and import the image back into ArtRage (File > Import Image). Set Pressure to 14%. This will prevent the glitter from going off the edge of the canvas.

6. Put the glitter cursor at the top center of the image, directly over the seam, but without going over the edge of the canvas.

7. Glitter down the seam to the bottom of the canvas. Make sure not to go off the edge of the canvas. Repeat along the horizontal seam.

Now you have a seamless glitter tile.
Subscribe to:
Posts (Atom)


