Donations Welcome

I am currently saving toward a new version of Paint Shop Pro. If you wish to help me out, then please donate.

Larger versions of images can be seen by clicking on the image. Also, thank you for your kind and encouraging comments. I love reading the comments. If you use my any of freebies, I would be overjoyed with a comment containing a link to your item. I love seeing any of my freebies in use.

Showing posts with label tubes. Show all posts

Monday, January 19, 2009

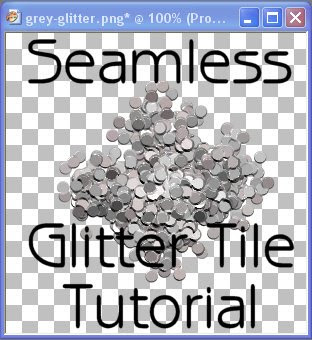
Seamless Glitter Tile Tutorial


This tutorial was inspired by a discussion on Scrap Stuff with PSP and PS. I learned how to make seamless tiles long before all the different programs and plugins existed for easy tiling. Here is an old-fashioned tutorial for making seamless tile the old-fashioned way. This tutorial uses a glitter picture tube which I have made greyscale so that the end product can be re-colored. The zip contains two glitter picture tubes, one is a single tube which should work perfectly for this tutorial. The second is a tube with 9 separate images for more random glittering. If you use my picture tube, you will need to put the tube in your Picture Tube directory (usually My Documents > My PSP Files > Picture Tubes.

Supplies Required:

Greyscale Glitter Picture Tubes (or your image of choice)

1. Open up a new image. The image for this tutorial is 300 x 300 at 300 dpi.

2. Select the Round Grey Glitter tube for your picture tube. The settings are:


Scale = 100
Step = 200
Placement Mode = Continuous
Selection Mode = Incremental

3. Paint your image with the glitter tube.

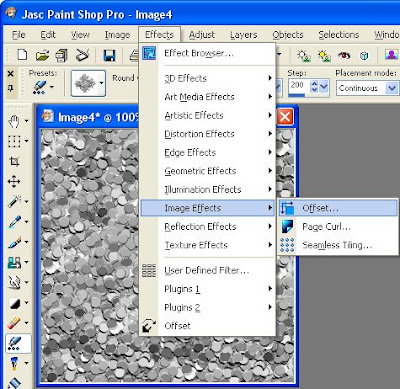
4. When you are done, apply the Offset Effect (Effects > Image Effects > Offset) with the following settings:
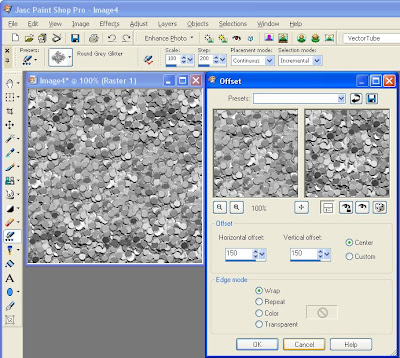


Horizontal offset = 150 (Or 50% the width of your image)
Vertical offset = 150 (Or 50% the height of your image)
Center = checked
Edge Mode = Wrap

NOTE: When you select center, the horizontal and vertical offset numbers will automatically change to be half of your image size.

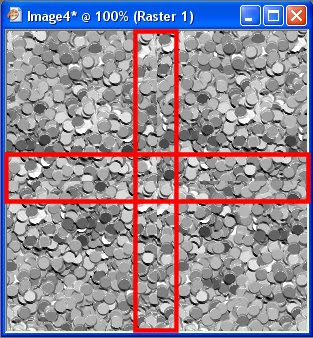
5. Now the edges of the image are in the middle and you should be able to see the ugly seams which I have outlined in red.


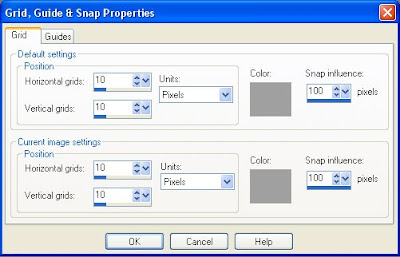
6. Turn on your grid (Ctrl + Alt + G) and make sure your grid is set to 10 by 10 pixels (View > Change Grid, Guide & Snap Properties).


7. I've made my grid yellow so that the contrast between the grid and the grey image is more obvious. With your picture tube, click once about 40 pixels from the center to the right, left, up and down. If you are using a 10 by 10 pixel grid, then this is 4 blocks right, 4 blocks left, 4 blocks up and 4 blocks down. I've circled the location in the image.
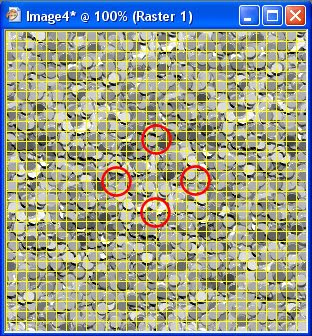


You can see that as you click in each location with the picture tube, the seam is disappearing. If you have an image larger than the sample shown in this tutorial, you may have to click on multiple locations along the seam to cover it all up.

First click with glitter tube to the left of the center.

Here is the image after 4 clicks.

8. If you did not glitter over the edges at the top, bottom, left and right of the image, you are now done. If you did, then you can apply the following correction.

a. Apply the offset effect a second time with the horizontal offset at 50% the width of your image and the vertical offset at 0. To show what happens, I have used a pink glitter tube.
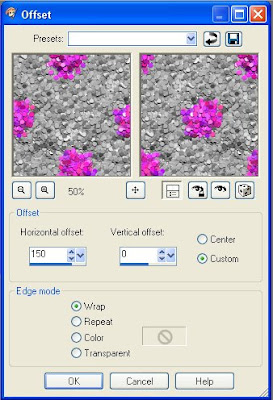


Horizontal = 150 (Or 50% the width of your image)
Vertical = 0
Custom = Checked
Edge Mode = Wrap

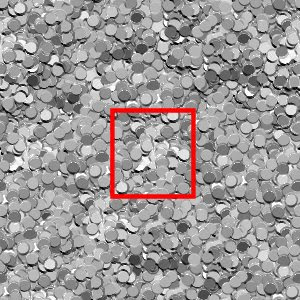
b. Check the middle of your image to see if you can see a seam. A seam might be present if any part of the picture tube went off the edge of the image. If you can see a seam in the middle of the image, click once in the center with the picture tube to cover it up.

c. Apply the offset effect with the original settings (see step 4).

d. Once again check the middle of your image for a seam. If you see one, click once with the glitter tube to cover it up.

9. Finally, you can adjust the color of the greyscale image with Manual Color Correction.
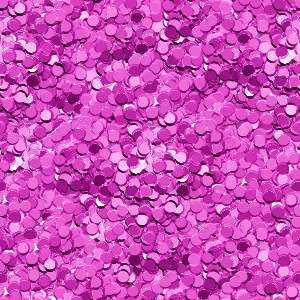

I made this one pink so that people can use it for Valentine's Day. Click on the image to download it.

Anything you make with this tutorial is yours to use as you see fit. The offset effect used in this tutorial is from PSP 9. If you are using an earlier version of PSP, it is possible that the offset effect is a plugin. Thanks to Shawna for finding the location of the offset effect.

Available in PDF.

Sunday, December 14, 2008

Frosted Gingerbread Cookie Tutorial

Someone asked for me to share how I make my cookies. So, I have written up what I did. Though, honestly, a lot of people have cookie tutorials available. This will work with text and with preset shapes. I will demonstrate with a preset shape in this tutorial, but it is the same way that I made the cookie alphas.

1. Open up a new raster image. For this tutorial, I chose 400 x 400 @ 300 dpi. Then select either a font or a preset shape and place it in the new image. Fill the font with a cookie texture or follow my cookie texture instructions in step 2. Scrap Stuff with PSP Tutorials provides cookie textures and an inner bevel setting with her Gingerbread Cookie Tutorial.

a. For text, select as a floating selection then proceed with the cookie texture.
b. For a preset shape, select your shape, set your color, then make sure retain style is unchecked. After setting the shape, select all, then click with the selection tool to float the shape.

2. I used #a57739 as my cookie base, and then applied a texture, but you can fill with a cookie texture or use a Blade Pro Preset. Set #a57739 as your font color or as the color for the preset shape.


3. Then, go to Effects > Texture Effects > Texture and apply the Paper coarse texture which comes with Paint Shop Pro.


Size = 100%
Smoothness = 0
Depth = 1
Ambience = 0
Shininess = 0
Color = White
Angle = 315
Intensity = 50
Elevation = 30

4. Next apply the Inner Bevel to give the cookie some depth. Any Inner Bevel setting you like will work. I used the settings below.


Bevel = 2
Width = 15
Smoothness = 40
Depth = 3
Ambience = 50
Shininess = 10
Color = White
Angle = 315
Intensity = 50
Elevation = 20

3. Make a new Raster Layer. Layers > New Raster Layer. If your cookie is a floating selection, make sure to de-float (Ctrl + Shift + F) prior to making a new layer.

4. Contract the selection by 15. Selections > Modify > Contract > 15.

5. Smooth the selection if your font or preset shape has sharp points. Else, you can skip this step. Selections > Modify > Smooth.


Smoothing amount = 10
Anti-alias = checked

6. Use the flood fill tool and fill the selection with white.


7. Apply a bevel to the frosting. I used Eye Candy Impact 5 Bevel because I wanted something smooth and creamy looking. This is the frosting bevel setting in Eye Candy Impact 5 Bevel.

Bevel
Bevel Width = 34.41
Bevel Height = 27
Bevel Smoothness = 100.00
Round Corners = 0
Bevel Placement = Inside Selection
Darken Deep Ares = 0
Shade Interior = Checked
Surface = None

Lighting
Direction = 111
Inclination = 60
Highlight Brightness = 80
Highlight Size = 50
Highlight Color = White
Shadow Color = #8c8474

Bevel Profile
Factory Profile = Button

8. Select None (Ctrl + D) and apply the Wave Distortion. Effects > Distortion Effects > Wave. If you are using Paint Shop Pro 8 or prior, you will need to reverse the amplitude and wavelength numbers have a different meaning in previous versions.


Horizontal displacement
Amplitude = 1
Wavelength = 36

Vertical displacement
Amplitude = 1
Wavelength = 60

Edge mode = Transparent

9. Then I followed Scrap Stuff with PSP Tutorials instructions on making sprinkles, tubed the sprinkles and used the Picture Tube to paint them over the surface of the cookie.


The results of this tutorial are yours to do with as you please. You can click on the final image to download it as a PNG.

EDIT: I guess some people might want the sprinkles tube. If you want my Christmas Sprinkles tube, it is now available for download. I used them at scale = 15, step = 150, placement mode = random, selection mode = random.