Donations Welcome

I am currently saving toward a new version of Paint Shop Pro. If you wish to help me out, then please donate.

Larger versions of images can be seen by clicking on the image. Also, thank you for your kind and encouraging comments. I love reading the comments. If you use my any of freebies, I would be overjoyed with a comment containing a link to your item. I love seeing any of my freebies in use.

Friday, June 17, 2011

Text on a Curve

I have used vectors to curve text in previous tutorials, but I thought I would go through the steps to make very simple curved text in Paint Shop Pro.

1.  First, it is necessary to generate the curved vector on which the text will sit.  The easiest way to do this is to create a circle or an ellipse using the Ellipse Tool.  It doesn't matter what fill is used for the ellipse as it will either be deleted or hidden after the text is complete.


Show Nodes = Checked
Create on Vector = Checked

2.  Select the Text Tool.  Make sure 'Create as Vector' is selected.


3.  Hover the text tool over the vector path that is part of the ellipse.  A curve should appear under the 'A' in the text tool .


4.  Click and the text box will appear.  Type your text.


5.  If you clicked on the top of the vector (and you have 'Align Center' selected for your text tool), then the text will be on top of the shape.


Here are examples as to what happens depending on where you click.

Top

Left Side
 

Right Side

Bottom

6.  If you want the text to go in a different direction, first convert the ellipse to a path by selecting the Pen Tool, then right-click and select 'Convert to Path' from the menu.


7.  Right-click again and select 'Edit' and then 'Reverse Path' from the menu.


Here is how the text looks depending on where you click on the shape after reversing the path.

Top

Left

Right

Bottom

8.  Hide the shape and the text is complete.


Sunday, June 12, 2011

Screw in Photoshop


Here is the screw tutorial for Photoshop.  Instead of the Cutout Effect, it uses Layer Styles.

1.  Open up a new canvas.  Mine is 200 x 200.

2.  Select the Ellipse Tool and draw out a circle on the canvas.  To make it easy, in Ellipse Options, check 'Circle'.  The color of the circle does not matter it will be covered up with layer styles.


3.  Go to Layer Styles and set a Metallic Gradient Overlay for the layer.  If you don't have a metallic gradient, you can use the defaults ones that come with PS by clicking on the triangle (or set of menu bars depending on version) and then selecting 'Metals' from the dropdown menu.


4.  When asked, you can either click 'Ok' to replace your existing gradients or 'Append' to add it to your existing gradients.  I chose 'Append'.


5.  I am using the 'Silver' gradient at 100%.  Set the gradient to an angle of 125o.


6.  Add a dark Inner Shadow.

Blend Mode = Multiply
Color = #000000
Opacity = 86
Angle = -45
Use Global Light = Checked
Distance = 15
Choke = 0
Size = 15
Contour = Linear
Anti-aliased = Unchecked
Noise = 0

7.  Add a light Inner Glow.

Blend Mode = Screen
Opacity = 85
Noise = 0
Color = #FFFFFF
Technique = Softer
Source = Edge
Choke = 5
Size = 15
Contour = Half Round
Anti-aliased = UnChecked
Range = 50
Noise = 0

8.  Select the shape for the type of screw.  The shape must be white.  For a flat head or Phillips head. choose the Rectangle Tool.


For an Allen head, choose the Polygon Tool and set the sides to 6.


9.  Make sure that 'Create New Shape Layer' is selected and draw out the shape.


For the flat head screw and the Phillips head, draw out the rectangle so that it stretches across the middle of the circle.


For the Allen head, place the cursor in the middle of the canvas and then drag outwards to draw out the hexagon.  If it isn't in the middle, then use the Mover tool to move it to the middle.


10.  Optional.  For the Phillips head, make sure that 'Add to shape area' is selected.  Then draw a rectangle perpendicular to the first.


11.  Optional.  If the Layer Style from the first shape was duplicated, clear it by selecting the default style.


12.  Go to Layer Styles and set the Layer Opacity to 65% and the Fill Opacity to 0%.


13.  Apply an Inner Shadow.

Blend Mode = Multiply
Color = #000000
Opacity = 75
Angle = -45
Use Global Light = Checked
Distance = 5
Choke = 0
Size = 15
Contour = Linear
Anti-aliased = Unchecked
Noise = 0

14.  Apply an Inner Glow.

Blend Mode = Multiply
Opacity = 75
Noise = 0
Color = #000000
Technique = Softer
Source = Edge
Choke = 0
Size = 15
Contour = Linear
Anti-aliased = UnChecked
Noise = 0

15.  Optional.  Use the Move Tool (or Edit > Transform Path > Rotate) to rotate the second shape layer 45 degrees.


The screw is now complete.  You can also make a simple rivet by putting a circle in the center.

Saturday, June 4, 2011

Rivet


The second tutorial for the SNL Father's theme is for rivets.  I had asked in my tutorial group the difference between an eyelet and a rivet and was mostly told that a rivet is solid.  So, I modified my screw tutorial for rivets.  This tutorial will also use Cutout Effect to create highlights and shadows.

1.  Make a new canvas.  Mine is 200 x 200 because my screw head is pretty small.

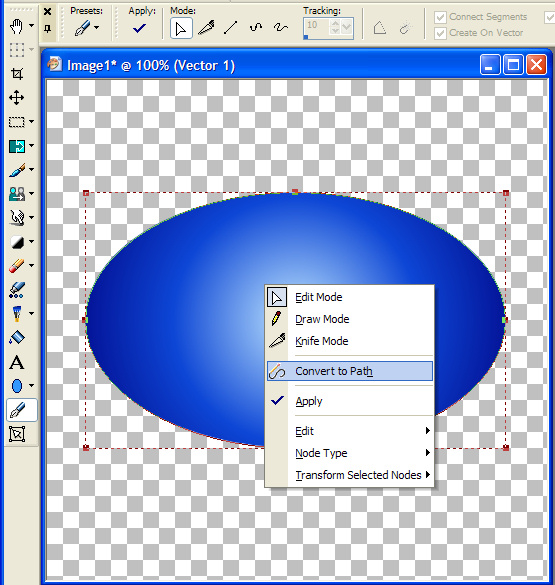
2.  Choose the Ellipse Tool and then choose the Circle shape.  With the foreground set to transparent and the background set to the color of your rivet, draw out a circle to fit the canvas.


3.  Choose the Object Selection Tool (or Pick Tool) and click the "Center in Canvas" icon.


4.  Ctrl + Shift + B to obtain the selection from the vector object.

5.  Create a new layer (Layers > New Raster Layer).

6.  Apply a white cutout (Effects > 3D Effects > Cutout) to the new layer.


Vertical = 5
Horizontal = 5
Opacity = 100
Blur = 30.00
Shadow Color = White

7.  Create a new layer (Layers > New Raster Layer).

8.  Apply a black cutout (Effects > 3D Effects > Cutout) to the new layer.

Vertical = -5
Horizontal = -5
Opacity = 100
Blur = 30.00
Shadow Color = Black

9.  Go to the Ellipse Tool and click the 'Draw Circle' icon if it isn't already selected, then flip the foreground and background materials so that the background material is now transparent.


10.  Set the width to 25.  Draw out a new circle.  This time, the circle should have a thick border and the interior should be hollow.  This will be the ring between the other part of the rivet and the inner 'nub'.


11.  Choose the Object Selection Tool (or Pick Tool) and click the "Center in Canvas" icon.


12.  Ctrl + Shift + B to obtain the selection from the vector object.

13.  Apply a black cutout (Effects > 3D Effects > Cutout) to the selection.  You may get an auto-action confirmation dialog.  Click 'OK', if you do.


14.  Reduce the horizontal and vertical offsets on the Cutout Effect (Effects > 3D Effects > Cutout).

Vertical =1
Horizontal =1
Opacity = 100
Blur = 30.00
Shadow Color = Black

15.  The rivet is now complete if you don't want to add words.

16.  Optional.  To make the 'nub' in the center more pronounced, select it with the magic wand, then repeat steps 5-8.


17.  Optional.  Merge the shadow and highlight layers create through the Cutout Effect.  I used Layers > Merge > Merge Down.

18.  Optional.  Apply a Gaussian blur.

19.  Optional.  To add words, you must first create a circular path.  Go to the first vector layer (the one with the solid, filled circle).  Duplicate this layer (Layers > Duplicate).

20.  Optional.  Move the layer to the top.


21.  Optional.  Expand the layer and then click the 'New Ellipse' layer to make this circle the active vector.


22.  Optional.  Re-size the circle so that it is slightly larger than the ring.


23.  Optional.  Go to the text tool.  Make sure 'Create as Vector' is chosen. 


24.  Optional.  Click on the edge of the circle.


25.  Optional.  Type your text and make any spacing adjustments necessary.

26.  Optional.  Hide the circle layer by clicking on the eye next to the 'New Ellipse' layer.


27.  Optional.  Ctrl + Shift + B to obtain the selection from the vector object.

28.  Optional.  Convert the text layer to a raster layer (Layers > Convert to Raster Layer).

29.  Optional.  Apply a black cutout to the text to make it appear that the text has been burnt into the rivet.

Vertical =1
Horizontal =1
Opacity = 100
Blur = 30.00
Shadow Color = Black

All the optional steps on the rivet are now complete.