I wrote up an action that will cut up a sheet of letters into individual files. However, I couldn't figure out how to automate the naming of the files without providing an options file and a mini-tutorial. So, to use the action to its fullest potential, you need to follow this tutorial.
Supplies:
6 x 6 Grid Template
Alpha Cutter Action and Output Settings Preset
1. The letters for the alpha need to be put on a grid. The cutter uses will evenly divide any canvas into 6 columns and 6 rows. This allows for 26 letters and 10 numbers. If you do not have a grid that you can follow, you can use my Grid Template. Open up the template or your own canvas in Photoshop.
2. Select a nice font. With the text tool, write out your letters and numbers as vectors. Try to position each letter in the middle of a grid square.
3. Turn off the layer containing the Grid Template by clicking the eye symbol on the layer palette.
4. Apply any styles or perform any actions needed to create the look of the alpha.
5. Install the action if you haven't done so already. Place the "alpha-cutter.iros" file some place where you can easily find it. Mine is in My Documents > Adobe > Presets > Output Settings.
6. Create the following directory My Documents > Adobe > alpha.
7. Play the action.
8. When you reach the pop-up box, read the instructions and press 'Continue'.
9. You may get a Save for Web warning message if you are using my template as the image is very large. Click 'Yes' if you get this warning.

10. Click the Optimize Settings button.
11. Select 'Edit Output Setting's from the menu that appears.
12. In the Output Settings dialog, click 'Load'.
13. Find the 'alpha-cutter.iros' file and load it. You should only have to perform steps 10-13 the first time you run the action. You will have to perform steps 10-13 again if you change the settings in the future.
14. Click 'Save'.
15. If you created the alpha directory, then the dialog will open in that directory. If not, then it will open in your last used directory. You can, if you wish, change to a different folder or make a folder for the alpha. The default name that appears in the dialog is the name of the file. So, if you used my Grid Template, then it will be HGG_gridtemplate.
16. Change the default name to something else.
17. Click 'Save' and the files will be saved.
When you go to the folder, you can see the individual files. They will be numbered from 1 - 36.
Donations Welcome
I am currently saving toward a new version of Paint Shop Pro. If you wish to help me out, then please donate.
Larger versions of images can be seen by clicking on the image. Also, thank you for your kind and encouraging comments. I love reading the comments. If you use my any of freebies, I would be overjoyed with a comment containing a link to your item. I love seeing any of my freebies in use.
Friday, October 15, 2010
Thursday, October 14, 2010
Wednesday, October 13, 2010
Tuesday, October 12, 2010
Spiderwebs Alpha - Green
I made this alpha last year, but didn't finish it until after Halloween. So, I decided to save it and give it out this year. I hope that people can use it. It comes in three colors. Here is the green one.
Sunday, October 10, 2010
Saturday, October 9, 2010
Friday, October 8, 2010
Wednesday, October 6, 2010
Awareness Ribbon
A member of my tutorial group asked for an awareness ribbon tutorial. This tutorial will show you how to make an awareness ribbon using the vector tools in Paint Shop Pro. The final ribbon can easily be re-colored. However, the example is pink because October is Breast Cancer Awareness Month and I'm writing this in October.
1. Open up a new canvas. Make it rectangular in shape. Mine is 1400 high by 800 wide.
2. Use the Preset Shape Tool to draw a Rectangle. Right-click and select Convert to Path.
3. Select the Object Selection Tool (or Pick Tool). Press the Shift key. When the Shift key is depressed and the mouse is over the object, the shear image (a parallelogram will be visible). While holding down the Shift key, slide the middle of the bottom of the rectangle to the right. Continue to hold down the Shift key and slide the middle of the top of the rectangle to the left. Now you should have a parallelogram.
4. Select the Pen Tool. Choose the node on the top left of the parallelogram. Slide the node down and to the left.
5. Slide the top right node up and to the left.
6. Move the bottom right node up.
7. Move the bottom left node to the right.
8. Select the bottom right node. Change the Node Type to Curve Before. Drag the handle slightly to the left to curve the ribbon toward the center.
9. Select the top right node. Change the Node Type to Curve After. Drag the handle slightly to the left.
10. Select the top left node. Change the Node Type to Curve Before. Drag the handle slightly to the left to curve the ribbon outward. Change the Node Type to Curve After and Smooth. This eliminates the possibility of an ugly bump.
11. Select the bottom left node. Change the Node type to Curve After. Drag the handle slightly to the left.
12. Duplicate the layer (Layers > Duplicate) and mirror the image (Ctrl + M). This creates the two overlapping pieces of the ribbon.
9. Create a new vector layer (Layers > New Vector Layer).
10. Select None (Ctrl + D).
11. Use the rectangle preset shape and draw out a rectangle across the tops of the two long ribbons.
12. Right-click and select Convert to Path.
13. Select the top left node and change the node type to Curve After by right-clicking the node, then choosing Node Type from the menu. Pull the handle up to create an upwards curve.
14. Repeat for the top right node except change the node type to Curve Before.
15. Select the bottom right node and change the node type to Curve After. Pull the handle up to create an upwards curve.
16. Repeat for the bottom left node except change the node type to Curve Before.
17. Move the current layer under the two ribbon layers.
The basic ribbon shape is now complete. You can provide shading to make the ribbon look more three-dimensional. I used a pink gradient to give my ribbon more depth.
Here is my gradient and how I applied the gradient to the layers.
Foreground Color = Dark Pink
Background Color = Light Pink
Layer - Copy of Vector 1 = Foreground - Background Gradient
Layer - Vector 1 = Foreground - Background Gradient Inverted (meaning with Invert box checked)
Layer - Vector 2 = Foreground - Background Gradient
I am making my final ribbon available as a grayscale image. It is still in vector format, so that the colors can easily be changed. It is in PSPimage format. I am trying out SkyDrive for this download just to see how it works. Like it? Hate it? Let me know what you think.
Tuesday, October 5, 2010
Layering and Blending Overlays in PSP
Sarah left a comment asking for a tutorial on how layer and blend overlays in Paint Shop Pro. I am being bribed with cookies and chocolate.
You can be very complex or very simple with overlays. This will be a very simple tutorial on layering and blending overlays. I will not go into great detail on re-coloring overlays, though you can do this to make your papers even more varied.
Supplies:
Square Overlay Set
1. Open up an existing paper that you want to change or open up a new canvas the desired size of your paper and fill with the color of your choice. For demonstration purposes, I filled my canvas with a red gradient.
2. Open the overlays in the square overlay set.
3. Select an Overlay. I chose Overlay01. Ctrl + C to copy the overlay.
4. Go to your paper. Ctrl + L to paste the overlay as a new layer (or Edit > Paste > Paste as New Layer).
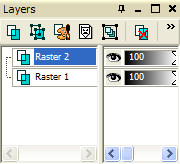
5. In the layers palette, right-click on the overlay layer.
6. Select Properties from the menu.
7. Change the blend mode (and, optionally, the opacity) of the layer. I changed mine to overlay.
8. Repeat steps 3 -7 for all the overlays that you wish to use.
9. Optional. To change the color of an overlay, use the manual color correction tool (Adjust > Color Balance > Manual Color Correction).
Or, if you have a version of PSP where the Manual Color Correction tool has been removed and you cannot find it, you can easily change the color using the Color Replacer Tool.
Set the Background Material to the color that you want to replace. Set the Foreground Material to the new color.
Click the Replace All Pixels button in the Tool Palette.
Here is my example with the different actions for each overlay layer.
Overlay01 = Overlay
Overlay02 = Screen, Opacity @ 80%
Overlay03 = Normal, Changed Color to Teal
Overlay04 = Normal
Overlay05 = Normal, Changed Color to Purple
You can be very complex or very simple with overlays. This will be a very simple tutorial on layering and blending overlays. I will not go into great detail on re-coloring overlays, though you can do this to make your papers even more varied.
Supplies:
Square Overlay Set
1. Open up an existing paper that you want to change or open up a new canvas the desired size of your paper and fill with the color of your choice. For demonstration purposes, I filled my canvas with a red gradient.
2. Open the overlays in the square overlay set.
3. Select an Overlay. I chose Overlay01. Ctrl + C to copy the overlay.
4. Go to your paper. Ctrl + L to paste the overlay as a new layer (or Edit > Paste > Paste as New Layer).
5. In the layers palette, right-click on the overlay layer.
6. Select Properties from the menu.
7. Change the blend mode (and, optionally, the opacity) of the layer. I changed mine to overlay.
8. Repeat steps 3 -7 for all the overlays that you wish to use.
9. Optional. To change the color of an overlay, use the manual color correction tool (Adjust > Color Balance > Manual Color Correction).
Or, if you have a version of PSP where the Manual Color Correction tool has been removed and you cannot find it, you can easily change the color using the Color Replacer Tool.
Set the Background Material to the color that you want to replace. Set the Foreground Material to the new color.
Click the Replace All Pixels button in the Tool Palette.
Here is my example with the different actions for each overlay layer.
Overlay01 = Overlay
Overlay02 = Screen, Opacity @ 80%
Overlay03 = Normal, Changed Color to Teal
Overlay04 = Normal
Overlay05 = Normal, Changed Color to Purple
Subscribe to:
Posts (Atom)