Donations Welcome

I am currently saving toward a new version of Paint Shop Pro. If you wish to help me out, then please donate.

Larger versions of images can be seen by clicking on the image. Also, thank you for your kind and encouraging comments. I love reading the comments. If you use my any of freebies, I would be overjoyed with a comment containing a link to your item. I love seeing any of my freebies in use.

Monday, August 17, 2009

Popsicle Stick


Required:

Eye Candy 5: Impact
Eye Candy 5: Textures

1. Open a new canvas 200 high x 1800 wide.

2. With the Rectangle Tool, draw out a vector rectangle that is the same size as the canvas.


3. Click on the node in the upper left corner of the canvas and drag it down the size of the canvas until it reaches the middle of the left edge.


4. This creates the basic popsicle shape. Grab the selection from the vector object (Ctrl + Shift + B).

5. Create a new layer (Layers > New Raster Layer).

6. Use Eye Candy 5: Textures Wood to create a white birch-like texture.


Ring Thickness = 160
Cut Offset = 0
Pulp Color = #fce8c4
Bark Color = f7d195
Variation Amount = 40
Variation Roughness = 76
Contrast = 10
Wood Orientation = 0
Seamless Tile = Unchecked
Random Seed = 1
Number of Knots = 0
Knot Size = 10.00
Grain Size = 1
Grain Aspect Ration = 20.00
Grain Density = 100
Grain Opacity = 80
Divide Into Panels = Unchecked

7. Duplicate the layer.

8. Gaussian blur the duplicate layer.


Radius = 5.00

9. Select None (Ctrl + D).

10. Mirror the layer (Ctrl + M).

11. Reduce the opacity of the duplicate layer to 50%.


12. Merge the layer with the one below (Layers > Merge > Merge Down).

13. Increase the canvas size to 250 x 1850.


Width = 1850
Height = 250
Top = 25
Bottom = 25
Left = 0
Right = 50

14. Use Eye Candy 5: Impact Extrude to create a third dimension to the stick.


Extrude Direction = 347
Extrude Distance = 51.91
Taper = 5
Smoothness = 20
Solid Color = Checked
Color = #f7d195
Light Direction = 338
Highlight Brightness = 80
Highlight Color = White
Shadowing = 20

15. The popsicle stick is now complete.

Sunday, August 16, 2009

Disco Ball (PS)


Here are the instructions for creating the disco ball in Photoshop or you can use my Disco Ball action.

1. Open up a new canvas, 1200 x 1200.


2. Go to the elliptical marquee tool.


3. Click on the upper left hand corner of the canvas (0,0) and draw out a circle to lower right hand corner of the canvas (1200,1200).


4. Fill (Shift + F5) the layer with your choice of color. I used white.


5. Filter > Render > Difference Clouds.


6. Use the Lens Flair filter (Filter > Render > Lens Flair) with the 105mm Prime lens type. The cross-hairs marking the flair center should be in the upper left of the sphere.


7. Use the Mosaic filter (Filter > Pixelate > Mosaic) with a cell size of 45 to create the squares.


8. Now use the Spherize filter (Filter > Distort > Spherize) to make the circle look like a globe.


The disco ball is now complete.

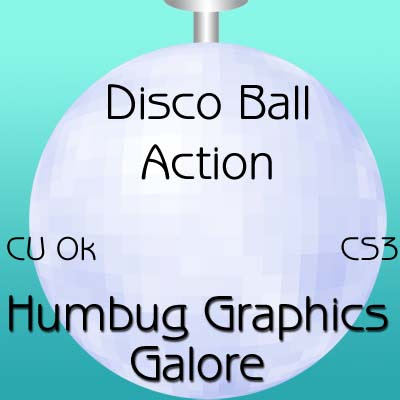
Disco Ball Action

I think someone asked for the disco ball as an action, though I'm not entirely sure what a PnP is supposed to be. Anyways, I thought it would be simple to create the disco ball in Photoshop. It was fairly easy to make the ball in Photoshop, but the hanger took me a while to figure out since I'm not as familiar with the vector commands in Photoshop. I also discovered that changing vector shapes in Photoshop do not get recorded in actions. Why is that? Oh well, something to figure out on another day.


Here is the disco ball as an action. It is written in CS3 since that is what I have installed currently. I had to change some of the steps, so it doesn't really follow the tutorial anymore. Photoshop doesn't have a balls and bubbles effect so I really needed to substitute another filter. This appears to work with different colors, gradients and patterns, though you will need to have your canvas open prior to running the action since Photoshop doesn't allow you to fill with any open canvas.

Saturday, August 15, 2009

Herringbone Patterned Paper


1. Open a new canvas 3600 wide by 300 high.

2. Fill the canvas with a color of your choice (I used #7996bd).

3. Apply the halftone effect, choosing an ink color that is a dark shade of your original color (I used #2c3c5e). To make broader stripes, increase the size. Use only even numbers.

Halftone pattern = Line
Size = 2
Screen angles = 60
Use as overlay = Checked
Blend mode = Normal
Opacity = 100
Color Scheme = Greyscale
Ink = #2c3c5e
Transparent = Checked

4. Go to the selection tool and make a custom selection.

Left = 0
Right = 3600
Top = 100
Bottom = 200

5. Ctrl + I to flip the selection.


6. Select None (Ctrl + D).

7. Add 45% uniform noise to give the pattern some texture (Adjust > Add/Remove Noise > Add Noise).


Uniform = Checked
Noise = 45
Monochrome = Checked

8. This is a a twill pattern. Credit for this pattern goes to Diz. It can be used as is for a ribbon, but we only need 2/3rds of the twill to create the herringbone pattern. Make a new custom selection.

Left = 0
Right = 3600
Top = 0
Bottom = 200

9. Open a new canvas 3600 x 3600.

10. Go to the materials palette and choose the twill pattern. Adjust the angle to 325.


11. Select the fill bucket and fill the new canvas with the pattern. The paper is now complete.

Here is a sample with the line size at 2.


Here is a sample with the line size at 4.

Friday, August 14, 2009

Disco Ball


1. Open a new 1200 x 1200 canvas.

2. Make sure that Rulers has been enabled (Ctrl + Alt + R).


3. Choose the Circle selection, then align the cursor with the center of the canvas (see red cross-hair in image), using the rulers to make sure that the exact center is selected. The ruler lines will be at 600 on the y-axis and 600 on the x-axis when the cursor is over the center of the canvas.


4. Draw out the selection until the edges of the canvas have been reached.


Selection type = Circle
Mode = Replace
Feather = 0
Anti-alias = Checked

5. Use the Balls and Bubbles effect to fill the circle with bubbles (Effects > Artistic Effects > Balls and Bubbles).

Shape
Automatic multiple balls or bubble = Checked
Coverage = 100
Average size = 25
Size variation = 50
Ball or bubbles type = Intersecting
Randomize = Checked
Seed = 38


Surface
Material = White (or select your own color, gradient or pattern)
Opacity = 100
Shininess = 35
Gloss = 0


Maps
Bump Map = Unchecked
Environment Map = Unchecked


Illumination
Maximum = 30
Minimum = 0
Light 1
  • Position = Upper Left
  • Color = White
  • Highlight Size = 15
  • Back Light = Unchecked
  • Bubble Light = Unchecked (will be grayed out and unavailable)
6. Repeat the Balls and Bubbles effect with all the settings the same (including the seed number), but reduce the opacity by half to 50.


7. Apply the Sunburst effect (Effects > Illumination Effects > Sunburst).


Color = White

Light spot
Brightness = 50
Horizontal = 37
Vertical = 32

Rays
Density = 25
Brightness = 50

Circles
Brightness = 50

8. Distort the image with the Pixelate effect (Effects > Distortion Effects > Pixelate).


Block width = 45
Block height = 45
Symmetric = Checked

9. Make the selection three-dimensional by applying the Spherize effect (Effects > Geometric Effects > Spherize.


Strength = 100

10. The basic disco ball is now complete.

11. To create a ceiling hanger for the ball, resize the canvas to 1200 wide and 1500 high.

12. Set the foreground to transparent and the background to a gray gradient.


13. Use the preset shapes tool to create a rectangle.


14. Use the ellipse tool to create an oval at the top of the rectangle.

15. Convert the oval to a path by right-clicking on the object and then selecting convert to path.

16. Switch to the pen tool, then click the top node and convert to a line.


17. Right click on the node, select Edit and then merge to eliminate the node.


18. Click the node on the left of the oval and change the node type to Line After.


19. Click the node on the right of the oval and change the node type to Line Before.


20. Move the vector layer to the bottom and the disco ball with ceiling hanger is complete.


Here is a script to go along with the tutorial. I'm not sure if the vector ceiling hanger will work on all versions of PSP as I have been having trouble with vectors in scripts not working in PSP 9 when the script is used on a different computer. So, leave a comment if the script works for you or if the script doesn't work for you.


UPDATE: The script is reported to work in PSP 9, X and X2. I do not yet have results for XI.

Tuesday, August 11, 2009

Beach Babies Add-On

Here is a small add-on for Beach Babies. It has two umbrellas from the umbrella script that I am working on, plus the items that I made for the quick page.

Thursday, August 6, 2009

Psychedelic Melting Glass

I have signed up for the Funkadelic Blog Train. I have some groovy ideas for a kit and I'm hoping that people will like paisley because I definitely think there will be a lot of paisley.

I'm still sick, but I have finished an antibiotic series, so maybe I'll be better soon. I'm also having to work a lot, so there hasn't been a lot of time to create. Working a lot has made my illness linger. Here is a chipboard alpha, since I hate making posts where there isn't a freebie.