Pages
▼
Thursday, July 15, 2010
Sequins
This tutorial will show you how to make sequins in Photoshop. This technique will also work in Photoshop Elements eventhough the screenshots are taken in Photoshop. If it is too confusing for PSE users, leave a comment and I will make PSE screenshots.
1. Open up a new canvas. Mine is 300 x 300 pixels at 300 dpi for a 1 inch sequin.
2. Select the ellipse tool. Click the triangle button next to the shape tool on the toolbar to make the ellipse options menu appear. Select Fixed Size and make the width and height the same as the size of your canvas. Make sure From Center is checked. Click the color box at the right hand side of the toolbar and select the color for your sequin.
3. Click the center of your canvas. It may be necessary to enable rulers to find the exact center. A perfect circle will appear.
4. Select the polygon tool. Make sure that sides are set to 6.
5. Draw out the hexagon so that the left side and the right side have a point.
6. Change the color of the hexagon so that it can be seen more easily by clicking the color box on the right side of the toolbar. The exact color does not matter as this hexagon will be deleted later.
7. Select the line tool. Set the weight to 2 pixels.
8. Draw a line horizontally across the circle so that it passes through two points of the hexagon. The line needs to touch each edge of the circle.
9. Duplicate the layer with the line (Layer > Duplicate Layer).
10. Rotate the layer using Transform Path (Edit > Transform Path > Rotate).
11. Set the rotation angle to 60 and accept the transformation.
12. Repeat steps 9-11 to create a third rotated line. In making the third line, duplicate the current layer with the line. There is no need to change layers to the original layer with the line.
13. There should be five layers in the layers palette. The top line layer should be the active, selected layer.
14. Press the shift key and click the layer with the hexagon. This should select all the layers except the one with the circle.
15. Right-click on the layers palette to make the layers menu appear and select Merge Layers or Ctrl + E.
16. Load the transparency of the current layer as a new selection (Select > Load Selection).
17. Select the layer with the circle.
18. Duplicate the layer.
19. Convert the new shape layer to a raster layer.
20. Subtract the transparent region of this layer from the existing selection.
21. Right click on the layer and select Delete Layer as it is no longer needed.
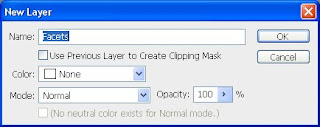
22. Create a new layer to hold the selections for the Facets.
23. Fill the selection with 50% grey so that the facets are easy to select.
24. Ctrl + D to deselect.
25. Select the magic wand. Make sure that Contiguous is checked and Sample All Layers is checked in the toolbar.
26. Select the top and bottom facets.
27. Create a new adjustment layer for brightness and contrast.
28. Set the brightness to +25.
29. Select the facet counterclockwise to the top facet and the one diagonal.
30. Create a new brightness/contrast adjustment layer and set the brightness to +50.
31. Select the last set of facets and create a new brightness/contrast layer. Set the brightness to -25.
32. Click the eye next to the hexagon layer and the facets layer (or delete them) to hide them as they are not needed anymore.
33. Convert the layer with the circle to a raster layer.
34. Select the elliptical marquee tool and draw out a circle in the center of the sequin.
35. Press the delete key to make a hole in the sequin. The sequin is now complete.


Oh vielen Dank Spencer,
ReplyDeletedas ist ja ein tolles Tut und so einfach, wenn man weiß wie es geht.
Schönen Tag noch.
LG
Finja
Just a quick note to let you know that a link to this post will be placed on CraftCrave today [15 Jul 12:00pm GMT]. Thanks, Maria
ReplyDeleteCan you do screen shots for PSE? I get to #16 and get lost. LOL Thank you!
ReplyDeleteThanks for this easy to follow tutorial!
ReplyDeletecan you provide this shape as a free download? I can't see to make one properly.
ReplyDelete