Pages
▼
Sunday, September 27, 2009
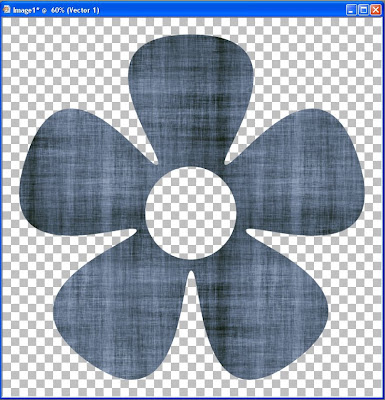
Frayed Edge Flower
This tutorial will show you how to make a frayed edge flower. However, this technique can be applied to any vector shape.
Supplied Needed:
Mesh Texture or Filter Forge + Dirty-Rag Texture
Vector Paint Script
1. I have provided a mesh texture that works well for frayed edges. You can make your own. I used Filter Forge to make mine. It is the Dirty-Rag texture. Open the mesh texture and adjust the grayscale image to a color of your choice.
2. Open a new canvas, 1200 x 1200.
3. Set as your background material the colorized mesh texture. Set your foreground material to transparent.
4. Go to your preset shape tool and select a preset shape. Make sure Create as Vector is checked and Anti-alias is checked. I used Flower 2. It comes with PSP. If the foreground material is not transparent, then set the line width to 0.
5. Make sure that the shape is a path. If the shape is not a path, then convert the shape to a path. The Flower 2 shape should already be a path.
6. Select a brush that will make a thread-like shape. Fuzzy fiber brushes and stitch brushes will work. I selected the Crosshatch brush, which comes with PSP.
7. Set the foreground material to the mesh texture. Now both foreground and background materials should be the same thing.
8. Here are my brush and brush variance settings for the Crosshatch brush. It is important to set Jitter to a lower number and Rotation to Direction. If you choose a different brush than Crosshatch, then the other settings could differ, depending on your artistic taste.
Size = 50
Step = 25
Density = 100
Rotation = 90
Opacity = 100
Blend mode = Normal
Color blend = Normal
Hue = Normal
Saturation = Normal
Lightness = Normal
Size = Normal
Opacity = Normal
Rotation = Direction
Density = Normal
Fade Rate = 1
Position Jitter = 25
Impressions per step = 1
9. Create a new raster layer then take the brush and trace along the edge of the preset shape or if you have poor coordination, like I do, you can use the Vector Paint Script.
Make sure the Vector Layer is selected, then press play on the Vector Paint script.
10. Change the step to 27.
11. Make sure the vector layer is selected. Paint around the edge of the flower a second time with the Vector Paint Script or do it by hand if you have artistic skill.
12. Move the vector layer over the two layers with the stitches in order to hide the ugly inner part of the stitches which don't completely merge with the texture of the flower.
The frayed edge flower is now complete. Here is an example of a frayed piece of cloth using the rectangle tool.


Thanks for the tutorial!
ReplyDeleteOOH LAH LAH...another exciting tut!
ReplyDeleteTHANK YOU so much!
Very intersting, all these tutorials and easy to understand, even for a french girl! Thanks a lot !
ReplyDeleteThanks - I think this technique will work for creating frayed ribbon!
ReplyDeleteThanks so much for your tutorials, they are great.
ReplyDeleteBarb
Excellent tutorial. Keep blogging and thanks for sharing!!!
ReplyDeleteRegards,
image masking