Donations Welcome
I am currently saving toward a new version of Paint Shop Pro. If you wish to help me out, then please donate.
Larger versions of images can be seen by clicking on the image. Also, thank you for your kind and encouraging comments. I love reading the comments. If you use my any of freebies, I would be overjoyed with a comment containing a link to your item. I love seeing any of my freebies in use.
Monday, February 25, 2013
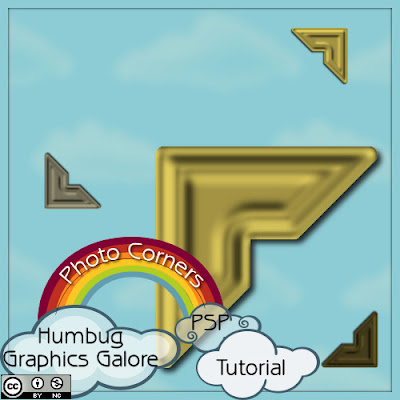
Vintage Photo Corners
The theme for this month at SNL is 'Photography'. It inspired me to create a tutorial on how to make photo corners in Paint Shop Pro.
1. Open up a new canvas 1 inch by 1 inch (300 x 300 pixels).
2. Select the 'Selection' Tool and set the selection type to 'Square'. Draw a square inside the canvas.
Selection Type = Square
Mode = Replace
Feather = 0
Anti-alias = Checked
3. Change the Mode to Remove or press the 'Ctrl' key and hold it down. Select another square down and to the right of the original square.
The selection should now have a square chunk missing from the lower right hand corner.
4. Choose the Freehand Selection Tool and set the selection type to 'Point to point' and the mode to 'Remove' or press and hold the 'Ctrl' key. Click at the bottom left corner. Click again at the top right corner. Now you should have a line that goes diagonally across the canvas from bottom left to top right. Click in the bottom right, then double-click in the bottom left to close the selection.
Selection Type =Point to point
Mode = Remove
Feather = 0
Smoothing = 0
Anti-alias = Checked
Now the selection should be a triangle with a piece missing from the middle.
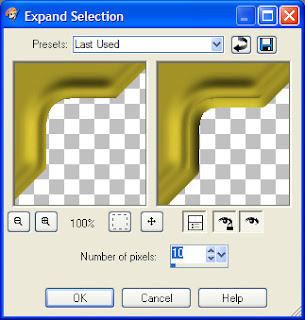
5. Expand (Selections > Modify > Expand) the selection 10 pixels.
6. Fill the selection with the color, gradient or pattern of your choice. I chose #B1A34A.
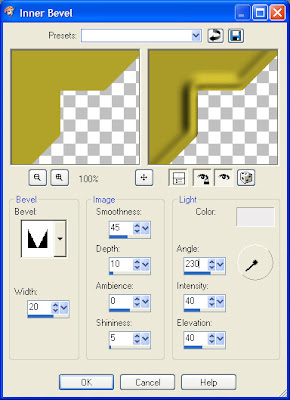
7. Apply an Inner Bevel (Effects > 3D Effects > Inner Bevel) using Bevel 8.
Bevel = 8
Width = 20
Smoothness = 45
Depth = 1-
Ambience = 0
Shininess = 5
Color = #EEECEC
Angle = 230
Intensity = 40
Elevation = 40
9. Contract (Selections > Modify > Contract) the selection 25 pixels.
10. Apply the same inner bevel but flip the angle 180 degrees.
Bevel = 8
Width = 20
Smoothness = 45
Depth = 1-
Ambience = 0
Shininess = 5
Color = #EEECEC
Angle =50
Intensity = 40
Elevation = 40
11. Expand the selection 10 pixels.
12. Apply a Gaussian Blur to hide the edges of the selection.
Radius = 2.00
13. Apply a Drop Shadow to give the corner some depth.
Vertical = 5
Horizontal = 5
Opacity = 80
Blur = 10.00
Color = Black
The photo corner is now complete.
Subscribe to:
Posts (Atom)


